Hole 17 at Caledonia Golf & Fish Club
- Par
- 3
- Yardage
- 175 yds
- Stroke index
- 17
- Hazards
- 2 bunkers
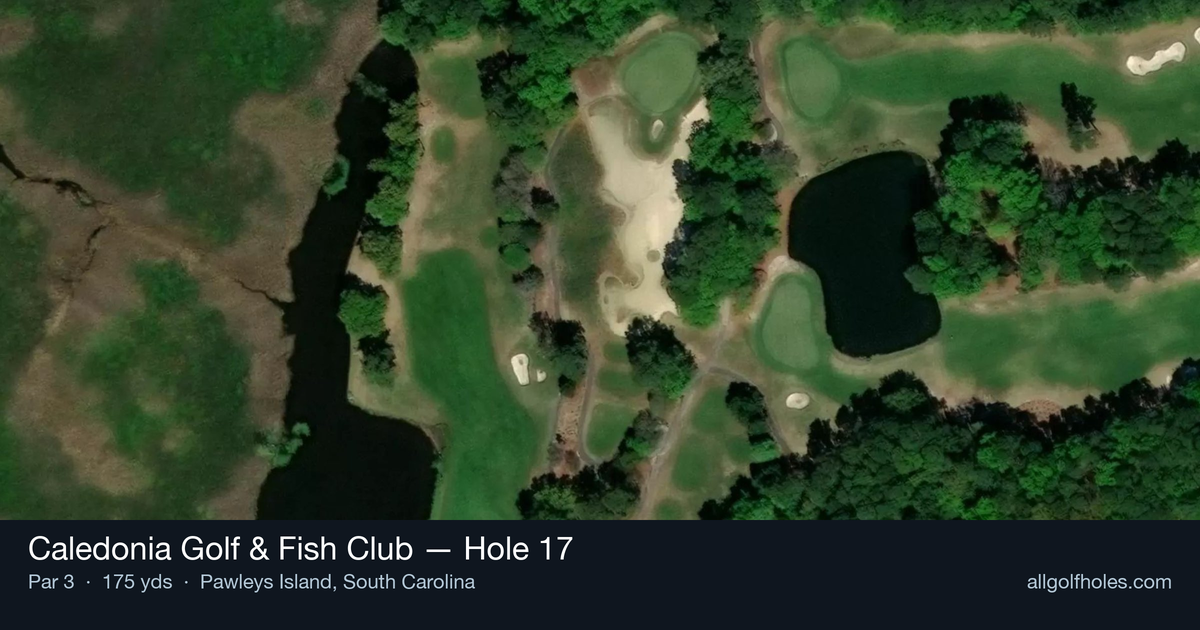
Aerial source not provided
Green size: 33 yds deep × 29 yds wide
Scorecard yardage is for Championship tees. The aerial shows its labeled reference position; distance rings measure to the green.
Championship tees · Par 3 · 175 yards
The plan for No. 17
The penultimate hole at Caledonia Golf & Fish Club hole 17 presents a deceptively challenging par 3 that embodies the course's reputation for having "18 signature holes." At 175 yards, this tee shot demands precision to a small green nestled within the natural Lowcountry landscape. Framed by the majestic live oaks that define Caledonia's character, the hole requires careful club selection as the compact putting surface offers little margin for error. The absence of major hazards might suggest simplicity, but the green's diminutive size and quick putting surfaces create their own defense. As golfers prepare for the famous finishing hole, this par 3 serves as a final test of accuracy, where finding the correct portion of the green becomes paramount for scoring opportunities in the South Carolina marsh setting.
Off the tee
Club selection is paramount on this hole - choose a club that you can swing confidently and commit fully to the shot. Most players will be looking at a mid-iron to long-iron depending on conditions and pin position. The target line should favor the center of the green, as the small putting surface punishes anything less than precise execution. Avoid the temptation to attack pins cut close to edges; instead, play to the heart of the green and rely on your putting. Wind conditions in the South Carolina lowcountry can be tricky, so factor in any breeze and make sure to take enough club to reach the back edge if needed.
Approach & recovery
Since this is a par 3, your tee shot is your approach shot. Focus on a smooth, controlled swing rather than trying to muscle the ball to the pin. The small green means you need to land the ball softly, so consider taking one more club and making a three-quarter swing for better control. Pay attention to the pin position during your pre-round preparation - front pins require precise distance control, while back pins allow for a more aggressive approach. The key is committing to your club selection and making a confident swing.
On the green
The small green at the 17th demands respect with your putter. While specific break patterns aren't detailed, expect subtle movements typical of Caledonia's quick putting surfaces. Focus on lag putting to avoid three-putts, as the compact surface can make distance control challenging. Read putts carefully from multiple angles, and remember that these greens are known to be quick - err on the side of leaving putts short rather than charging past the hole. Any putt within reasonable birdie range should be attacked, as this represents one of your best scoring opportunities on the back nine. ## RISK VS REWARD The risk/reward calculation here is subtle but important. While there are no major hazards to navigate, the small green creates its own challenge. The reward for an accurate tee shot is a legitimate birdie opportunity that can provide momentum heading into the difficult 18th hole. The risk lies in missing the green entirely, which could lead to a difficult up-and-down and potential bogey. Play conservatively to the center of the green, and let your putting create the birdie opportunity rather than forcing a perfect approach shot. ## DIFFERENT SKILL LEVELS **High-Handicap Players:** Focus entirely on finding the green with your tee shot. Choose a club you're confident with, even if it means aiming for the back of the green. A two-putt par is an excellent score that keeps you in position for the final hole. Avoid trying to attack pins or make heroic shots - steady course management wins here. **Low-Handicap Players:** This hole offers a prime scoring opportunity if approached with precision. You can be more aggressive with pin hunting, especially with back or center pin positions. Use the small green to your advantage by working on distance control and spin. Consider the pin position in relation to your next hole strategy - a birdie here provides valuable cushion for the challenging finishing hole that awaits.
Watch for
- Course conditioning and mapped hazards may affect line selection; confirm from the aerial.
Hole 17 Green Complex
Mapped green boundary
Green size: 4,990 sq ft
How did Hole 17 play?
How did this hole play today?
Frequently asked questions
Yardage reference: Championship tees · 175 yards.
What club should I use on this par 3?
↓
At 175 yards, most golfers will need a mid-iron (7-iron to 8-iron) to reach this green. Adjust for elevation, wind, and pin position.
How difficult is hole 17?
↓
This hole is a good scoring opportunity for most golfers.
How big is the green on hole 17?
↓
The green is medium-sized with moderate targets. Pay attention to pin placement when selecting your approach club.
What's a good score on hole 17?
↓
This hole is a solid par with birdie chances for precise approach shots. Making par is a good result here. Focus on hitting the green and avoiding three-putts.