Hole 13 at Caledonia Golf & Fish Club
- Par
- 4
- Yardage
- 398 yds
- Stroke index
- 5
- Hazards
- 3 bunkers
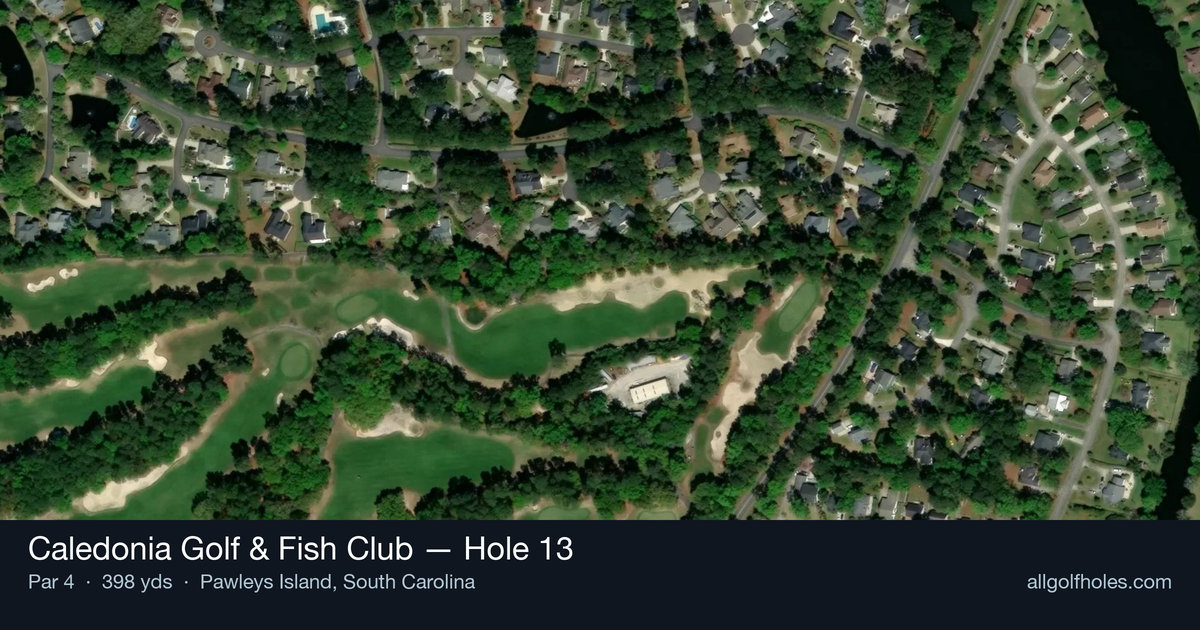
Aerial source not provided
Green size: 19 yds deep × 26 yds wide
Scorecard yardage is for Championship tees. The aerial shows its labeled reference position; distance rings measure to the green.
Championship tees · Par 4 · 398 yards
The plan for No. 13
The 13th hole at Caledonia Golf & Fish Club exemplifies Mike Strantz's masterful design philosophy, demanding precision from tee to green on this deceptively challenging par 4. At 398 yards, this straight hole requires two very good shots to reach the putting surface, with no margin for error off the tee. The fairway presents a generous target, but accuracy becomes paramount as players navigate toward the small green complex. Framed by the course's signature majestic oaks and natural lowcountry beauty, the approach shot tests every aspect of your iron play. Miss the tee shot, and reaching the green in regulation becomes nearly impossible, making this the fifth-ranked handicap hole a true test of consistency and course management at this historic South Carolina gem.
Off the tee
Your tee shot strategy centers on finding the optimal position for your approach, typically in the 250-270 yard range depending on your distance capabilities. The straight layout might appear forgiving, but the majestic oaks and natural contours that define Caledonia can quickly penalize wayward drives. Focus on the center-left portion of the fairway to open up the best angle to the small green. Club selection should prioritize accuracy - many players benefit from taking one less club to ensure they stay in play. The key is avoiding the rough or any natural areas that could complicate your approach shot positioning.
Approach & recovery
The approach shot to this small green requires precise club selection and committed execution. With the green's compact size, distance control becomes paramount - being pin-high is more important than being perfectly aligned laterally. Depending on your tee shot position, you'll likely face a mid-iron to short-iron approach. Aim for the center of the green regardless of pin position, as the small target leaves little margin for error. Take note of wind conditions, as they can significantly impact club selection on this exposed approach shot.
On the green
The small green size means every putt becomes crucial for scoring. Focus on lag putting to the correct level, as three-putts can quickly derail your score on this hole. The green's subtle contours, typical of Strantz's design work, reward golfers who take time to read the slopes carefully. Pay particular attention to grain direction, which can be influenced by the surrounding lowcountry environment. Conservative putting strategy often pays dividends here - getting your first putt close is more valuable than aggressive attempts at distant pins. ## RISK VS REWARD This hole offers limited risk/reward opportunities, instead demanding consistent execution of fundamental shots. The primary risk comes from being overly aggressive with club selection or target lines when precision should be the priority. The reward for patient, strategic play is significant - players who execute two solid shots often walk away with birdie opportunities, while aggressive players frequently struggle to make par after wayward shots. ## DIFFERENT SKILL LEVELS **High-Handicap Players:** Focus on keeping the ball in play off the tee, even if it means using a fairway wood or hybrid instead of driver. For the approach, aim for the center of the green regardless of pin position and accept any putt inside 20 feet as a success. Your goal should be avoiding big numbers rather than chasing birdies. **Low-Handicap Players:** You can be more aggressive with your target line off the tee to optimize your approach angle. Consider pin position when selecting your approach club and target, but respect the small green size. This hole often separates good rounds from great ones, so maintain your strategic discipline even when feeling confident with your ball-striking. The 13th hole at Caledonia exemplifies why this course has earned its reputation for having "18 signature holes" - it may lack dramatic hazards, but it demands the kind of precise, thoughtful golf that defines championship-caliber course management.
Watch for
- Course conditioning and mapped hazards may affect line selection; confirm from the aerial.
Hole 13 Green Complex
Mapped green boundary
Green size: 2,798 sq ft
How did Hole 13 play?
How did this hole play today?
Frequently asked questions
Yardage reference: Championship tees · 398 yards.
What's the best strategy off the tee?
↓
For this 398-yard par 4, most players will hit driver to set up a comfortable approach. Be mindful of the bunker at 188.9 yards if you hit driver.
How difficult is hole 13?
↓
This hole is a good scoring opportunity for most golfers. Key challenges include: small green.
How big is the green on hole 13?
↓
The green is small and requires precision. The green is deeper than wide, so club selection is crucial. Expect challenging pin positions with limited room for error.
Which side of the fairway is safer on hole 13?
↓
Aim for the left side of the fairway when possible. Missing right brings more trouble into play.
What's a good score on hole 13?
↓
This hole is a medium-length test where par is a solid result. A straightforward par 4 where course management pays off.