Hole 6 at National Golf Links of America
- Par
- 3
- Yardage
- 141 yds
- Hazards
- 5 bunkers
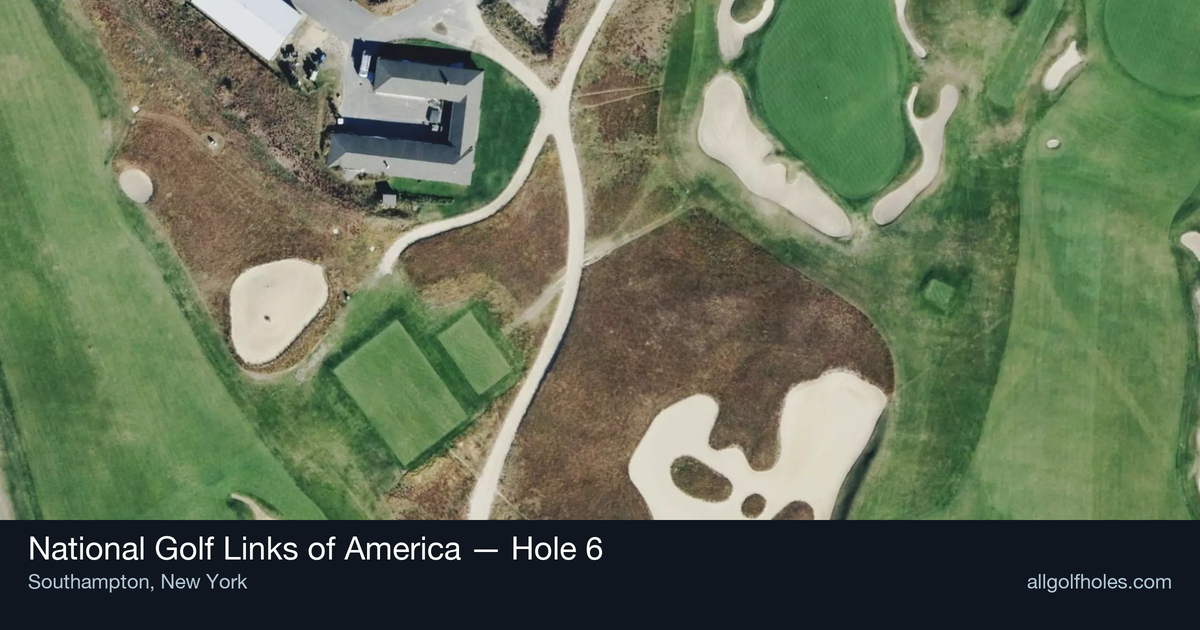
Aerial source not provided
Green size: 42 yds deep × 52 yds wide
Scorecard yardage is for Pro tees. The aerial shows its labeled reference position; distance rings measure to the green.
Pro tees · Par 3 · 141 yards
The plan for No. 6
The sixth hole at National Golf Links of America presents a deceptively challenging par 3 that embodies the course's philosophy of strategic golf design. At 141 yards, this short iron test demands precision over power, with the small green requiring pinpoint accuracy from the tee. True to Charles Blair Macdonald's vision of recreating classic British links features, this hole rewards thoughtful club selection and committed execution. The compact green complex punishes wayward shots, making distance control paramount in the often-windy Southampton conditions. While appearing straightforward on the scorecard, National Golf Links of America hole 6 exemplifies how strategic architecture can transform a modest yardage into a memorable test of skill and nerve.
Off the tee
**Club Selection**: Depending on conditions, this will typically play anywhere from a wedge to a mid-iron. Take one extra club if there's any doubt about distance, as coming up short on a small green often leads to difficult recovery shots. **Target Line**: Aim for the center of the green regardless of pin position. The small putting surface means that even a shot to the middle will leave a reasonable putt to most pin locations. **Key Considerations**: Check wind direction carefully before selecting your club. The coastal location can create swirling winds that aren't immediately apparent from the tee. Commit fully to your club choice and swing smoothly rather than trying to manufacture distance.
Approach & recovery
Since this is a par 3, the tee shot is your approach. Focus on a smooth, controlled swing that prioritizes accuracy over distance. The straight layout means you can play aggressively toward the pin, but the small green demands respect. **Landing Strategy**: Aim to land the ball on the green rather than trying to bounce it on. The small target requires a direct carry to ensure you stay on the putting surface.
On the green
The small green means most putts will be relatively short, but don't underestimate the subtle breaks that can exist on seemingly flat surfaces. Take time to read the green carefully, as three-putting from short range can quickly turn a scoring opportunity into a bogey. **Pin Position Strategy**: With such a small green, pin position becomes less relevant than simply finding the putting surface. Focus on lag putting to ensure you don't compound any mistakes with poor distance control. ## RISK VS REWARD This hole offers a clear birdie opportunity for players who execute properly. The risk is minimal if you play conservatively to the center of the green, but the reward of an easy birdie putt makes it worth being slightly aggressive with your target line. **Conservative Play**: Aim for the middle of the green with a club you're confident will carry the distance. **Aggressive Play**: You can be more aggressive with pin hunting given the short distance, but ensure you're not short-siding yourself if you miss. ## DIFFERENT SKILL LEVELS **High Handicap Players**: Focus entirely on finding the green with your most reliable short iron or wedge. Don't worry about pin position - any shot on the green gives you a chance at par and possibly birdie. **Low Handicap Players**: This is a birdie hole where you can be more aggressive with pin hunting. Use the opportunity to gain a stroke on the field, but don't let a miss here turn into a momentum killer. **Course Management**: Regardless of skill level, this hole rewards patience and good decision-making. Take your time with club selection, and don't let the short yardage fool you into being careless with your execution. The beauty of this hole lies in its simplicity - there are no hidden tricks or severe hazards, just the fundamental challenge of hitting your target under pressure. Make a committed swing to the center of the green, and you'll walk away satisfied with your approach to this classic short hole.
Watch for
- Course conditioning and mapped hazards may affect line selection; confirm from the aerial.
Hole 6 Green Complex
Mapped green boundary
Green size: 11,703 sq ft
Course coverage
Tournament and creator videos about National Golf Links of America — shared course coverage, not hole-specific clips.
Official & tour
Tour & network videos
Official coverage mentioning National Golf Links of America.
Inside Trump International Golf Links, Doonbeg | 3 Key Holes
Featured by these creators
Creator videos about this course
YouTube creators who filmed or featured National Golf Links of America. · Stats as of Oct 12, 2026 · 6d ago
All eyes on the leaders 👀 The final round is underway at Trump International Golf Links.
How did Hole 6 play?
How did this hole play today?
Frequently asked questions
Yardage reference: Pro tees · 141 yards.
What club should I use on this par 3?
↓
At 141 yards, most golfers will need a short iron (9-iron to PW) to reach this green. Adjust for elevation, wind, and pin position.
How difficult is hole 6?
↓
This hole is a good scoring opportunity for most golfers. Key challenges include: large green requiring good lag putting.
How big is the green on hole 6?
↓
The green is large and can play quite long. The green is deeper than wide, so club selection is crucial. Three-putt territory if you don't manage your approach distance well.
What's a good score on hole 6?
↓
This hole is a legitimate birdie opportunity for accurate iron players. Most golfers should target par, with birdie chances if you hit the green in regulation.