Hole 3 at Baltusrol Golf Club (Lower Course)
- Par
- 4
- Yardage
- 451 yds
- Stroke index
- 1
- Hazards
- 3 bunkers
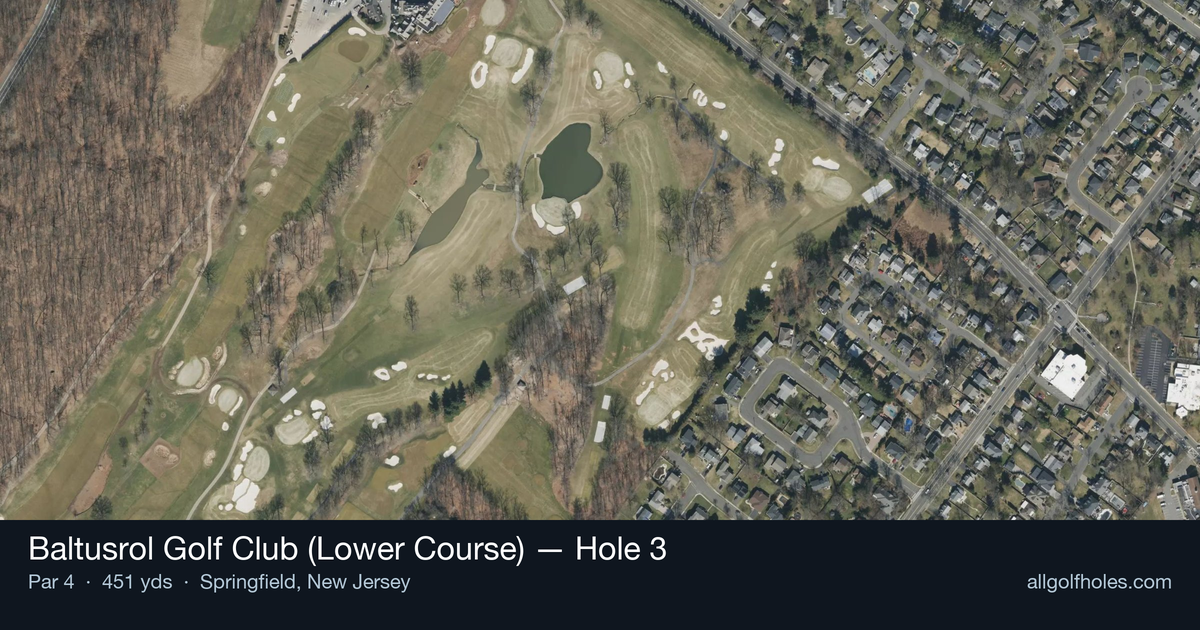
Aerial source not provided
Green size: 34 yds deep × 33 yds wide
Scorecard yardage is for Championship tees. The aerial shows its labeled reference position; distance rings measure to the green.
Championship tees · Par 4 · 451 yards
The plan for No. 3
This challenging par 4 at Baltusrol represents one of A.W. Tillinghast's most demanding tests, earning its reputation as the number one handicap hole on the Lower Course. The combination of length, accuracy requirements, and strategic complexity makes this a true championship-caliber hole where course management and precision execution are paramount.
Off the tee
The tee shot strategy centers on finding the optimal position in the fairway while avoiding the thick rough and trees that frame both sides. Your target line should favor the center-left portion of the fairway, providing the best angle for your approach shot. Driver is typically the right choice here for most players, as you'll need the distance to set up a manageable approach to this lengthy par 4. The key risk to avoid is being too aggressive with your line - the trees and rough are unforgiving, and recovery shots from these areas make par extremely difficult. Focus on a smooth, controlled swing that prioritizes accuracy over maximum distance. A well-struck tee shot that finds the fairway, even if it's not your longest drive, puts you in prime position for the approach.
Approach & recovery
The approach shot presents the hole's greatest strategic challenge, with the ditch short of the green serving as a critical factor in club selection. You must carry this hazard while also navigating the bunkers that guard the green complex. The two large bunkers short and right, along with the bunker on the left side, create a narrow corridor to the putting surface. Your approach should target the center of the green, as the small size leaves little margin for error. The green features a ridge that feeds balls to the right, so understanding this slope is crucial for both approach shots and recovery attempts. Take one extra club to ensure you clear the ditch comfortably - coming up short here is costly and often leads to bogey or worse.
On the green
The small green at the 3rd hole rewards precision putting and careful green reading. The ridge running through the green creates distinct sections, with balls naturally feeding toward the right side. The most challenging pin position is back-left, positioned on top of the ridge, which requires exceptional approach shot accuracy. When putting, pay close attention to the ridge's influence on ball movement. Putts from below the ridge will break more dramatically than they appear, while those from above may be faster than expected. Conservative putting strategy often pays dividends here - getting your first putt close and making the second is preferable to aggressive attempts that could leave difficult comeback putts.
Watch for
- At 451 yards with thick rough and trees lining both sides of the fairway, this straight par 4 requires two quality shots to reach the small green in regulation.
- The presence of a ditch short of the green adds a critical hazard element that influences both tee shot positioning and approach club selection.
- With bunkers strategically placed short and right, plus one guarding the left side of the green, every shot requires careful consideration.
Hole 3 Green Complex
Mapped green boundary
Green size: 6,664 sq ft
How did Hole 3 play?
How did this hole play today?
Frequently asked questions
Yardage reference: Championship tees · 451 yards.
What's the best strategy off the tee?
↓
For this 451-yard par 4, most players will hit driver to set up a comfortable approach.
How difficult is hole 3?
↓
This hole is a moderate challenge for most golfers. Key challenges include: long par 4.
What hazards should I watch out for on hole 3?
↓
Key hazards include: 3 greenside bunkers. Plan your shots to avoid these trouble spots.
How big is the green on hole 3?
↓
The green is fairly large with multiple pin positions. Lag putting becomes important on longer putts.
What's a good score on hole 3?
↓
This hole is one of the tougher holes where par feels like birdie. A challenging par 4. Accept that bogey happens and avoid big numbers.