Hole 7 at Baltusrol Golf Club (Lower Course)
- Par
- 5
- Yardage
- 500 yds
- Stroke index
- 13
- Hazards
- 6 bunkers
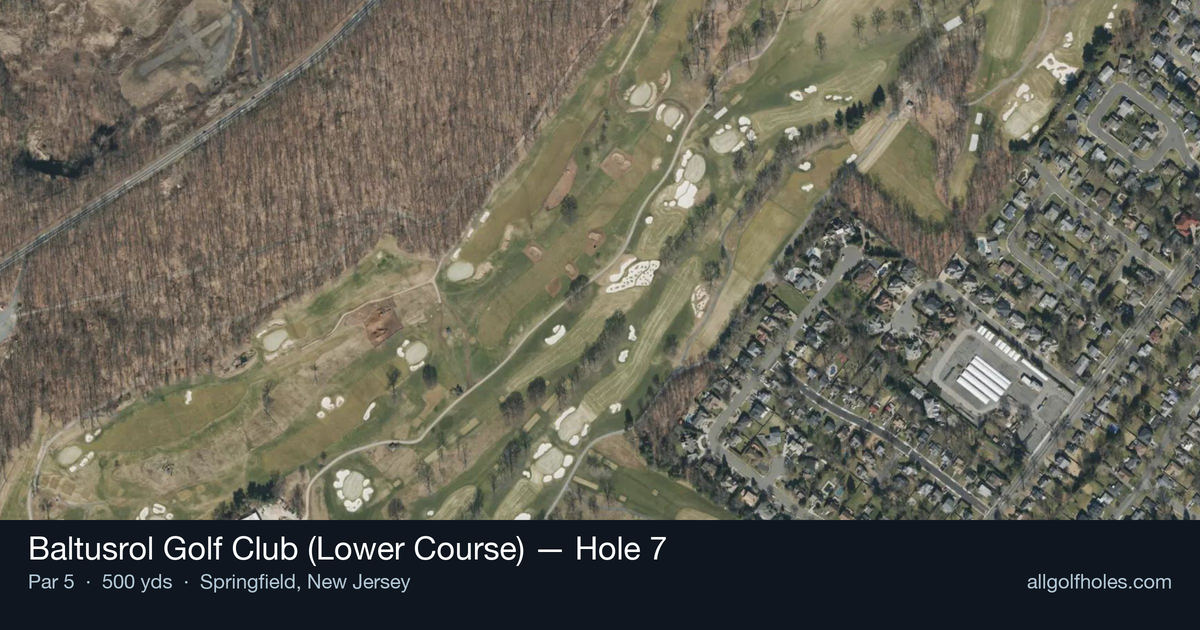
Aerial source not provided
Green size: 29 yds deep × 51 yds wide
Scorecard yardage is for Championship tees. The aerial shows its labeled reference position; distance rings measure to the green.
Championship tees · Par 5 · 500 yards
The plan for No. 7
This straightforward par 5 presents an excellent scoring opportunity on Baltusrol's championship layout, but the small green demands precision on your final approach. Smart course management and conservative play will yield better results than aggressive tactics on this relatively hazard-free hole.
Off the tee
Your tee shot strategy should focus on finding the fairway and setting up the best angle for your second shot. With no hazards threatening the landing zone, you can be aggressive with your driver or 3-wood depending on your comfort level. Aim for the center of the fairway to give yourself the widest possible target. The key is avoiding any rough that might complicate your approach shots, as the small green will punish any lack of control from poor lies.
Approach & recovery
Your approach strategy depends entirely on your distance after the tee shot. Longer hitters may have an opportunity to reach the green in two, but the small target makes this a high-risk proposition. Consider laying up to your favorite wedge distance - typically between 100-120 yards - to ensure a controlled approach to the compact green. If you do attempt to reach in two, favor the center of the green regardless of pin position, as the small surface leaves little room for error.
On the green
The small green at the 7th requires precise putting and careful speed control. Without specific knowledge of the green's contours, focus on lag putting to avoid three-putts, which can quickly turn a scoring opportunity into a bogey. Pay attention to the overall slope and grain direction, and remember that on smaller greens, even seemingly makeable putts can be tricky due to less margin for error on your target line.
Watch for
- At 500 yards with no significant hazards, this par 5 rewards solid ball-striking and intelligent club selection.
- With no hazards threatening the landing zone, you can be aggressive with your driver or 3-wood depending on your comfort level.
- The key is avoiding any rough that might complicate your approach shots, as the small green will punish any lack of control from poor lies.
Hole 7 Green Complex
Mapped green boundary
Green size: 8,766 sq ft
How did Hole 7 play?
How did this hole play today?
Frequently asked questions
Yardage reference: Championship tees · 500 yards.
Can this par 5 be reached in two?
↓
At 500 yards, Reachable in two for longer hitters. Consider laying up short of hazards if going for it is risky.
How difficult is hole 7?
↓
This hole is a good scoring opportunity for most golfers. Key challenges include: heavily bunkered, large green requiring good lag putting.
How big is the green on hole 7?
↓
The green is large and can play quite long. Three-putt territory if you don't manage your approach distance well.
What's a good score on hole 7?
↓
This hole is a solid birdie opportunity with smart layup strategy. Most golfers can reach in three. Position your layup to leave a comfortable wedge.