Hole 2 at Baltusrol Golf Club (Lower Course)
- Par
- 4
- Yardage
- 371 yds
- Stroke index
- 7
- Hazards
- 10 bunkers
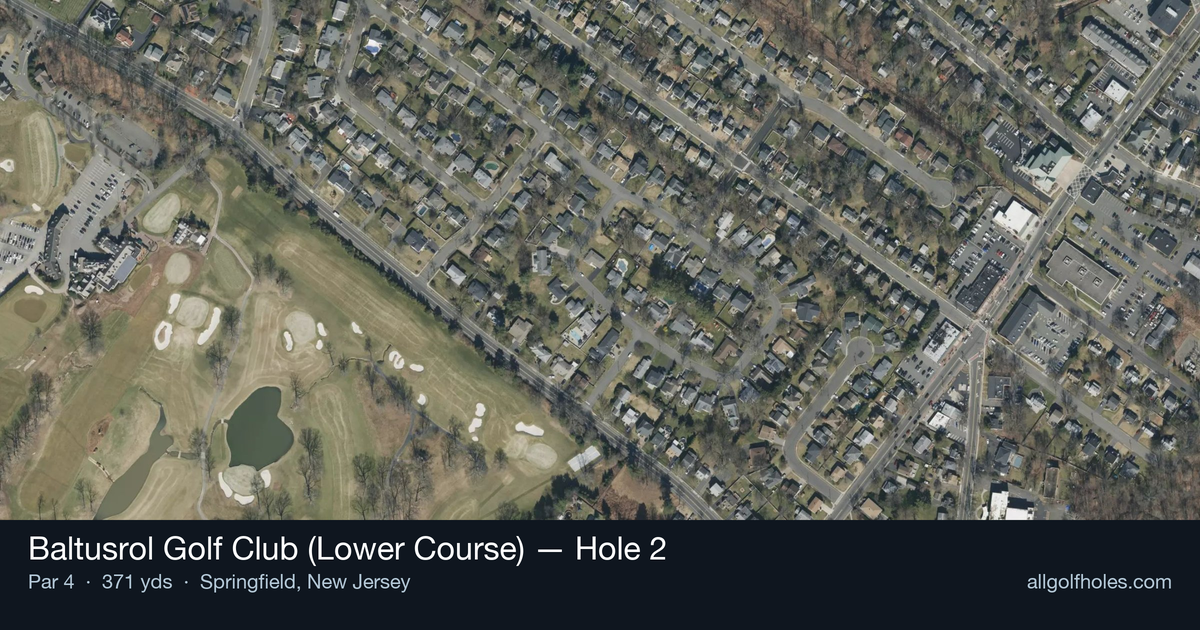
Aerial source not provided
Green size: 33 yds deep × 31 yds wide
Scorecard yardage is for Championship tees. The aerial shows its labeled reference position; distance rings measure to the green.
Championship tees · Par 4 · 371 yards
The plan for No. 2
This classic Tillinghast design presents a deceptively challenging par 4 that demands precision and course management from tee to green. While the yardage suggests a straightforward hole, the recent addition of fairway bunkers and the elevated green with limited visibility create strategic complexities that require careful planning.
Off the tee
The key to success starts with finding the fairway, as the newly installed bunkers have significantly narrowed the ideal landing zone. Target the center-left portion of the fairway to avoid the strategically placed sand traps while setting up the best angle for your approach. A well-struck driver or 3-wood should leave you in prime position, but course management is crucial here – taking one less club to ensure accuracy often proves more beneficial than maximum distance. The straight layout rewards players who can hit their target line consistently rather than those who chase extra yards.
Approach & recovery
The approach shot represents the hole's primary challenge, playing uphill to an elevated green where much of the putting surface remains hidden from the fairway. This blind or semi-blind nature demands precise yardage calculation and club selection. Plan for the ball to play shorter due to the uphill lie, typically requiring one to two extra clubs depending on the pin position. The small green size leaves little margin for error, making center-green the safest target unless you're confident in your distance control. Pay attention to pin sheets and course conditions, as the elevated surface can make approaches play differently throughout the day.
On the green
The small green requires precision putting and careful green reading. While specific break patterns vary with pin positions, the elevated nature of the putting surface means approaches that miss the target often face challenging recovery shots. Focus on leaving yourself below the hole when possible, as uphill putts on this green tend to be more manageable than downhill attempts. The recent green expansions have added some pin positions, but the fundamental challenge remains: precision over aggression.
Watch for
- This mid-length par 4 features recently added fairway bunkers that tighten the landing area, demanding accuracy off the tee.
- The key to success starts with finding the fairway, as the newly installed bunkers have significantly narrowed the ideal landing zone.
Hole 2 Green Complex
Mapped green boundary
Green size: 6,715 sq ft
Course and tournament history
Historical context for the course and venue. Each entry identifies the event or course it describes.
1995 · Tiger Woods
In its listing of the "Top 100 Courses in the U.S.", GOLF Magazine selected the Lower Course as 22nd in 1995, 1997, and 1999. The three signature holes of the Lower Course are the fourth, a
Source →
How did Hole 2 play?
How did this hole play today?
Frequently asked questions
Yardage reference: Championship tees · 371 yards.
What's the best strategy off the tee?
↓
For this 371-yard par 4, most players will hit 3-wood or driver to set up a comfortable approach.
How difficult is hole 2?
↓
This hole is a good scoring opportunity for most golfers. Key challenges include: heavily bunkered.
How big is the green on hole 2?
↓
The green is fairly large with multiple pin positions. Lag putting becomes important on longer putts.
What's a good score on hole 2?
↓
This hole is a medium-length test where par is a solid result. A straightforward par 4 where course management pays off.