Hole 4 at Baltusrol Golf Club (Lower Course)
- Par
- 3
- Yardage
- 186 yds
- Stroke index
- 17
- Hazards
- 4 bunkers · Water
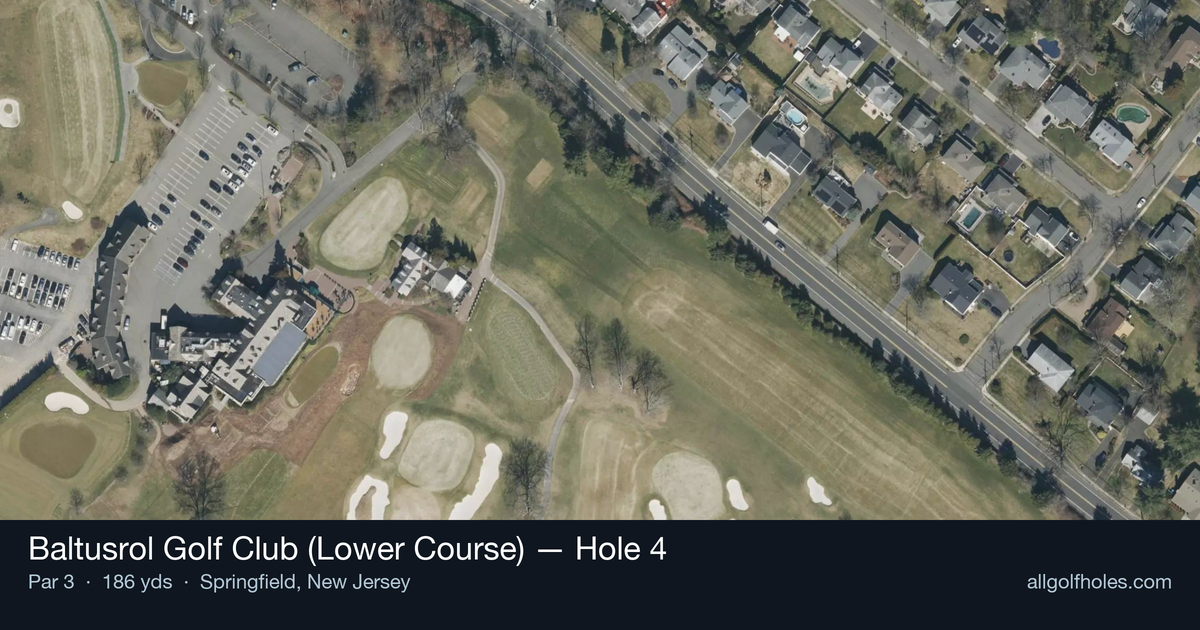
Aerial source not provided
Green size: 32 yds deep × 46 yds wide
Scorecard yardage is for Championship tees. The aerial shows its labeled reference position; distance rings measure to the green.
Championship tees · Par 3 · 186 yards
The plan for No. 4
The "Famous Fourth" at Baltusrol is one of golf's most iconic par 3s, demanding precision and nerve as you carry the entire shot over water to reach the green. This signature hole offers no bailout options - you must commit fully to your club selection and execute a confident swing to clear the pond that stretches nearly to the green's edge.
Off the tee
Club selection is absolutely critical on this all-or-nothing par 3. Take one extra club to ensure you clear the water comfortably - the penalty for coming up short is severe. Focus on a smooth, confident swing rather than trying to muscle the shot. Aim for the center of the green regardless of pin position, as the small target leaves little margin for error. Check wind conditions carefully, as even a slight breeze can dramatically affect your ball flight over the water. Commit fully to your club choice and swing with conviction.
Approach & recovery
Since this is a par 3, your tee shot is your approach. The key is playing to the fat part of the green rather than chasing pins. The water hazard eliminates any chance of recovery from a short shot, making distance control more important than direction. Take dead aim at the center of the green and trust your yardage. If the pin is tucked in a difficult position, resist the temptation to get aggressive - a safe shot to the middle of the green is always the smart play on this hole.
On the green
The small green can present subtle breaks that are magnified by the pressure of having just cleared the water hazard. Take time to read your putt carefully, as the adrenaline from successfully navigating the water carry can affect your putting stroke. Focus on speed control, as three-putting after successfully clearing the hazard would be particularly frustrating. The green's compact size means most putts are makeable, so stay aggressive within reason.
Watch for
- The Famous Fourth presents a deceptively simple challenge: hit it straight and carry the water.
- With water extending to within feet of the green, there's virtually no room for error short of the target.
Hole 4 Green Complex
Mapped green boundary
Green size: 8,189 sq ft
How did Hole 4 play?
How did this hole play today?
Frequently asked questions
Yardage reference: Championship tees · 186 yards.
What club should I use on this par 3?
↓
At 186 yards, most golfers will need a long iron or hybrid (5-iron to 6-iron) to reach this green. Adjust for elevation, wind, and pin position.
How difficult is hole 4?
↓
This hole is one of the tougher holes on the course for most golfers. Key challenges include: water in play, heavily bunkered, large green requiring good lag putting.
What hazards should I watch out for on hole 4?
↓
Key hazards include: 4 greenside bunkers; water at 132.6 yards. Plan your shots to avoid these trouble spots.
How big is the green on hole 4?
↓
The green is large and can play quite long. The green is wider than it is deep, rewarding shots that find the correct tier. Three-putt territory if you don't manage your approach distance well.