Hole 12 at Cascata
- Par
- 3
- Yardage
- 165 yds
- Stroke index
- 18
- Hazards
- 1 bunker · Water
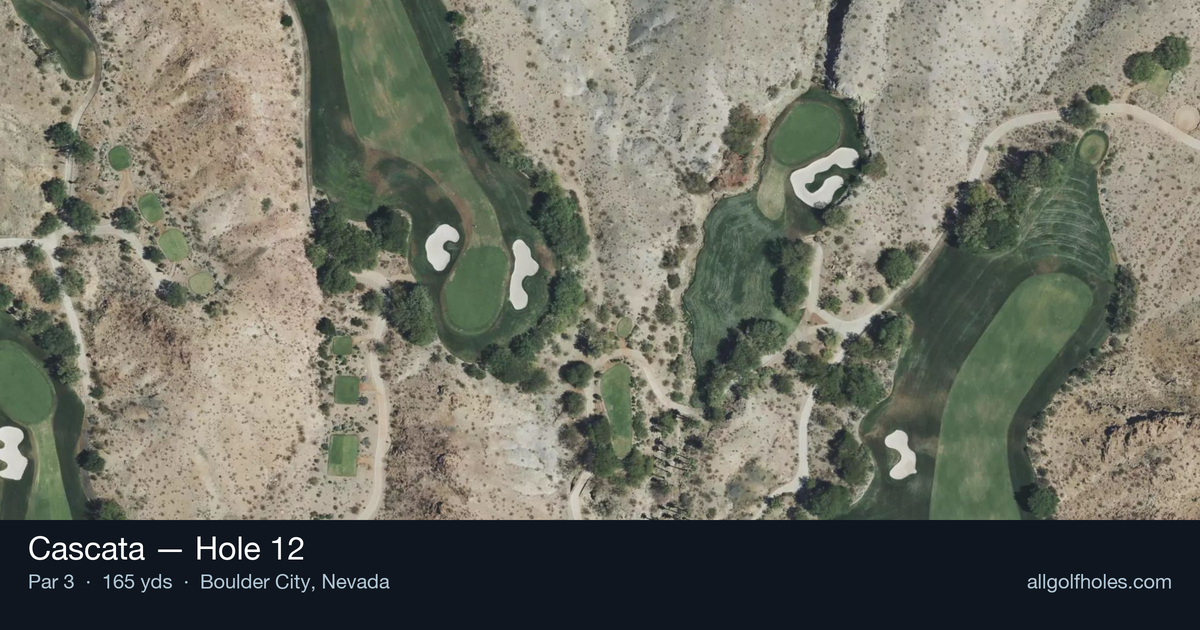
Aerial source not provided
Green size: 31 yds deep × 25 yds wide
Scorecard yardage is for Championship tees. The aerial shows its labeled reference position; distance rings measure to the green.
Championship tees · Par 3 · 165 yards
The plan for No. 12
Cascata hole 12 presents one of the most visually stunning and nerve-testing par 3s in Las Vegas golf, demanding a daunting carry over a dramatic canyon that defines this desert masterpiece. At 165 yards, this signature hole requires precise club selection and unwavering commitment as golfers must navigate the intimidating chasm between tee and green. The small target green sits perched beyond the natural desert gorge, with no room for error on the tee shot. Against the backdrop of the otherworldly Mojave Desert landscape and luxury homes dotting the surrounding bluffs, this hole epitomizes Cascata's reputation for combining breathtaking scenery with championship-caliber golf challenges. The canyon carry creates an all-or-nothing mentality that separates this hole from typical desert par 3s.
Off the tee
Your tee shot is everything on this hole - there's no recovery option once you're in the canyon. Focus on smooth tempo and solid contact rather than trying to muscle the shot. A mid-iron to long-iron will typically be required depending on conditions and pin position. The key is selecting enough club to comfortably clear the canyon while still controlling distance to the small green. Don't let the dramatic scenery and canyon views affect your pre-shot routine - pick your target line on the green and commit to it completely.
Approach & recovery
Since this is a par 3, your tee shot IS your approach shot. The small green demands accuracy, so aim for the center of the putting surface rather than chasing difficult pin positions. The green's compact size means even a well-struck shot can easily run off the back or sides if you're overly aggressive. Factor in any wind conditions, which can be tricky in this canyon setting, and always err on the side of taking more club rather than less.
On the green
The small green at the 12th creates challenging putting scenarios even when you find the putting surface. Expect subtle breaks and potential ridge lines that can affect ball roll. With limited green space, lag putting becomes crucial - focus on getting your first putt close rather than being overly aggressive with longer putts. The elevated setting may create optical illusions, so trust your read and commit to your line. ## RISK VS REWARD This hole offers a classic all-or-nothing risk/reward scenario. The reward for a solid tee shot is a legitimate birdie opportunity on a relatively short par 3. However, the risk is severe - any shot that doesn't carry the canyon results in a lost ball and penalty stroke. There's no middle ground here, making it essential to play within your capabilities and choose a club that gives you confidence in clearing the hazard. ## DIFFERENT SKILL LEVELS **High-Handicap Players:** Take an extra club and aim for the center of the green. Don't let the canyon intimidate you into making a tentative swing - commit to your shot and trust your club selection. Consider playing to the front portion of the green to ensure you clear the carry. **Low-Handicap Players:** You can be more aggressive with pin hunting, but still respect the canyon hazard. Use the spectacular setting to your advantage by taking time to properly read wind conditions and green contours. This hole rewards precise execution and offers a genuine scoring opportunity for well-struck shots. The 12th at Cascata exemplifies desert golf at its most dramatic - where stunning natural beauty meets strategic challenge, demanding both technical skill and mental toughness to score well.
Watch for
- Course conditioning and mapped hazards may affect line selection; confirm from the aerial.
Hole 12 Green Complex
Mapped green boundary
Green size: 4,298 sq ft
How did Hole 12 play?
How did this hole play today?
Frequently asked questions
Yardage reference: Championship tees · 165 yards.
What club should I use on this par 3?
↓
At 165 yards, most golfers will need a mid-iron (7-iron to 8-iron) to reach this green. Adjust for elevation, wind, and pin position.
How difficult is hole 12?
↓
This hole is a moderate challenge for most golfers. Key challenges include: water in play, small green.
What hazards should I watch out for on hole 12?
↓
Key hazards include: 1 greenside bunker; water at 119.8 yards. Plan your shots to avoid these trouble spots.
How big is the green on hole 12?
↓
The green is small and requires precision. Expect challenging pin positions with limited room for error.
What's a good score on hole 12?
↓
This hole is a solid par with birdie chances for precise approach shots. Making par is a good result here. Focus on hitting the green and avoiding three-putts.