Hole 5 at Olympia Fields Country Club (North Course)
- Par
- 4
- Yardage
- 387 yds
- Stroke index
- 11
- Hazards
- 4 bunkers
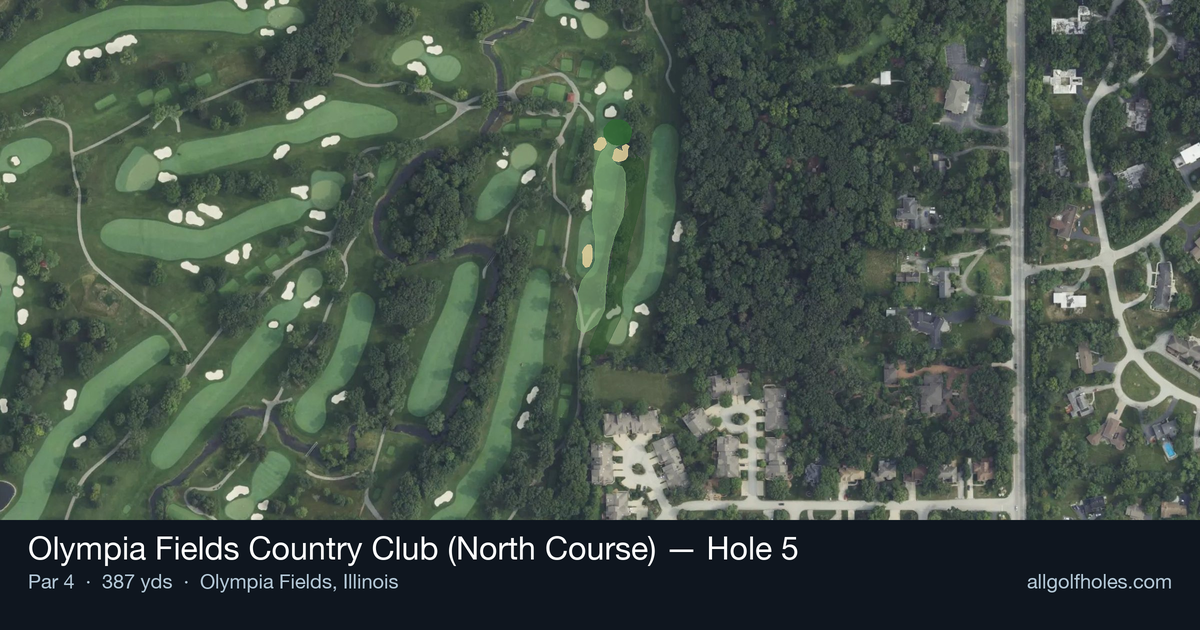
Aerial source not provided
Green size: 26 yds deep × 29 yds wide
Scorecard yardage is for Championship tees. The aerial shows its labeled reference position; distance rings measure to the green.
Championship tees · Par 4 · 387 yards
The plan for No. 5
Olympia Fields Country Club (North Course) hole 5 presents a deceptively strategic par 4 that demands precision over power. This 387-yard test features a straight layout that appears straightforward from the tee, but the small green complex reveals the hole's true challenge. Without significant hazards to navigate, golfers must focus on course management and approach shot accuracy. The tee shot offers a generous target, allowing players to find their preferred angle for the crucial second shot. However, the compact green demands pinpoint iron play, as missing the putting surface leaves challenging recovery shots. What makes this hole memorable is its emphasis on execution under pressure – a perfect example of how championship courses like Olympia Fields test mental fortitude alongside technical skill, requiring golfers to earn every birdie opportunity.
Off the tee
The tee shot strategy centers on positioning for the optimal approach angle. With the fairway running straight and hazard-free, focus on finding the center-left portion of the landing zone, typically around 250-270 yards out. This positioning provides the best angle into the small green and eliminates any concern about running out of fairway. Driver is the preferred club for most players, as the extra distance helps with approach club selection. However, players who struggle with accuracy should consider a 3-wood or hybrid to ensure they find the short grass. The key is avoiding the rough, which will make the approach shot significantly more challenging given the small target.
Approach & recovery
The approach shot is where this hole's true challenge reveals itself. The small green demands pinpoint accuracy, making club selection critical. Most players will have a mid-iron to short-iron remaining, but the exact club depends heavily on pin position and wind conditions. Aim for the center of the green regardless of pin position - the small size means chasing pins often leads to trouble. Focus on a smooth, controlled swing that prioritizes accuracy over distance. Take one extra club if you're between distances, as coming up short is preferable to flying the green and facing a difficult recovery shot.
On the green
The small green size means putting strategy is relatively straightforward - get the ball close to the hole and make the putt. However, the compact surface can create subtle breaks that are easy to misread. Take time to read the green carefully, as even short putts can have more break than expected. From longer distances, focus on lag putting to the correct tier or section of the green. The small size means there's little room for error on aggressive putts, so prioritize getting down in two putts rather than charging every birdie attempt. ## RISK VS REWARD This hole offers a clear risk/reward proposition: aggressive play can yield birdies, but the small green punishes wayward shots severely. The primary reward comes from an accurate drive that sets up a short-iron approach, creating genuine birdie opportunities. The main risk lies in being too aggressive with approach shots to tucked pins. Players who chase every pin position often find themselves in difficult recovery situations around the small green, turning a scoring opportunity into a bogey or worse. ## DIFFERENT SKILL LEVELS **High Handicappers:** Focus on hitting fairways and greens in regulation. Use a 3-wood or hybrid off the tee if driver accuracy is inconsistent. On approaches, always aim for the center of the green and take an extra club to ensure you reach the putting surface. Par is an excellent score here. **Low Handicappers:** This hole should be a birdie opportunity with proper execution. Use driver to get as close as possible, then attack the green with precision. You can be slightly more aggressive with pin positions, but still respect the small green size. This is a hole where you need to capitalize to score well on the challenging North Course. The key for all skill levels is recognizing that this hole rewards patience and precision over power and aggression. Smart course management here sets up one of the better scoring opportunities on this demanding championship layout.
Watch for
- Course conditioning and mapped hazards may affect line selection; confirm from the aerial.
Hole 5 Green Complex
Mapped green boundary
Green size: 4,704 sq ft
How did Hole 5 play?
How did this hole play today?
Frequently asked questions
Yardage reference: Championship tees · 387 yards.
What's the best strategy off the tee?
↓
For this 387-yard par 4, most players will hit driver to set up a comfortable approach.
How difficult is hole 5?
↓
This hole is a good scoring opportunity for most golfers.
How big is the green on hole 5?
↓
The green is medium-sized with moderate targets. Pay attention to pin placement when selecting your approach club.
What's a good score on hole 5?
↓
This hole is a medium-length test where par is a solid result. A straightforward par 4 where course management pays off.