Hole 4 at Olympia Fields Country Club (North Course)
- Par
- 4
- Yardage
- 392 yds
- Stroke index
- 13
- Hazards
- 5 bunkers
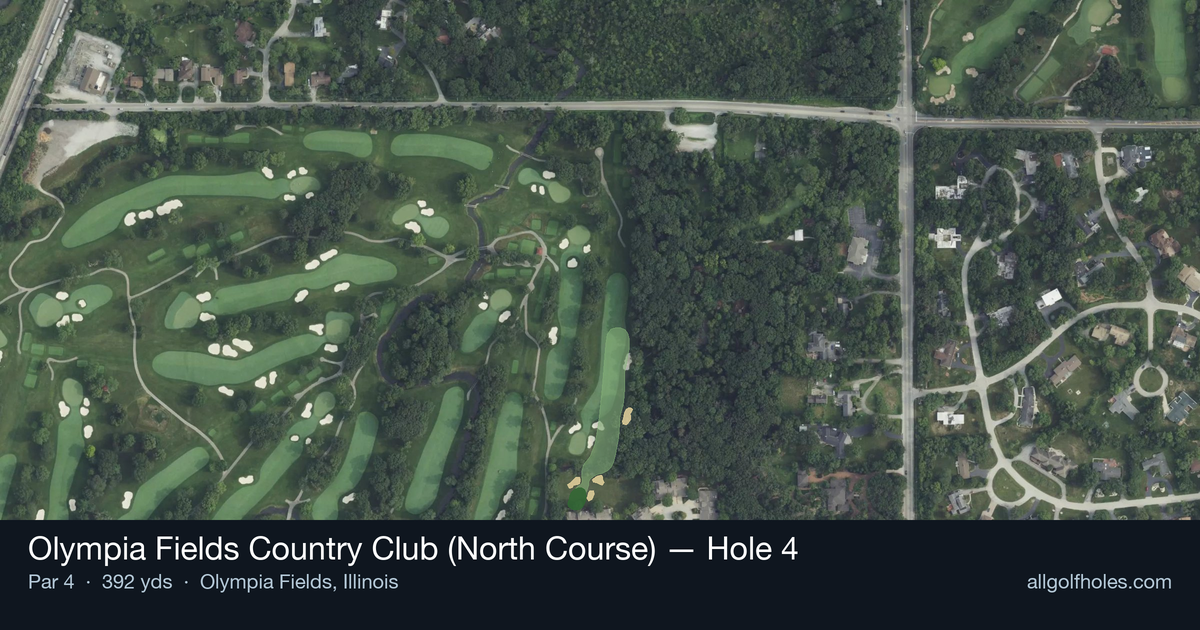
Aerial source not provided
Green size: 28 yds deep × 21 yds wide
Scorecard yardage is for Championship tees. The aerial shows its labeled reference position; distance rings measure to the green.
Championship tees · Par 4 · 392 yards
The plan for No. 4
The fourth hole at Olympia Fields Country Club (North Course) presents a deceptively straightforward par 4 that demands precision over power. This 392-yard test features a generous fairway that invites aggressive tee shots, but the real challenge emerges on the approach to a small, well-protected green complex. Without significant hazards cluttering the landscape, golfers must rely on course management and accurate iron play to score well. The compact putting surface requires careful club selection and precise distance control, as missing the target often leaves difficult recovery shots. What makes this hole memorable is its ability to penalize overconfident play while rewarding thoughtful strategy, embodying the classic design principles that have made Olympia Fields a respected championship venue for over a century.
Off the tee
The tee shot strategy should focus on finding the optimal position for your approach rather than maximum distance. A well-struck 3-wood or hybrid will leave most players with a mid-iron into the green, which is ideal for attacking the small target. Driver isn't necessarily off the table, but the extra distance may leave you with an awkward wedge distance where spin control becomes critical. Target the center-right portion of the fairway to open up the best angle to the green. The straight layout means there's no need to work the ball significantly, so play to your natural shot shape. Focus on tempo and solid contact rather than trying to overpower this hole.
Approach & recovery
The small green is the defining feature of this hole and demands respect on your approach shot. With no significant hazards to navigate, your primary concern is distance control and hitting the correct portion of the green. A mid-iron to long-iron approach, depending on your tee shot position, should allow for proper trajectory and spin to hold the putting surface. Aim for the center of the green unless the pin position clearly favors one side. The compact target means even slight misses can leave challenging up-and-downs, so err on the side of caution. Take one extra club if you're between selections to ensure you clear any front-edge trouble.
On the green
The small green likely features subtle breaks that can be deceptive from distance. Spend extra time reading putts from multiple angles, as the compact surface means every foot matters. Lag putting becomes crucial here – focus on getting your first putt close rather than being overly aggressive from long range. Pay attention to grain direction and any slope that might affect ball roll. With limited real estate, three-putts can quickly turn a scoring opportunity into a bogey, so prioritize solid speed control over aggressive line choices. ## RISK VS REWARD This hole offers a refreshing low-risk, high-reward scenario. The absence of major hazards means you can play aggressively without severe penalty for slight misses. The primary risk comes from being too aggressive with pin hunting on the small green, potentially leaving yourself in difficult recovery positions. The reward for smart play is significant – this should be a birdie opportunity for most golfers who execute their game plan. The key is not getting greedy and allowing the hole's apparent simplicity to lead to careless mistakes. ## DIFFERENT SKILL LEVELS **High-Handicap Players:** Focus on hitting fairway first, green second. Use whatever club off the tee gives you the best chance of finding short grass. Don't worry about pin positions – aim for the center of the green and take your par or better. This hole can be a confidence builder if you stick to conservative targets. **Low-Handicap Players:** This is a prime birdie opportunity that you should capitalize on. Consider the pin position more heavily in your club selection and approach strategy. You can be more aggressive with your approach shots, but respect the small green size. Use this hole to gain momentum for the more challenging holes ahead. The 13th handicap ranking suggests this hole should play easier than most on the course, making it an important scoring opportunity regardless of your skill level. Smart course management here can set a positive tone for the remainder of your round.
Watch for
- Course conditioning and mapped hazards may affect line selection; confirm from the aerial.
Hole 4 Green Complex
Mapped green boundary
Green size: 3,833 sq ft
How did Hole 4 play?
How did this hole play today?
Frequently asked questions
Yardage reference: Championship tees · 392 yards.
What's the best strategy off the tee?
↓
For this 392-yard par 4, most players will hit driver to set up a comfortable approach.
How difficult is hole 4?
↓
This hole is a good scoring opportunity for most golfers. Key challenges include: small green.
How big is the green on hole 4?
↓
The green is small and requires precision. Expect challenging pin positions with limited room for error.
What's a good score on hole 4?
↓
This hole is a medium-length test where par is a solid result. A straightforward par 4 where course management pays off.