Hole 10 at Sea Island Golf Club (Seaside)
- Par
- 4
- Yardage
- 399 yds
- Stroke index
- 12
- Hazards
- 3 bunkers
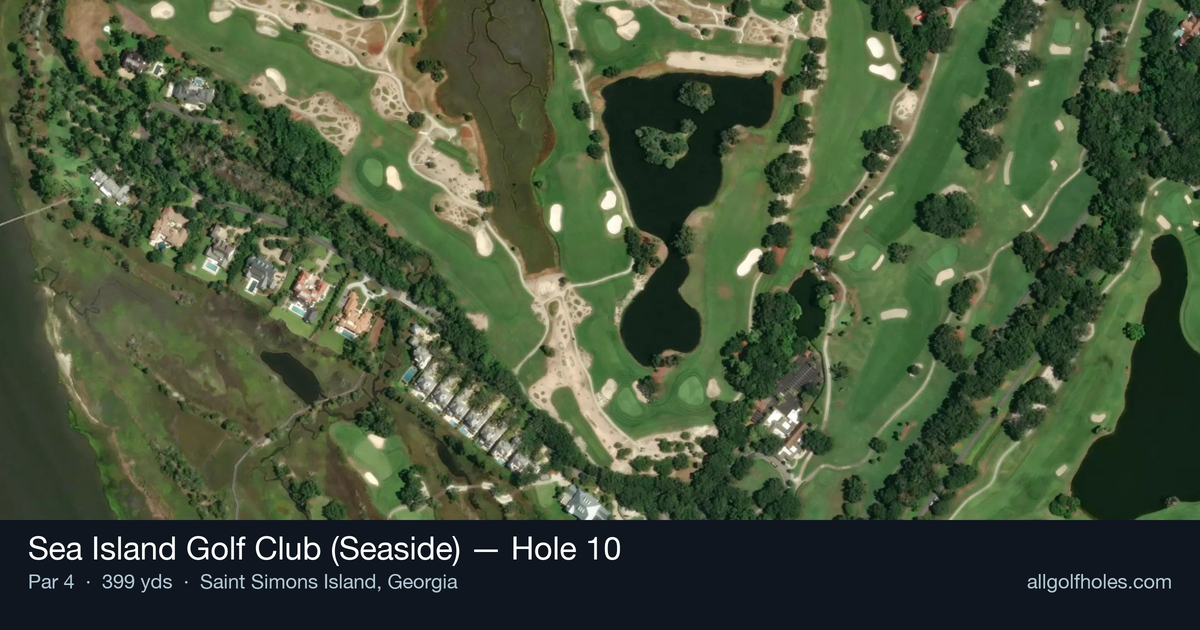
Aerial source not provided
Green size: 36 yds deep × 23 yds wide
Scorecard yardage is for Championship tees. The aerial shows its labeled reference position; distance rings measure to the green.
Championship tees · Par 4 · 399 yards
The plan for No. 10
The 10th hole at Sea Island Golf Club (Seaside) exemplifies the unpredictable nature of authentic links golf, where wind conditions transform this 399-yard par 4 into a completely different challenge from round to round. This straight-away hole demands precise club selection and course management, as coastal breezes can turn a comfortable mid-iron approach into a white-knuckle long iron battle. The generous fairway provides ample landing area for the tee shot, but the real test comes with the approach to a small, subtly contoured green that punishes anything but the most accurate strikes. With minimal hazards to distract, players must focus entirely on reading the ever-changing wind patterns that Bobby Jones himself encountered when he praised this historic course during his Grand Slam year. This deceptively simple hole rewards strategic thinking over raw power.
Off the tee
Your tee shot strategy should prioritize positioning over distance, especially given the unpredictable coastal winds. A well-struck driver or 3-wood down the center of the fairway leaves you with a manageable approach, but club selection must account for wind direction and strength. On calm days, an aggressive driver can set up a short iron approach, but when the wind is up, consider a more conservative 3-wood or hybrid to ensure you stay in the fairway and maintain control. The target line should favor the center of the fairway, giving you the best angle into the small green. Avoid the temptation to cut corners or get too aggressive with your line - the straight layout rewards patience and precision. Pay close attention to the wind direction during your pre-shot routine, as crosswinds can significantly affect ball flight and landing position.
Approach & recovery
The approach shot is where this hole reveals its true character. With a small green as your target, precision becomes crucial regardless of the distance remaining. Wind conditions will dictate club selection more than yardage - you might find yourself hitting anything from a comfortable 7-iron to a gripped-down 5-iron depending on the day's conditions. Focus on hitting the center of the green rather than chasing pins, especially when the wind is swirling. The compact green size leaves little margin for error, so a conservative approach targeting the heart of the putting surface often yields better results than aggressive pin-hunting. Take extra time to read the wind, and don't be afraid to take one more club if conditions are uncertain.
On the green
The small green at the 10th demands respect with your putter. While specific break patterns aren't detailed, the coastal location suggests subtle influences from the surrounding terrain and wind exposure. Focus on speed control above all else - getting your first putt close to the hole is more important than trying to hole everything from long range. Pay attention to grain direction, which can be influenced by the prevailing coastal winds. The compact size means most putts will be relatively short, but don't underestimate the importance of reading even the shortest putts carefully. Take your time and trust your read. ## RISK VS REWARD The 10th hole offers a classic risk/reward scenario in club selection and aggression level. The reward for precise play is significant - a well-positioned drive and accurate approach can set up birdie opportunities. However, the risk comes from the wind's ability to magnify small mistakes into larger problems. The biggest risk/reward decision comes with pin positions near the edges of the small green. While attacking these pins can yield scoring opportunities, the margin for error is minimal. Weigh the potential reward against your confidence level and the day's wind conditions before committing to an aggressive approach. ## DIFFERENT SKILL LEVELS **High Handicappers:** Focus on keeping the ball in play and targeting the center of the green. Use a conservative tee shot strategy with a club you can control, even if it means a longer approach. On the approach, take plenty of club and aim for the middle of the green regardless of pin position. Two putts from anywhere on the green represents a successful hole. **Low Handicappers:** You can be more aggressive with driver off the tee to set up shorter approach shots, but maintain discipline in wind conditions. Attack pins only when wind conditions allow for precise distance control. Use your short game skills around the green if you do miss, as the small target requires creative recovery shots. This is a hole where course management and adaptability separate good scores from great ones. The key to mastering Seaside's 10th hole lies in embracing the links golf mentality - respect the wind, play within yourself, and let the conditions dictate your strategy rather than fighting against them.
Watch for
- Course conditioning and mapped hazards may affect line selection; confirm from the aerial.
Hole 10 Green Complex
Mapped green boundary
Green size: 4,305 sq ft
How did Hole 10 play?
How did this hole play today?
Frequently asked questions
Yardage reference: Championship tees · 399 yards.
What's the best strategy off the tee?
↓
For this 399-yard par 4, most players will hit driver to set up a comfortable approach.
How difficult is hole 10?
↓
This hole is a good scoring opportunity for most golfers. Key challenges include: small green.
How big is the green on hole 10?
↓
The green is small and requires precision. The green is deeper than wide, so club selection is crucial. Expect challenging pin positions with limited room for error.
What's a good score on hole 10?
↓
This hole is a medium-length test where par is a solid result. A straightforward par 4 where course management pays off.