Hole 6 at Southern Highlands Golf Club
- Par
- 4
- Yardage
- 397 yds
- Stroke index
- 10
- Hazards
- 5 bunkers
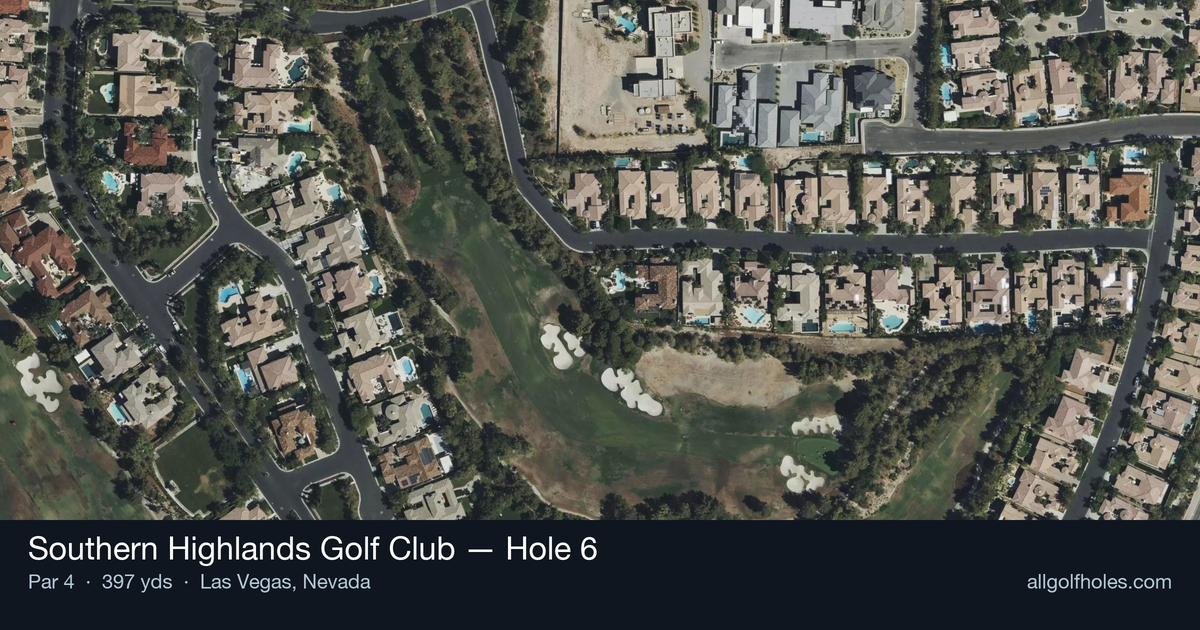
Aerial source not provided
Green size: 29 yds deep × 21 yds wide
Scorecard yardage is for Championship tees. The aerial shows its labeled reference position; distance rings measure to the green.
Championship tees · Par 4 · 397 yards
The plan for No. 6
Southern Highlands Golf Club hole 6 presents a deceptively challenging par 4 that rewards precision over power. This straight 397-yard test features a generous fairway that invites aggressive tee shots, but the real challenge lies in the approach to a small, well-protected green complex. The absence of major hazards might fool players into complacency, yet the compact putting surface demands surgical accuracy with your iron play. Distance control becomes paramount as the green's subtle undulations can quickly turn a good approach into a difficult two-putt scenario. This hole exemplifies Southern Highlands' strategic design philosophy, where course management and smart club selection trump brute force, making it a true test of golf strategy and execution.
Off the tee
Your tee shot strategy should prioritize position over pure distance. With the hole measuring 397 yards, most golfers can comfortably reach the green in regulation without needing their longest drive. Focus on finding the center of the fairway, as this straight layout rewards accuracy. Consider taking one club less than your typical driver if you tend to struggle with accuracy - a well-struck 3-wood or hybrid will leave you in excellent position. The key target line runs down the middle of the fairway, giving you the best angle for your approach shot to the small green.
Approach & recovery
The approach shot is where this hole reveals its true challenge. With a small green as your target, club selection becomes critical. Most players will face a mid-iron to long-iron depending on their tee shot distance and pin position. Take note of the pin location during your pre-round preparation - front pins may play shorter but offer less margin for error, while back pins require you to carry the shot fully to avoid coming up short. Err on the side of taking enough club, as missing short of a small green often leads to difficult up-and-down situations.
On the green
The compact green size means every putt matters significantly. Focus on getting your approach shot below the hole when possible, as uphill putts are generally easier to control on smaller surfaces. Pay attention to the overall slope and grain of the green during your practice round or warm-up. With limited real estate to work with, lag putting becomes essential - getting your first putt close is more important than being aggressive from long range. Two-putts should be your primary goal unless you have a clear, straight uphill look. ## RISK VS REWARD This hole's risk/reward equation favors conservative play. While the absence of major hazards might tempt aggressive play, the small green punishes approaches that miss their target. The reward for hitting the green in regulation is substantial - a legitimate birdie opportunity. However, the risk of missing the green entirely and facing a challenging short game shot often outweighs the benefits of aggressive club selection. Smart course management suggests playing for the center of the green regardless of pin position. ## DIFFERENT SKILL LEVELS **High Handicappers:** Focus entirely on finding the fairway with your tee shot, even if it means using a more lofted club. For your approach, aim for the center of the green regardless of pin position. Accept bogey as a reasonable score if your approach shot misses the target - don't compound mistakes by attempting heroic recovery shots. **Low Handicappers:** You can be more aggressive with pin hunting, but respect the small green size. Consider the wind conditions and green firmness when selecting your approach club. This hole offers a legitimate birdie opportunity for skilled players who can consistently hit their targets, making it a potential scoring hole in competitive rounds. The key to mastering this hole lies in recognizing that sometimes the most aggressive play is the most conservative one - hitting the fairway and the green in regulation will serve you better than any heroic recovery shot.
Watch for
- Course conditioning and mapped hazards may affect line selection; confirm from the aerial.
Hole 6 Green Complex
Mapped green boundary
Green size: 3,061 sq ft
How did Hole 6 play?
How did this hole play today?
Frequently asked questions
Yardage reference: Championship tees · 397 yards.
What's the best strategy off the tee?
↓
For this 397-yard par 4, most players will hit driver to set up a comfortable approach.
How difficult is hole 6?
↓
This hole is a moderate challenge for most golfers. Key challenges include: heavily bunkered, small green.
How big is the green on hole 6?
↓
The green is small and requires precision. Expect challenging pin positions with limited room for error.
What's a good score on hole 6?
↓
This hole is a medium-length test where par is a solid result. A straightforward par 4 where course management pays off.