Hole 5 at Southern Highlands Golf Club
- Par
- 4
- Yardage
- 365 yds
- Stroke index
- 16
- Hazards
- 3 bunkers · Water
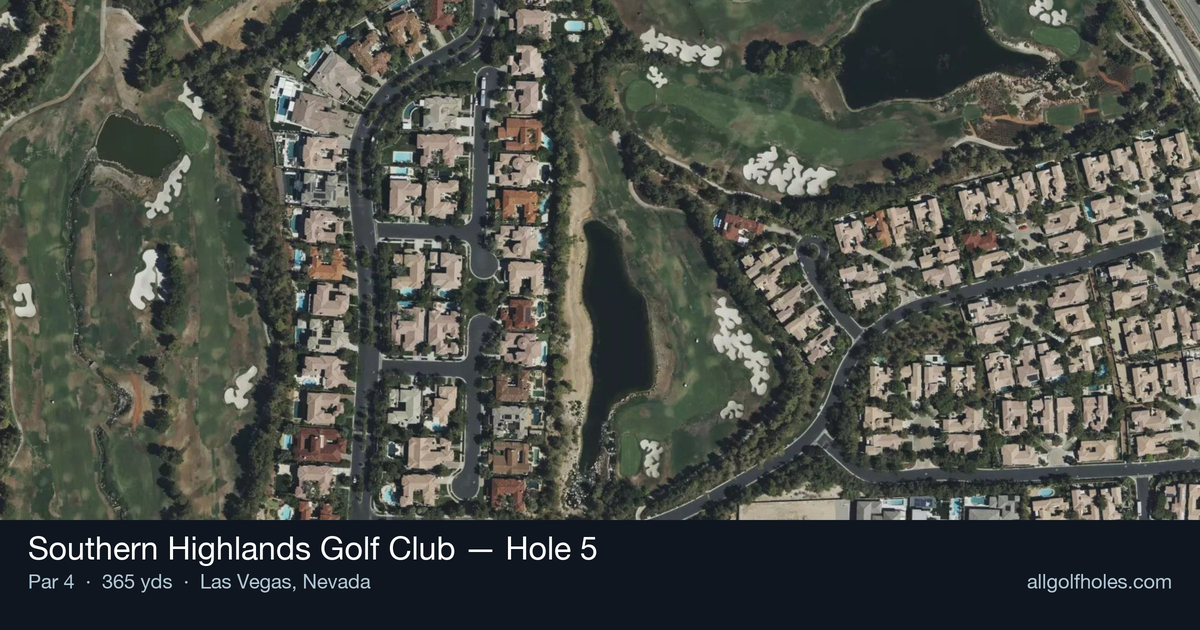
Aerial source not provided
Green size: 32 yds deep × 17 yds wide
Scorecard yardage is for Championship tees. The aerial shows its labeled reference position; distance rings measure to the green.
Championship tees · Par 4 · 365 yards
The plan for No. 5
The fifth hole at Southern Highlands Golf Club presents a deceptively straightforward par 4 that rewards precision over power. At 365 yards, this manageable length might suggest an easy birdie opportunity, but the small green demands accuracy on the approach shot. The straight layout offers a clear view from tee to green, allowing golfers to plot their strategy across the desert landscape. With no significant hazards guarding the fairway, players can focus on positioning their tee shot for the optimal angle into the compact putting surface. The green's intimate size transforms what appears to be a scoring hole into a test of short iron precision, making Southern Highlands Golf Club hole 5 a subtle challenge that separates thoughtful course management from aggressive play.
Off the tee
The tee shot strategy centers on positioning for your preferred approach distance. Most players will benefit from a confident driver or strong 3-wood, as the straight layout and absence of major hazards allow for aggressive play off the tee. Target the center of the fairway to ensure the best angle into the small green. Longer hitters should focus on smooth tempo rather than maximum distance, as getting too close to the green could leave an awkward short iron or wedge distance. The key is finding your comfort zone - whether that's a 150-yard approach with a 7-iron or a 120-yard approach with a wedge. Plan backwards from your preferred approach distance to determine the optimal tee shot.
Approach & recovery
The approach shot is where this hole's challenge reveals itself. The small green demands precision and the right club selection for the conditions. Take one extra club if there's any doubt, as coming up short of a small target is far more costly than being long and having to chip back. Pay attention to pin position - with a small green, the difference between front and back pin positions significantly affects club selection. When the pin is tucked, aim for the center of the green and let your putting handle the rest. The straight hole layout means you'll typically have a good angle regardless of your tee shot position.
On the green
The compact green requires careful speed control on putts. Small greens typically feature subtle breaks that can be deceptive, so take extra time to read the slope. Focus on getting your first putt within tap-in range rather than being overly aggressive with longer putts. The green's size means most putts will be makeable if you can control your speed effectively. ## RISK VS REWARD This hole offers excellent risk/reward potential for players willing to be aggressive. The scoring opportunity is clear - attack the pin when conditions are favorable and your confidence is high. However, the small green punishes wayward approach shots, so the reward comes to those who execute precisely. Consider being more aggressive when you have a comfortable approach distance and favorable wind conditions. ## DIFFERENT SKILL LEVELS **Higher Handicap Players:** Focus on fairway first, green second. Use whatever club gives you confidence off the tee, even if it's a hybrid or long iron. For the approach, aim for the center of the green regardless of pin position and take the birdie putt if it comes, but never risk missing the green entirely. **Lower Handicap Players:** This is a hole to attack. Use driver confidently to set up your preferred approach distance. Be aggressive with approach shots when you have good lies and favorable conditions. This handicap-16 hole should be a consistent birdie opportunity for skilled players who execute their game plan. The absence of major hazards makes this hole more about execution than navigation - stick to your strengths and take advantage of one of the course's better scoring opportunities.
Watch for
- Course conditioning and mapped hazards may affect line selection; confirm from the aerial.
Hole 5 Green Complex
Mapped green boundary
Green size: 3,075 sq ft
How did Hole 5 play?
How did this hole play today?
Frequently asked questions
Yardage reference: Championship tees · 365 yards.
What's the best strategy off the tee?
↓
For this 365-yard par 4, most players will hit 3-wood or driver to set up a comfortable approach.
How difficult is hole 5?
↓
This hole is a moderate challenge for most golfers. Key challenges include: water in play, small green.
How big is the green on hole 5?
↓
The green is small and requires precision. The green is deeper than wide, so club selection is crucial. Expect challenging pin positions with limited room for error.
What's a good score on hole 5?
↓
This hole is a medium-length test where par is a solid result. A straightforward par 4 where course management pays off.