Hole 7 at Southern Highlands Golf Club
- Par
- 4
- Yardage
- 440 yds
- Stroke index
- 6
- Hazards
- 6 bunkers
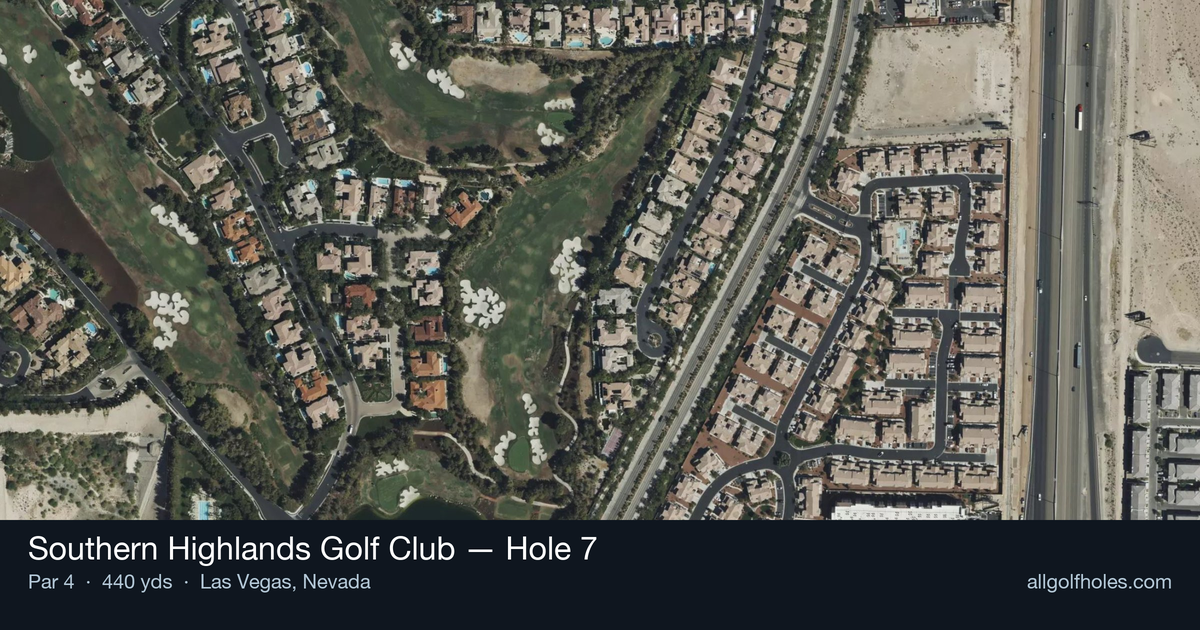
Aerial source not provided
Green size: 32 yds deep × 23 yds wide
Scorecard yardage is for Championship tees. The aerial shows its labeled reference position; distance rings measure to the green.
Championship tees · Par 4 · 440 yards
The plan for No. 7
Southern Highlands Golf Club hole 7 presents a deceptively challenging par 4 that demands both power and precision from the championship tees at 440 yards. This straight-away layout may appear straightforward on the scorecard, but the small green complex creates the hole's defining challenge. The generous fairway invites an aggressive tee shot, allowing golfers to take advantage of the desert's firm conditions to maximize distance. However, the approach shot becomes increasingly demanding as players near the putting surface. The compact green requires pinpoint accuracy with mid-irons, as any wayward approach leaves difficult recovery shots. With no major hazards to navigate, success hinges entirely on execution and course management, making this the sixth-ranked handicap hole a true test of fundamental golf skills in the stunning Las Vegas desert setting.
Off the tee
The key off the tee is finding the optimal position in the landing zone, typically around 250-280 yards from the tee depending on your distance. With the straight layout, focus on the center of the fairway as your target line. Driver is the obvious choice for most players to leave a manageable approach distance, but don't be afraid to throttle back slightly for accuracy. The absence of major hazards means you can be aggressive with your line, but remember that missing the fairway on a 440-yard hole often means a difficult recovery shot to a small green.
Approach & recovery
Your approach shot is where this hole can make or break your score. With a small green as your target, precision becomes paramount. Depending on your tee shot position, you'll likely face anywhere from a mid-iron to hybrid for your second shot. Take one extra club and swing smoothly rather than forcing a shot. The key is hitting the green in regulation - missing this small target often results in a challenging up-and-down. Pay attention to pin position and aim for the center of the green unless you're confident in your distance control.
On the green
The small green size means every putt matters significantly. Focus on getting your first putt close rather than being overly aggressive with longer attempts. Speed control becomes crucial on a smaller surface where running putts off the green is a real possibility. Take time to read the subtle breaks carefully, as even minor slopes are magnified on a compact putting surface. ## RISK VS REWARD This hole offers limited risk/reward opportunities, which is actually the strategic challenge itself. The straightforward design means there are no shortcuts or aggressive lines that can significantly shorten the hole. The reward comes from playing smart, conservative golf - hitting fairways and greens rather than attempting heroic shots. The risk lies in getting impatient and trying to overpower the hole, which often leads to poor positioning and difficult recovery shots. ## DIFFERENT SKILL LEVELS **High Handicappers:** Focus entirely on keeping the ball in play. Consider a 3-wood or hybrid off the tee if driver accuracy is inconsistent. For the approach, take plenty of club and aim for the center of the green regardless of pin position. Two-putting for bogey is a solid result here. **Low Handicappers:** This hole rewards precision and course management skills. Work the ball to create the best approach angle, and be aggressive with pin hunting only when you're confident in your distance control. This is a hole where par is always a good score, and birdie opportunities come from executing your plan rather than taking risks. The strategic beauty of this hole lies in its simplicity - it rewards good golf shots and punishes poor execution without hiding behind tricky design elements. Success comes from respecting the hole's length and the challenge of hitting a small target under pressure.
Watch for
- Course conditioning and mapped hazards may affect line selection; confirm from the aerial.
Hole 7 Green Complex
Mapped green boundary
Green size: 3,835 sq ft
How did Hole 7 play?
How did this hole play today?
Frequently asked questions
Yardage reference: Championship tees · 440 yards.
What's the best strategy off the tee?
↓
For this 440-yard par 4, most players will hit driver to set up a comfortable approach.
How difficult is hole 7?
↓
This hole is a moderate challenge for most golfers. Key challenges include: heavily bunkered, small green.
How big is the green on hole 7?
↓
The green is small and requires precision. The green is deeper than wide, so club selection is crucial. Expect challenging pin positions with limited room for error.
What's a good score on hole 7?
↓
This hole is a demanding hole where bogey is not unusual. This longer par 4 will test most golfers. Focus on position over distance.