Hole 2 at Southern Highlands Golf Club
- Par
- 3
- Yardage
- 201 yds
- Stroke index
- 14
- Hazards
- 3 bunkers
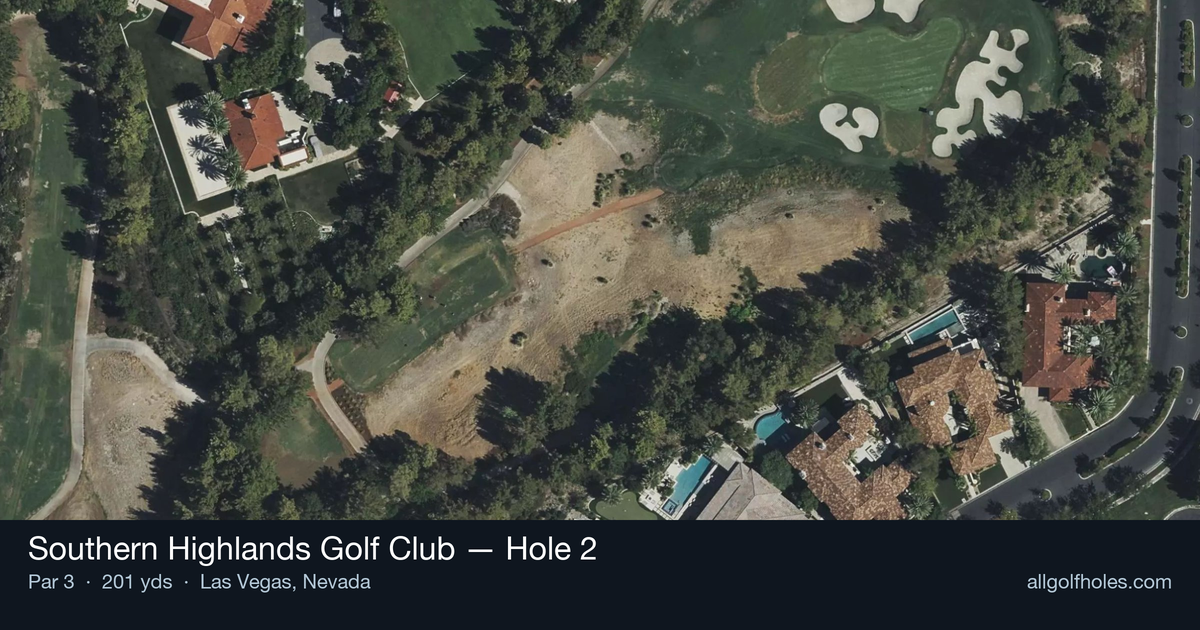
Aerial source not provided
Green size: 38 yds deep × 27 yds wide
Scorecard yardage is for Championship tees. The aerial shows its labeled reference position; distance rings measure to the green.
Championship tees · Par 3 · 201 yards
The plan for No. 2
The second hole at Southern Highlands Golf Club presents a deceptively challenging par 3 that demands precision over power. At 201 yards, this straight shot requires golfers to navigate to a small, well-protected green that rewards accuracy above all else. The elevated tee provides stunning views of the Las Vegas valley while creating an optical illusion that can fool even experienced players about distance and wind conditions. Without major hazards cluttering the landscape, this hole's defense lies in its compact target and the desert surroundings that punish errant shots. The small green complex demands a committed tee shot with the right club selection, as short approaches leave difficult up-and-downs while long shots find trouble beyond the putting surface. Southern Highlands Golf Club hole 2 epitomizes desert golf strategy—respect the target, trust your yardage, and execute with confidence.
Off the tee
From 201 yards, most players will need a long iron, hybrid, or fairway wood depending on conditions and elevation changes. The target line is straightforward - aim for the center of the green and trust your distance control. Wind conditions in Las Vegas can significantly affect club selection, so factor in any breeze before committing to your choice. Take one extra club if you're between selections, as coming up short on a par 3 often leads to more difficult recovery shots than being slightly long.
Approach & recovery
Since this is a par 3, your tee shot IS your approach shot. The small green size demands precision, making it crucial to pick a specific target rather than just aiming at the green generally. Focus on smooth tempo and solid contact rather than trying to overpower the shot. The lack of major hazards means you can be aggressive with your target selection, but respect the green's dimensions by ensuring your miss is still on the putting surface.
On the green
Small greens typically feature subtle breaks that can be deceptive from distance. Take time to read the green carefully, as what looks flat from the tee may have more movement than expected. Pin position becomes critical on a small green - when the flag is tucked near an edge, consider aiming for the center and two-putting rather than risking a miss that leaves a difficult chip shot. Speed control is paramount, as small greens offer less room for error on longer putts. ## RISK VS REWARD This hole offers a clear risk/reward decision based on pin position and your confidence level. When the pin is accessible in the center of the green, you can attack aggressively for birdie opportunities. However, when tucked pins demand precise execution, the smart play is targeting the fat part of the green and accepting a longer putt. The absence of major hazards means the penalty for missing isn't severe, but getting off the green entirely creates unnecessary difficulty. ## DIFFERENT SKILL LEVELS **High-Handicap Players:** Focus on getting the ball somewhere on the green rather than attacking specific pin positions. Choose a club you're confident with, even if it means being slightly long, and aim for the center of the green regardless of pin placement. A bogey from the green is better than a double bogey from short rough. **Low-Handicap Players:** Use your distance control precision to attack pin positions when conditions allow. Consider the pin placement in relation to your natural ball flight - if you typically draw the ball, a right pin position might be more accessible. Factor in course conditions, elevation, and wind to make aggressive plays when the percentages favor birdie opportunities. The 14 handicap rating suggests this hole plays easier than many others on the course, making it a genuine scoring opportunity for players who execute solid iron shots and avoid the temptation to overthink a relatively straightforward hole.
Watch for
- Course conditioning and mapped hazards may affect line selection; confirm from the aerial.
Hole 2 Green Complex
Mapped green boundary
Green size: 4,387 sq ft
How did Hole 2 play?
How did this hole play today?
Frequently asked questions
Yardage reference: Championship tees · 201 yards.
What club should I use on this par 3?
↓
At 201 yards, most golfers will need a long iron or hybrid (5-iron to 6-iron) to reach this green. Adjust for elevation, wind, and pin position.
What hazards should I watch out for on hole 2?
↓
Key hazards include: 3 greenside bunkers. Plan your shots to avoid these trouble spots.
How big is the green on hole 2?
↓
The green is small and requires precision. The green is wider than it is deep, rewarding shots that find the correct tier. Expect challenging pin positions with limited room for error.