Hole 4 at Cascata
- Par
- 3
- Yardage
- 216 yds
- Stroke index
- 15
- Hazards
- 1 bunker · Water
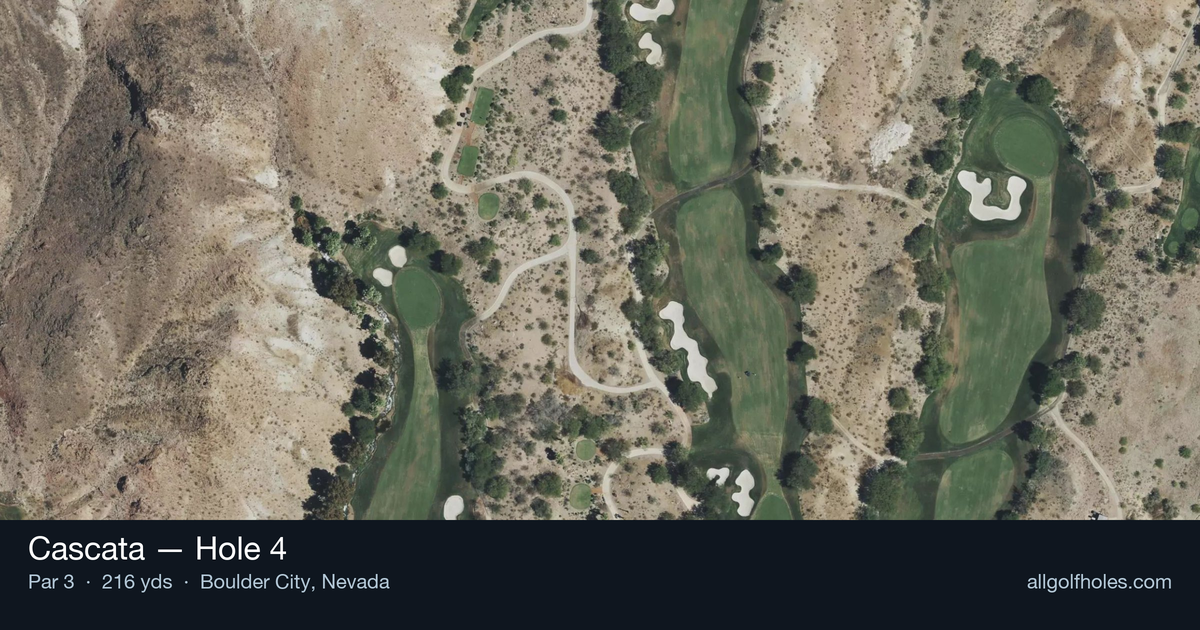
Aerial source not provided
Green size: 29 yds deep × 35 yds wide
Scorecard yardage is for Championship tees. The aerial shows its labeled reference position; distance rings measure to the green.
Championship tees · Par 3 · 216 yards
The plan for No. 4
Cascata hole 4 presents a deceptively challenging par 3 that epitomizes the dramatic desert golf experience this Boulder City masterpiece is renowned for. At 216 yards, this straight shot demands precision and club selection mastery against the stunning backdrop of Nevada's rugged landscape. The small green creates an intimidating target that requires golfers to commit fully to their approach shot, with the desert terrain providing little forgiveness for wayward strikes. While hazards are minimal, the combination of distance, desert conditions, and the compact green complex makes accuracy paramount. This hole showcases Cascata's ability to create memorable golf moments through strategic design rather than overwhelming obstacles, rewarding confident ball-striking with one of the course's most satisfying pars.
Off the tee
Your primary focus should be selecting the right club for the conditions and committing fully to your swing. The 216-yard distance typically calls for anything from a long iron to a hybrid, depending on wind conditions and pin position. In the desert climate, factor in the thinner air which can add 5-10 yards to your normal carry distances. Aim for the center of the green unless the pin is in an accessible location. The straight layout removes any directional guesswork, allowing you to focus entirely on distance control. Take one extra club if there's any doubt – being long on this small green is preferable to coming up short.
Approach & recovery
Since this is a par 3, your tee shot IS your approach shot. The key strategic consideration is understanding that the small green size leaves little margin for error. Visualize a specific landing area rather than just aiming at the flag. Consider the pin position: if it's tucked behind a bunker or on a tier, playing to the fat part of the green often yields better results than going directly at the flag. Wind plays a significant role in the desert, so take time to assess conditions from multiple angles on the tee. A slight breeze can dramatically affect ball flight over this distance.
On the green
With a small green, your putting strategy should focus on lag putting to ensure you don't three-putt. Desert greens typically run faster than their counterparts in more humid climates, especially later in the day. Read the general slope and focus on speed control rather than trying to hole everything. If you find yourself above the hole, be extra cautious with pace. The small green size means even modest putts can run well past if you're not careful with your speed. ## RISK VS REWARD This hole offers limited risk/reward scenarios, which is actually its strategic beauty. The main decision is whether to be aggressive with pin hunting or play conservatively to the center of the green. Given the handicap rating of 15, this hole statistically favors the field, making it an ideal place to pick up a stroke on par. The reward for aggressive play is minimal compared to the risk of missing the small target entirely. Smart course management suggests taking your par and moving on. ## DIFFERENT SKILL LEVELS **High Handicappers:** Focus on making solid contact and getting the ball somewhere on the green. Don't worry about pin hunting – the center of the green is your target every time. Take an extra club to ensure you reach the putting surface, as short misses often lead to difficult up-and-downs. **Low Handicappers:** You can be more aggressive with pin positions, especially when the flag is in the middle third of the green. Use this as a confidence-building hole where you can attack with a controlled, committed swing. Consider the pin position in your club selection – a back pin might call for one extra club even if you normally wouldn't need it. **Mid Handicappers:** This hole rewards good fundamentals and smart decision-making. Pick your club based on your most comfortable distance rather than trying to force a specific iron. If you're between clubs, take the longer one and make a smooth, controlled swing. The beauty of Cascata's 4th hole lies in its simplicity – it's a pure test of execution without the visual intimidation found elsewhere on this dramatic desert course.
Watch for
- Course conditioning and mapped hazards may affect line selection; confirm from the aerial.
Hole 4 Green Complex
Mapped green boundary
Green size: 5,728 sq ft
How did Hole 4 play?
How did this hole play today?
Frequently asked questions
Yardage reference: Championship tees · 216 yards.
What club should I use on this par 3?
↓
At 216 yards, most golfers will need a fairway wood or hybrid to reach this green. Adjust for elevation, wind, and pin position.
How difficult is hole 4?
↓
This hole is one of the tougher holes on the course for most golfers. Key challenges include: long par 3, water in play.
What hazards should I watch out for on hole 4?
↓
Key hazards include: 1 greenside bunker; water at 173.8 yards. Plan your shots to avoid these trouble spots.
How big is the green on hole 4?
↓
The green is medium-sized with moderate targets. Pay attention to pin placement when selecting your approach club.
What's a good score on hole 4?
↓
This hole is a challenging par where bogey is acceptable. This longer par 3 will test your long iron or hybrid game. Par is a good score.