Hole 2 at Cascata
- Par
- 4
- Yardage
- 427 yds
- Stroke index
- 1
- Hazards
- 6 bunkers
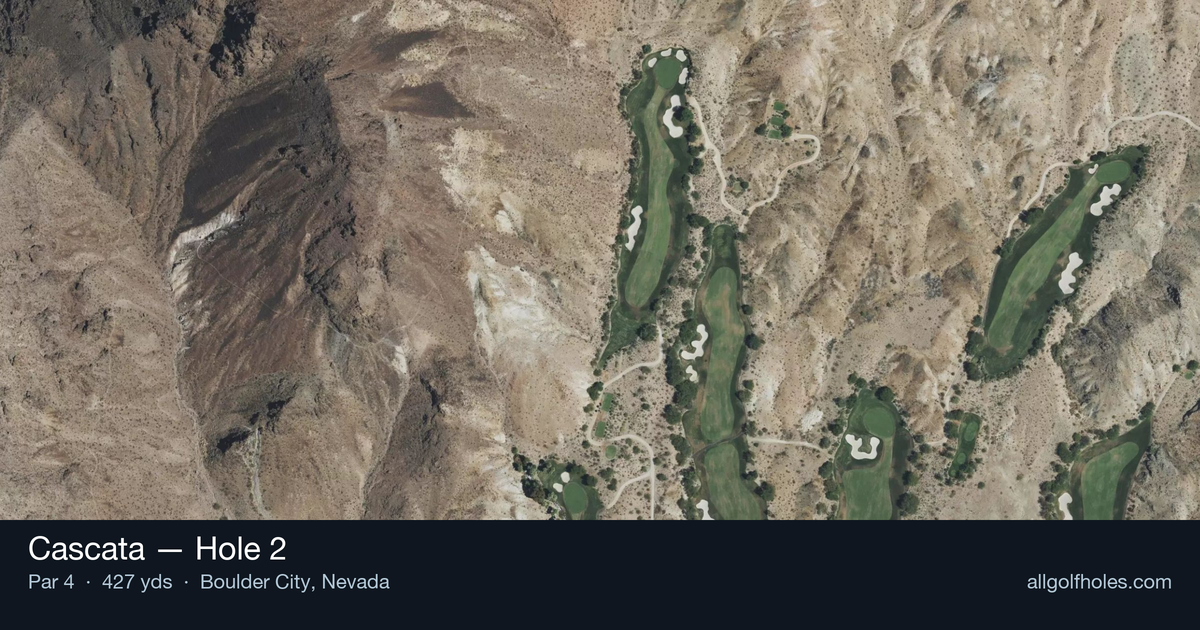
Aerial source not provided
Green size: 33 yds deep × 26 yds wide
Scorecard yardage is for Championship tees. The aerial shows its labeled reference position; distance rings measure to the green.
Championship tees · Par 4 · 427 yards
The plan for No. 2
Cascata hole 2 stands as the course's most demanding par 4, earning its number one handicap rating through strategic complexity rather than overwhelming length. This straight 427-yard test requires precision from the championship tees, where the Nevada desert landscape frames a deceptively challenging layout. The tee shot demands accuracy to find the optimal position for the crucial approach shot to a small, well-protected green complex. Without significant hazards cluttering the hole, success depends entirely on course management and execution under pressure. Set against Cascata's dramatic desert backdrop in Boulder City, this early examination separates confident ball-strikers from those who will struggle throughout the round, establishing the tone for one of Las Vegas's premier golf experiences.
Off the tee
The tee shot strategy centers on finding the optimal position for your approach shot while maximizing distance. With no major hazards to navigate, focus on hitting your most reliable tee shot rather than forcing extra distance. A well-struck driver or strong 3-wood should leave you with a manageable mid-iron approach. Target the center of the fairway, as the straight layout doesn't favor either side. The key is avoiding any wayward shots that could leave you in rough or compromise your angle to the small green. Given the hole's difficulty rating, accuracy trumps distance - a shorter shot from the fairway is far preferable to a longer shot from trouble.
Approach & recovery
The approach shot to Cascata's second hole is where the real challenge begins. With a small green as your target, precision becomes critical. From the fairway, you'll likely face a mid-iron to long-iron depending on your tee shot distance and pin position. Focus on hitting the center of the green rather than attacking pins, especially early in the round. The small target demands a committed swing with proper club selection - don't try to force a shorter club if conditions or distance call for more. Take one extra club if you're between selections, as missing short or long of this small green will make par very difficult.
On the green
The small green size means putting strategy revolves around lag putting and avoiding three-putts. Without specific knowledge of the green's contours, focus on getting your first putt close rather than being overly aggressive. Speed control becomes crucial on smaller greens, as there's less margin for error. Read putts carefully and commit to your line, but prioritize getting the ball close to the hole on longer putts. Two-putting from anywhere on this green should be considered a success. ## RISK VS REWARD This hole offers limited risk/reward opportunities, which actually defines its strategic challenge. The straightforward layout and lack of major hazards mean there are few shortcuts to scoring - you must execute two solid shots. The main risk/reward decision comes with club selection on both shots: pushing for extra distance off the tee to shorten the approach, or being more aggressive with pin hunting on the approach shot. Generally, the conservative approach pays dividends here. The stroke-one handicap rating suggests that even scratch players find this hole challenging, making par a solid score for most golfers. ## DIFFERENT SKILL LEVELS **High-Handicap Players:** Focus entirely on course management and playing within your capabilities. Use your most reliable tee shot, even if it's a hybrid or long iron. From there, select a club that ensures you reach the green rather than trying to get close to pins. Two-putting for bogey is a reasonable goal. **Mid-Handicap Players:** This hole rewards your best swings, so commit fully to each shot. A solid drive followed by an aggressive but smart approach gives you the best chance at par. Don't be afraid to take an extra club on the approach - missing the green makes par very difficult. **Low-Handicap Players:** This is a hole where your short game and mental approach matter as much as ball-striking. Consider the pin position carefully and play to the fat part of the green when pins are tucked. Your goal should be par with an occasional birdie when everything clicks perfectly. The key for all skill levels is respecting this hole's difficulty rating and not letting a challenging start derail your round. Smart course management and solid execution will serve you well on Cascata's demanding second hole.
Watch for
- Course conditioning and mapped hazards may affect line selection; confirm from the aerial.
Hole 2 Green Complex
Mapped green boundary
Green size: 4,821 sq ft
How did Hole 2 play?
How did this hole play today?
Frequently asked questions
Yardage reference: Championship tees · 427 yards.
What's the best strategy off the tee?
↓
For this 427-yard par 4, most players will hit driver to set up a comfortable approach.
How difficult is hole 2?
↓
This hole is a moderate challenge for most golfers. Key challenges include: heavily bunkered.
How big is the green on hole 2?
↓
The green is medium-sized with moderate targets. Pay attention to pin placement when selecting your approach club.