Hole 15 at Cascata
- Par
- 3
- Yardage
- 212 yds
- Stroke index
- 16
- Hazards
- 2 bunkers
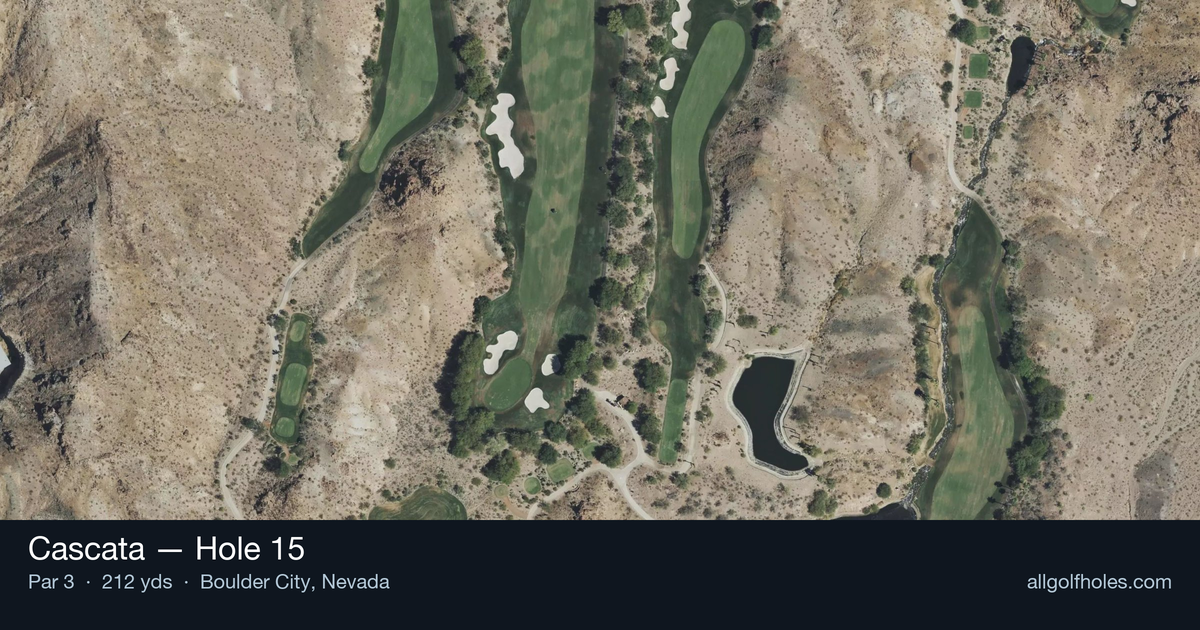
Aerial source not provided
Green size: 34 yds deep × 27 yds wide
Scorecard yardage is for Championship tees. The aerial shows its labeled reference position; distance rings measure to the green.
Championship tees · Par 3 · 212 yards
The plan for No. 15
Cascata hole 15 presents a deceptively challenging par 3 that demands precision over the 212 yards to a compact green nestled in the Nevada desert landscape. This straight-forward tee shot may appear straightforward, but the small target requires golfers to commit fully to their club selection and execute with confidence. The elevated tee position offers stunning views of the surrounding mountains while creating an optical illusion that can deceive distance judgment. With minimal hazards protecting the green, the primary defense lies in the putting surface itself, where accurate approach shots are rewarded and wayward strikes leave difficult recovery options. This hole epitomizes Cascata's philosophy of rewarding precise shot-making in one of golf's most spectacular settings.
Off the tee
Club selection is paramount on this hole, with most golfers requiring anything from a mid-iron to long-iron depending on conditions and pin position. The desert setting at Cascata means elevation changes and wind can significantly affect distance, so factor in these conditions when making your selection. Aim for the center of the green unless you're confident in your distance control with a specific pin position. The straight layout means there's no preferred side to favor - simply pick your target line to the flag and commit to a smooth, controlled swing. Avoid the temptation to overclub and fly the green, as recovery shots around small greens can be tricky.
Approach & recovery
Since this is a par 3, your tee shot is your approach shot. Focus on landing the ball on the correct level of the green, as small greens often feature subtle tiers that can create challenging putts if you're on the wrong section. Take one extra club if you're unsure about distance - being slightly long is often better than coming up short on desert courses where recovery areas can be unforgiving. The key is committing to your club selection and making a confident, balanced swing rather than trying to manufacture distance with a shorter iron.
On the green
Small greens typically feature more pronounced slopes and breaks than their larger counterparts. Study the green carefully from the tee box to identify any obvious tiers or slopes. Pin positions on small greens can dramatically affect putting difficulty, so adjust your target accordingly. If the pin is tucked behind a slope or ridge, consider aiming for the fat part of the green to ensure a manageable two-putt. Speed control becomes critical on smaller surfaces - focus on getting your first putt close rather than being overly aggressive with birdie attempts. ## RISK VS REWARD This hole offers a moderate risk/reward scenario. The reward is a legitimate birdie chance on a relatively straightforward par 3, while the risk lies in the precision required to hit and hold the small green. Aggressive players might attack pins, especially on the easier handicap rating, but conservative course management suggests aiming for the center of the green and taking your par or birdie depending on the resulting putt. The lack of significant hazards reduces the penalty for missing, but recovery from around small greens can still cost strokes. ## DIFFERENT SKILL LEVELS **Low Handicappers**: This is your birdie hole. Be aggressive with pin positions, especially if you're confident in your iron play. Use the straight layout to your advantage and attack the flag when conditions allow. Focus on leaving yourself uphill putts when possible. **Mid Handicappers**: Play to the center of the green and take your pars. This hole's handicap rating suggests it should be manageable for your skill level. Don't get greedy with pin positions - a solid par here keeps you in good position for the more challenging closing holes. **High Handicappers**: Take enough club to comfortably reach the green and aim for the largest part of the putting surface. This is an excellent opportunity to build confidence with your iron play. Focus on making good contact and getting the ball on the green rather than worrying about specific pin positions.
Watch for
- Course conditioning and mapped hazards may affect line selection; confirm from the aerial.
Hole 15 Green Complex
Mapped green boundary
Green size: 5,175 sq ft
How did Hole 15 play?
How did this hole play today?
Frequently asked questions
Yardage reference: Championship tees · 212 yards.
Why is hole 15 called 'Firethorn'?
↓
Based on the context provided, hole 15 at Cascata is called "Firethorn" following Augusta National's tradition of naming holes after plants and flowers, where the 15th hole is also named "Firethorn." The name likely reflects the firethorn plant's characteristic thorny nature, suggesting this hole presents sharp challenges and defensive hazards that golfers must carefully navigate.
What club should I use on this par 3?
↓
At 212 yards, most golfers will need a fairway wood or hybrid to reach this green. Adjust for elevation, wind, and pin position.
How difficult is hole 15?
↓
This hole is a moderate challenge for most golfers. Key challenges include: long par 3.
What hazards should I watch out for on hole 15?
↓
Key hazards include: 2 greenside bunkers. Plan your shots to avoid these trouble spots.
How big is the green on hole 15?
↓
The green is medium-sized with moderate targets. Pay attention to pin placement when selecting your approach club.
What's a good score on hole 15?
↓
This hole is a challenging par where bogey is acceptable. This longer par 3 will test your long iron or hybrid game. Par is a good score.