Hole 2 at Westin Innisbrook Resort 'Copperhead Course'
- Par
- 4
- Yardage
- 435 yds
- Stroke index
- 11
- Hazards
- 2 bunkers · Water
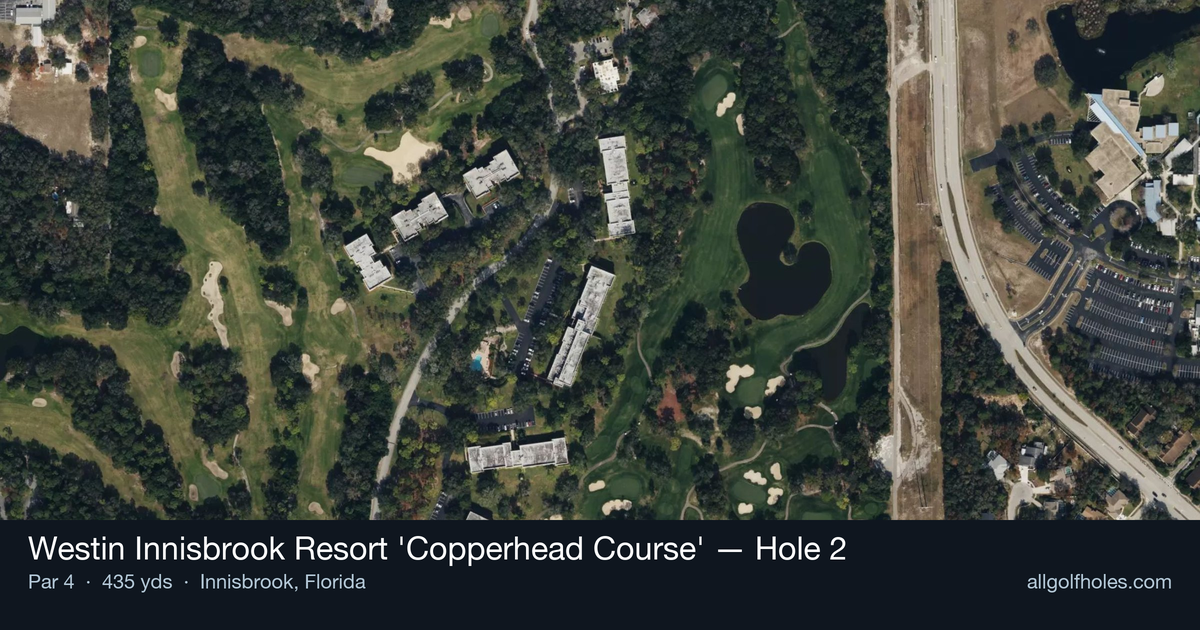
Aerial source not provided
Green size: 40 yds deep × 25 yds wide
Scorecard yardage is for Championship tees. The aerial shows its labeled reference position; distance rings measure to the green.
Championship tees · Par 4 · 435 yards
The plan for No. 2
The second hole at Westin Innisbrook Resort 'Copperhead Course' exemplifies the ball-striking precision that defines this renowned PGA Tour venue. This straight par 4 stretching 435 yards demands accuracy from the opening tee shot, as Lawrence Packard's design features the signature tight, tree-lined fairways that make Copperhead a true test of skill. The straightforward layout may appear deceptive, but the small green complex requires a well-struck approach shot to find the putting surface. With minimal hazards protecting the hole, success hinges purely on execution and course management. This early examination sets the tone for the challenges ahead, reminding players why Copperhead has earned its reputation as one of Florida's premier golf strategy tests.
Off the tee
The tee shot strategy centers on finding the optimal position in the landing zone while avoiding the trees that squeeze the fairway. A driver isn't always the answer here—consider a 3-wood or hybrid to ensure you stay in the short grass and set up the best approach angle. Target the center-left portion of the fairway, as this provides the most forgiving line and opens up the small green for your approach shot. The trees demand respect, so prioritize accuracy over distance. A well-positioned drive around 250 yards leaves an ideal approach distance while maintaining control.
Approach & recovery
With the green's small size being the primary defense, club selection becomes critical on the approach shot. The straight layout means you'll typically have a clear view of the target, but the compact green demands precision. A mid-iron to long-iron, depending on your tee shot position and conditions, should be the play. Aim for the center of the green regardless of pin position—the small target makes aggressive pin-hunting a risky proposition. Focus on a smooth, controlled swing that prioritizes accuracy over distance, as missing this green will test your short game skills.
On the green
The small green size means putting strategy revolves around lag putting and avoiding three-putts rather than aggressive birdie attempts. Read the slopes carefully, as subtle breaks can be magnified on a compact surface. When the pin is tucked near an edge, aim for the fat part of the green and rely on solid lag putting. The Florida climate and Bermuda grass typical of the region means putts may break more than expected, especially in the afternoon when the greens firm up. ## RISK VS REWARD This hole offers a classic risk/reward scenario in club selection. The reward for an aggressive driver comes in the form of a shorter approach shot, but the risk of finding the trees can lead to bogey or worse. The smarter play for most golfers is accepting a longer approach shot in exchange for staying in play. Similarly, on the approach, the reward of attacking pins is minimal given the small green size, while the risk of missing the target entirely can quickly turn a scoring opportunity into a struggle. ## DIFFERENT SKILL LEVELS **High-handicap players** should treat this as a two-shot hole focused on avoiding big numbers. Use a fairway wood or hybrid off the tee to maximize accuracy, then aim for the center of the green with whatever club gets you there comfortably. Don't be tempted to force a birdie—par is an excellent score here. **Low-handicap players** can be more aggressive with driver selection if they have confidence in their accuracy, but should still respect the tree-lined nature of the hole. The approach shot offers the best opportunity to separate yourself from the field, as precise iron play to different pin positions becomes crucial. These players should focus on leaving putts below the hole when possible, as the small green can create challenging downhill putts. The 2nd hole at Copperhead serves as an early reminder that this PGA Tour venue demands respect and precision. Success here builds confidence for the challenges ahead, while mistakes can quickly compound on a course known for testing every aspect of your game.
Hole 2 Green Complex
Mapped green boundary
Green size: 4,708 sq ft
Course coverage
Tournament and creator videos about Westin Innisbrook Resort 'Copperhead Course' — shared course coverage, not hole-specific clips.
Tournament coverage
Valspar Championship highlights
Valspar Championship | Final Round Highlights
2025
How did Hole 2 play?
How did this hole play today?
Frequently asked questions
Yardage reference: Championship tees · 435 yards.
What's the best strategy off the tee?
↓
For this 435-yard par 4, most players will hit driver to set up a comfortable approach.
How difficult is hole 2?
↓
This hole is a moderate challenge for most golfers. Key challenges include: water in play.
What hazards should I watch out for on hole 2?
↓
Key hazards include: 2 greenside bunkers; water at 282.6 yards. Plan your shots to avoid these trouble spots.
How big is the green on hole 2?
↓
The green is medium-sized with moderate targets. The green is deeper than wide, so club selection is crucial. Pay attention to pin placement when selecting your approach club.
What's a good score on hole 2?
↓
This hole is a demanding hole where bogey is not unusual. This longer par 4 will test most golfers. Focus on position over distance.