Hole 14 at Westin Innisbrook Resort 'Copperhead Course'
- Par
- 5
- Yardage
- 590 yds
- Stroke index
- 2
- Hazards
- 2 bunkers · Water
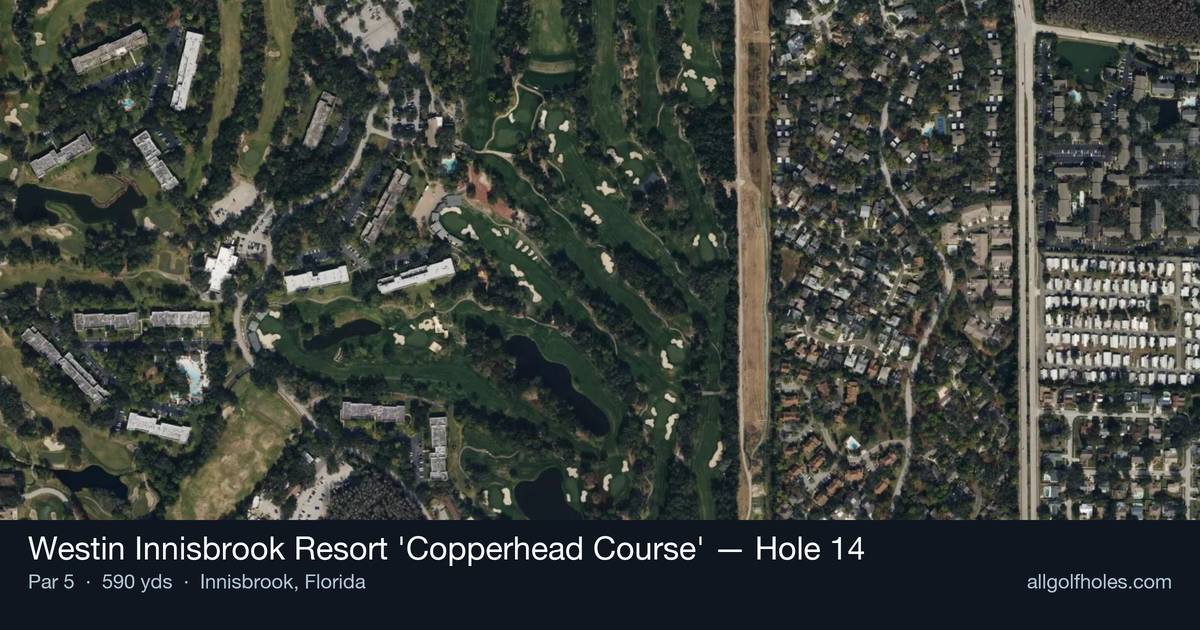
Aerial source not provided
Green size: 39 yds deep × 25 yds wide
Scorecard yardage is for Championship tees. The aerial shows its labeled reference position; distance rings measure to the green.
Championship tees · Par 5 · 590 yards
The plan for No. 14
The signature hole at Westin Innisbrook Resort 'Copperhead Course' hole 14 stands as the course's most famous and strategically demanding par 5. This 590-yard double dogleg represents the final birdie opportunity before entering the dreaded "Snake Pit" closing stretch. The hole's deceptive straight appearance masks a complex routing that requires precise navigation around multiple turns, with elevation changes adding another layer of difficulty. Strategic positioning becomes paramount as golfers must thread their tee shot through the initial dogleg, then carefully plan their approach to set up the optimal angle into the small, subtly contoured green. As Copperhead's last par 5, this hole demands both power and finesse, making it a true test of championship golf that has challenged PGA Tour professionals for decades.
Off the tee
The opening shot sets up the entire hole's strategy. Focus on finding the optimal position in the landing zone rather than maximum distance. A well-struck driver or strong 3-wood should target the center-right portion of the fairway to set up the best angle for navigating the first dogleg. Avoid the temptation to cut too much of the corner, as trees and rough will severely limit your options for the second shot. The key is positioning yourself with a clear sight line to the next landing area while maintaining good distance for your approach strategy.
Approach & recovery
The second shot presents the hole's critical decision point. Most players will face a choice between laying up to an ideal wedge distance or attempting to reach the green in two. The double dogleg nature means your tee shot position dramatically affects this decision. If well-positioned, a mid-iron to long-iron can advance the ball significantly while staying short of trouble. For those going for the green, precise distance control is essential given the small target and surrounding hazards. The approach angle becomes crucial here - favor the side that gives you the best entry to the pin position.
On the green
The small green demands precision and rewards good lag putting. Innisbrook's greens are known for their subtle breaks that can fool even experienced players. Study the slope carefully, as three-putts are common when players underestimate the green's movement. Pin positions in the corners are particularly challenging, often requiring approach shots to the center of the green for the best chance at birdie. The putting surface's firmness can vary with conditions, so pay attention to how approach shots are reacting throughout your round. ## RISK VS REWARD This hole epitomizes risk/reward golf strategy. The opportunity to reach in two exists for longer hitters, but the penalty for missing is severe given the small green and surrounding trouble. The safer play - three well-executed shots - often yields better scoring results than aggressive attempts that find trouble. Consider your current round situation: if you need birdies, the risk may be worthwhile, but if you're playing well, protecting your score is often the smarter choice. ## DIFFERENT SKILL LEVELS **Higher Handicap Players:** Focus on three conservative shots that keep the ball in play. Use the tee shot to find the fairway, advance the second shot as far as safely possible while staying in the short grass, then rely on your short game for the third shot. Avoiding big numbers is more important than chasing birdies on this demanding hole. **Lower Handicap Players:** Your superior ball-striking allows for more aggressive lines and going for the green in two when conditions permit. However, respect the hole's reputation - even tour professionals often play conservatively here. Your advantage comes from better distance control and the ability to work the ball around the doglegs more effectively. The 14th hole's reputation as Copperhead's signature challenge is well-earned. Success here comes from smart course management, precise club selection, and respecting the hole's subtle dangers while capitalizing on legitimate scoring opportunities.
Hole 14 Green Complex
Mapped green boundary
Green size: 4,857 sq ft
Course coverage
Tournament and creator videos about Westin Innisbrook Resort 'Copperhead Course' — shared course coverage, not hole-specific clips.
Tournament coverage
Valspar Championship highlights
Valspar Championship | Final Round Highlights
2025
How did Hole 14 play?
How did this hole play today?
Frequently asked questions
Yardage reference: Championship tees · 590 yards.
Can this par 5 be reached in two?
↓
At 590 yards, A true three-shot hole for most players. Position your layup to leave a comfortable wedge distance.
How difficult is hole 14?
↓
This hole is a moderate challenge for most golfers. Key challenges include: long par 5, water in play.
What hazards should I watch out for on hole 14?
↓
Key hazards include: 2 greenside bunkers; water at 457.2 yards. Plan your shots to avoid these trouble spots.
How big is the green on hole 14?
↓
The green is medium-sized with moderate targets. The green is wider than it is deep, rewarding shots that find the correct tier. Pay attention to pin placement when selecting your approach club.
What's a good score on hole 14?
↓
This hole is a true three-shot hole where birdie requires execution. This longer par 5 demands patience. Two good shots set up the scoring opportunity.