Hole 3 at Doral Golf Resort and Spa 'The Blue monster'
- Par
- 4
- Yardage
- 438 yds
- Stroke index
- 1
- Hazards
- 1 bunker · Water
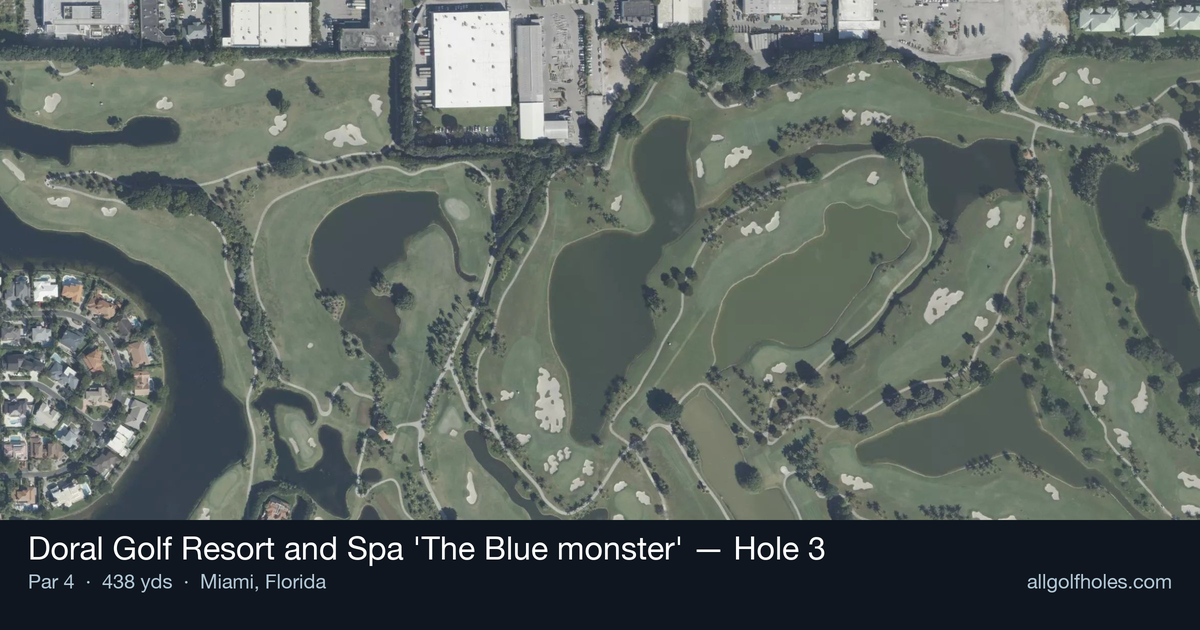
Aerial source not provided
Green size: 32 yds deep × 34 yds wide
Scorecard yardage is for Championship tees. The aerial shows its labeled reference position; distance rings measure to the green.
Championship tees · Par 4 · 438 yards
The plan for No. 3
The third hole at Doral Golf Resort and Spa 'The Blue Monster' stands as the course's number one handicap hole, immediately establishing its reputation as a formidable test. This straight par 4 stretches 438 yards through the heart of the Blue Monster's demanding layout, where precision takes precedence over power. The tee shot must navigate narrow landing areas that characterize this legendary Miami course, requiring golfers to thread their drive through a corridor that punishes wayward shots. The approach shot presents its own challenge to a compact green complex that demands accuracy and proper club selection. As part of the storied Blue Monster that has tested PGA Tour professionals for decades, this hole embodies the course's philosophy of rewarding strategic thinking over brute force, making it a memorable early examination of a golfer's complete skill set.
Off the tee
The tee shot strategy centers on finding the optimal position in what the Blue Monster is famous for - narrow landing areas. Your target line should favor the center of the fairway, as the course's reputation for punishing wayward drives is well-earned here. Consider taking one club less than you might normally hit to ensure accuracy over distance, as positioning trumps length on this hole. The key is avoiding the trouble that can quickly turn a scoring opportunity into a bogey or worse. Focus on a smooth, controlled swing that prioritizes finding the short grass.
Approach & recovery
From the fairway, you'll face a demanding approach to a small green that requires precise club selection. The compact target means there's little room for error, so take extra time to factor in wind conditions common in South Florida. Aim for the center of the green regardless of pin position, as the small surface makes getting close to any flag a challenge. A conservative approach that finds the putting surface is far better than an aggressive shot that misses the target entirely. Consider the green's speed and firmness when selecting your club, as the Blue Monster's greens are known to be true but fast.
On the green
The small green demands respect with your putter. Focus on lag putting to avoid three-putts, as the combination of size and speed can make distance control tricky. Read putts carefully, as even short putts can be challenging on these true but quick surfaces. The key is getting your first putt close rather than being overly aggressive with birdie attempts. ## RISK VS REWARD This hole offers limited risk/reward opportunities, which is precisely what makes it so challenging. The smart play is conservative golf - fairway first, green second, two-putt third. Any aggressive moves are likely to be punished, making this a hole where par is always a good score and bogey isn't the end of the world. ## DIFFERENT SKILL LEVELS **High Handicappers:** Focus entirely on keeping the ball in play. Use a fairway wood or hybrid off the tee if needed to ensure accuracy. Aim for the center of the green with your approach and be content with two-putting for bogey. This hole's difficulty means avoiding big numbers is the priority. **Low Handicappers:** While you can be more aggressive with driver, still prioritize position over distance. Use your course management skills to play to your strengths - if you're more comfortable with a longer iron into the green, lay back off the tee. Attack pins only when they're in favorable positions and conditions are ideal. The Blue Monster's reputation as one of golf's great championship tests is exemplified by this hole, where precision and patience are the keys to success.
Watch for
- Mapped water influences carry decisions and safe margins off the tee and on approaches.
- Mapped bunkers guard landing areas and greenside recovery lines.
Hole 3 Green Complex
Mapped green boundary
Green size: 3,984 sq ft
How did Hole 3 play?
How did this hole play today?
Frequently asked questions
Yardage reference: Championship tees · 438 yards.
What's the best strategy off the tee?
↓
For this 438-yard par 4, most players will hit driver to set up a comfortable approach.
How difficult is hole 3?
↓
This hole is one of the tougher holes on the course for most golfers. Key challenges include: water in play, small green.
What hazards should I watch out for on hole 3?
↓
Key hazards include: water at 301.3 yards. Plan your shots to avoid these trouble spots.
How big is the green on hole 3?
↓
The green is small and requires precision. The green is wider than it is deep, rewarding shots that find the correct tier. Expect challenging pin positions with limited room for error.
What's a good score on hole 3?
↓
This hole is a demanding hole where bogey is not unusual. This longer par 4 will test most golfers. Focus on position over distance.