Hole 2 at Doral Golf Resort and Spa 'The Blue monster'
- Par
- 4
- Yardage
- 376 yds
- Stroke index
- 17
- Hazards
- 6 bunkers · Water
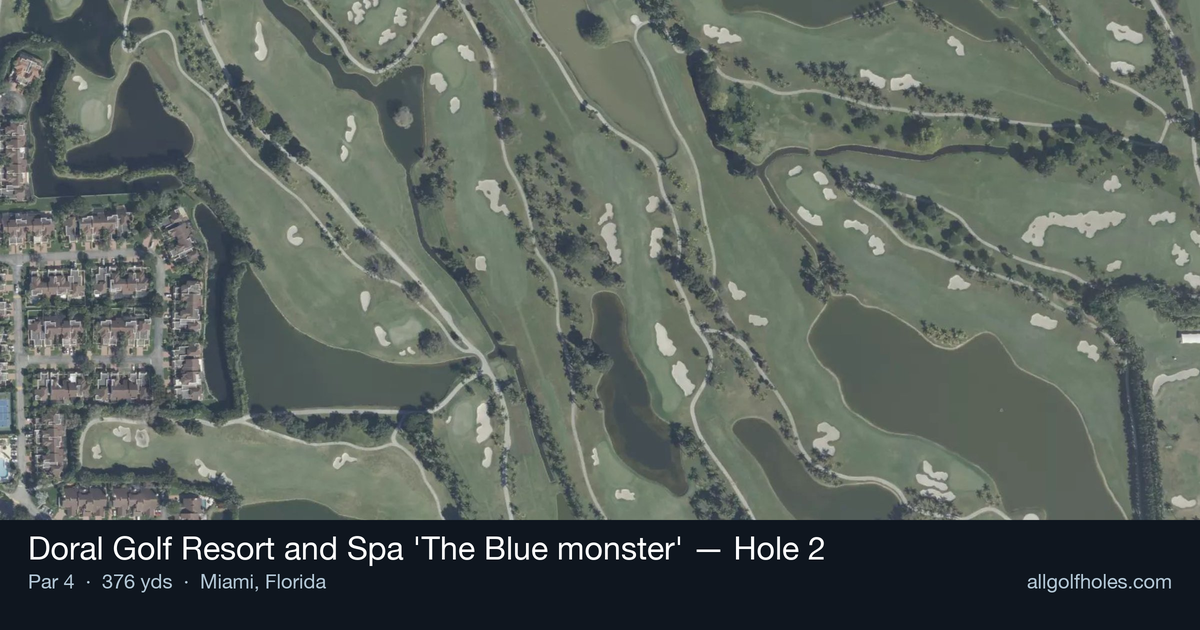
Aerial source not provided
Green size: 21 yds deep × 43 yds wide
Scorecard yardage is for Championship tees. The aerial shows its labeled reference position; distance rings measure to the green.
Championship tees · Par 4 · 376 yards
The plan for No. 2
The second hole at Doral Golf Resort and Spa 'The Blue Monster' presents a deceptively straightforward par 4 that exemplifies the course's reputation for precision over power. At 376 yards, this straight hole may appear generous from the tee, but the Blue Monster's characteristic narrow landing areas demand accuracy from the opening shot. The tee shot must navigate the course's famously demanding fairway corridors, where even slight misses can leave challenging recovery shots. The approach plays to a small green complex that requires precise distance control, typical of the Blue Monster's unforgiving yet fair design philosophy. While lacking dramatic water hazards or severe doglegs, this hole embodies the strategic thinking that has made Doral a PGA Tour venue for decades, rewarding golfers who prioritize placement over distance in South Florida's often windy conditions.
Off the tee
The tee shot strategy centers on finding the optimal position in the landing zone rather than maximizing distance. Given the Blue Monster's reputation for narrow fairways, focus your target line down the center of the fairway with a slight preference toward the side that offers the best approach angle to the pin position. Club selection should prioritize accuracy - many players will benefit from taking a 3-wood or hybrid off the tee to ensure they find the short grass. The relatively short length means you don't need driver to reach a comfortable approach distance, so resist the temptation to overpower this hole.
Approach & recovery
With the green being small in size, your approach shot demands precision and the right club selection. From the typical landing area, you'll likely face a short to mid-iron approach, making this an excellent birdie opportunity if you execute properly. Focus on the center of the green regardless of pin position, as the small target leaves little margin for error. The fast, true greens that Doral is known for mean your ball will release upon landing, so factor this into your club selection and aim point.
On the green
The small green size makes putting strategy relatively straightforward but unforgiving. Speed control becomes paramount on Doral's notoriously fast greens - it's better to leave putts short and give them a chance to drop rather than racing them past the hole. Pay attention to the overall slope and grain direction, which in South Florida typically runs toward the water or prevailing wind direction. Two-putting should be your primary goal unless you have a very makeable birdie chance. ## RISK VS REWARD This hole presents a classic risk/reward scenario disguised as a straightforward par 4. The reward is clear - a well-positioned drive leaves a short iron into a small green for an excellent birdie opportunity. However, the risk lies in the Blue Monster's demanding nature: miss the narrow fairway and you're immediately playing defense, while missing the small green can lead to difficult up-and-downs. The smart play is to take the conservative route off the tee and be aggressive only with your approach if you're in perfect position. ## DIFFERENT SKILL LEVELS **High-Handicap Players**: Focus entirely on finding the fairway with your most reliable club, even if it's a 5-iron or hybrid. From there, aim for the center of the green with whatever club gets you there comfortably. Accept par as a good score and don't force birdie attempts that could lead to big numbers. **Low-Handicap Players**: You can be more aggressive with driver if your accuracy is sharp, but still prioritize position over distance. Look to attack pins when you're in the fairway, but respect the small green size. This is a hole where your short game skills can really pay dividends if you miss the green in regulation. The 2nd hole at the Blue Monster rewards patient, strategic golf over aggressive play, setting the tone for the demanding round ahead.
Watch for
- Mapped water influences carry decisions and safe margins off the tee and on approaches.
- Mapped bunkers guard landing areas and greenside recovery lines.
Hole 2 Green Complex
Mapped green boundary
Green size: 4,504 sq ft
How did Hole 2 play?
How did this hole play today?
Frequently asked questions
Yardage reference: Championship tees · 376 yards.
What's the best strategy off the tee?
↓
For this 376-yard par 4, most players will hit 3-wood or driver to set up a comfortable approach.
How difficult is hole 2?
↓
This hole is a moderate challenge for most golfers. Key challenges include: water in play, heavily bunkered.
How big is the green on hole 2?
↓
The green is medium-sized with moderate targets. Pay attention to pin placement when selecting your approach club.
What's a good score on hole 2?
↓
This hole is a medium-length test where par is a solid result. A straightforward par 4 where course management pays off.