Hole 9 at Shoal Creek Golf Club
- Par
- 4
- Yardage
- 455 yds
- Stroke index
- 7
- Hazards
- 4 bunkers · Water
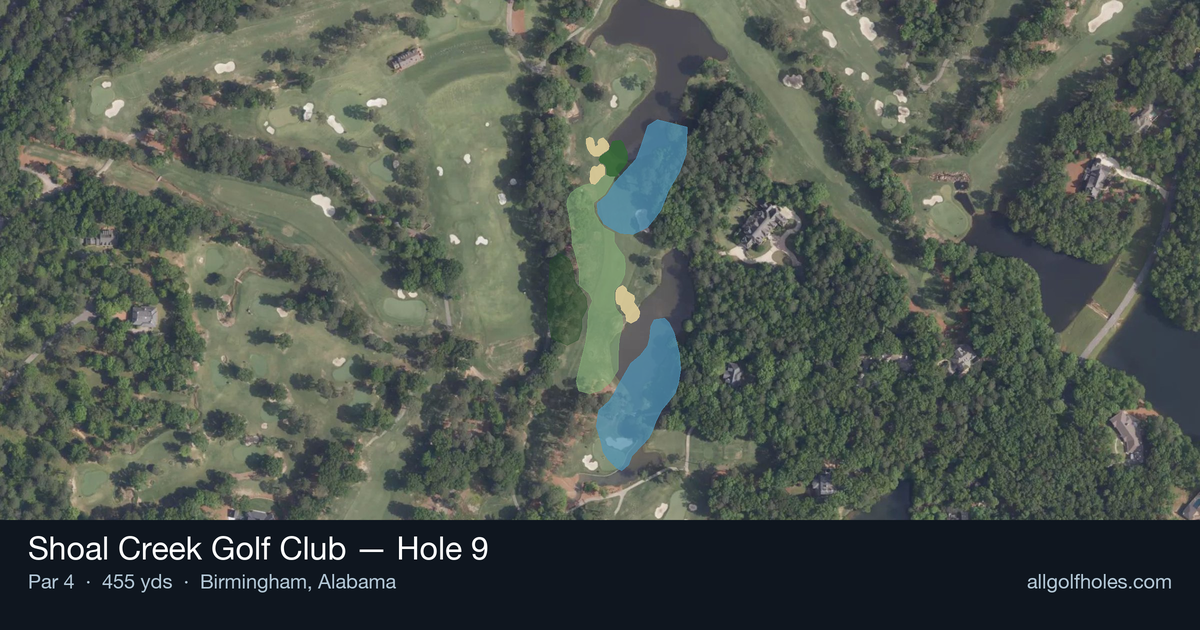
Aerial source not provided
Green size: 39 yds deep × 28 yds wide
Scorecard yardage is for Championship tees. The aerial shows its labeled reference position; distance rings measure to the green.
Championship tees · Par 4 · 455 yards
The plan for No. 9
The ninth hole at Shoal Creek Golf Club presents a deceptively challenging par 4 that serves as a demanding finish to the front nine. At 415 yards, this straight-away hole requires precision over power, with its small green complex demanding an accurate approach shot to secure a good scoring opportunity. The tee shot plays to a generous fairway that invites aggressive play, but the real test lies in the approach. With no significant hazards to navigate, golfers might expect a straightforward hole, yet the compact green size creates its own challenge. Distance control becomes paramount as the putting surface offers little margin for error on wayward approach shots. This strategic par 4 rewards thoughtful course management, making it a memorable conclusion to Shoal Creek's opening nine holes where precision trumps distance.
Off the tee
The tee shot strategy revolves around positioning yourself for the best possible approach angle to the small green. With no significant hazards to navigate, focus on finding the optimal distance for your most confident approach club. Many players will benefit from a controlled 3-wood or hybrid off the tee, leaving a comfortable mid-iron into the green rather than forcing a longer approach after a wayward driver. Target the center of the fairway, as the straight layout doesn't favor either side. Pay attention to pin position when selecting your tee club - a back pin might call for a more aggressive tee shot to shorten the approach, while a front pin allows for a more conservative strategy.
Approach & recovery
The approach shot is where this hole's true challenge reveals itself. The small green demands pinpoint accuracy, making club selection and commitment crucial. Take one extra club to ensure you clear any front-edge trouble and focus on the center of the green regardless of pin position. A smooth, controlled swing trumps trying to perfectly dial in the distance. The green's compact size means even a well-struck shot to the center will leave a reasonable putt to most pin positions. Avoid the temptation to attack difficult pins - the small target makes this a percentage play hole.
On the green
With a small putting surface, most approach shots that find the green will leave manageable putts. However, the compact nature means any shot that misses the green could leave challenging up-and-downs. Focus on speed control rather than trying to be overly aggressive with line, as the smaller target area can make recovery shots more difficult. Pay attention to the overall slope and grain direction, as these factors become magnified on smaller greens. Lag putting to the center of the hole area often proves more effective than trying to be too precise with your reads. ## RISK VS REWARD The primary risk-reward decision comes with tee shot aggression. While driver might leave a shorter approach, the increased accuracy demands of hitting a small green with a more lofted club can actually make the hole more difficult. The reward for finding the green in regulation is significant, as the small surface typically yields good birdie opportunities when you're putting rather than chipping. Consider the conditions - firm greens make aggressive approaches riskier, while soft conditions might allow for more attacking play. ## DIFFERENT SKILL LEVELS **High-Handicap Players:** Prioritize accuracy over distance throughout the hole. Use your most reliable fairway club off the tee, even if it means a longer approach shot. Aim for the center of the green regardless of pin position, and focus on avoiding short-sided positions around the green. **Low-Handicap Players:** You can be more aggressive with driver if you're confident in your iron play, but remember that the small green still demands respect. Consider pin position more heavily in your club selection, and don't be afraid to take dead aim when conditions favor precision. This hole offers a good scoring opportunity for players who execute their game plan properly. The key for all skill levels is recognizing that this hole rewards patience and precision over power and aggression.
Hole 9 Green Complex
Mapped green boundary
Green size: 4,975 sq ft
How did Hole 9 play?
How did this hole play today?
Frequently asked questions
Yardage reference: Championship tees · 455 yards.
How difficult is hole 9?
↓
This hole is a moderate challenge for most golfers. Key challenges include: water in play.
What hazards should I watch out for on hole 9?
↓
Key hazards include: water at 178.2 yards. Plan your shots to avoid these trouble spots.
How big is the green on hole 9?
↓
The green is medium-sized with moderate targets. Pay attention to pin placement when selecting your approach club.
Which side of the fairway is safer on hole 9?
↓
Aim for the left side of the fairway when possible. Missing right (water) brings more trouble into play.
What's a good score on hole 9?
↓
This hole is a demanding hole where bogey is not unusual. This longer par 4 will test most golfers. Focus on position over distance.