Hole 5 at Shoal Creek Golf Club
- Par
- 3
- Yardage
- 220 yds
- Stroke index
- 15
- Hazards
- 4 bunkers · Water
Aerial source not provided
Green size: 43 yds deep × 32 yds wide
Scorecard yardage is for Championship tees. The aerial shows its labeled reference position; distance rings measure to the green.
Championship tees · Par 3 · 220 yards
The plan for No. 5
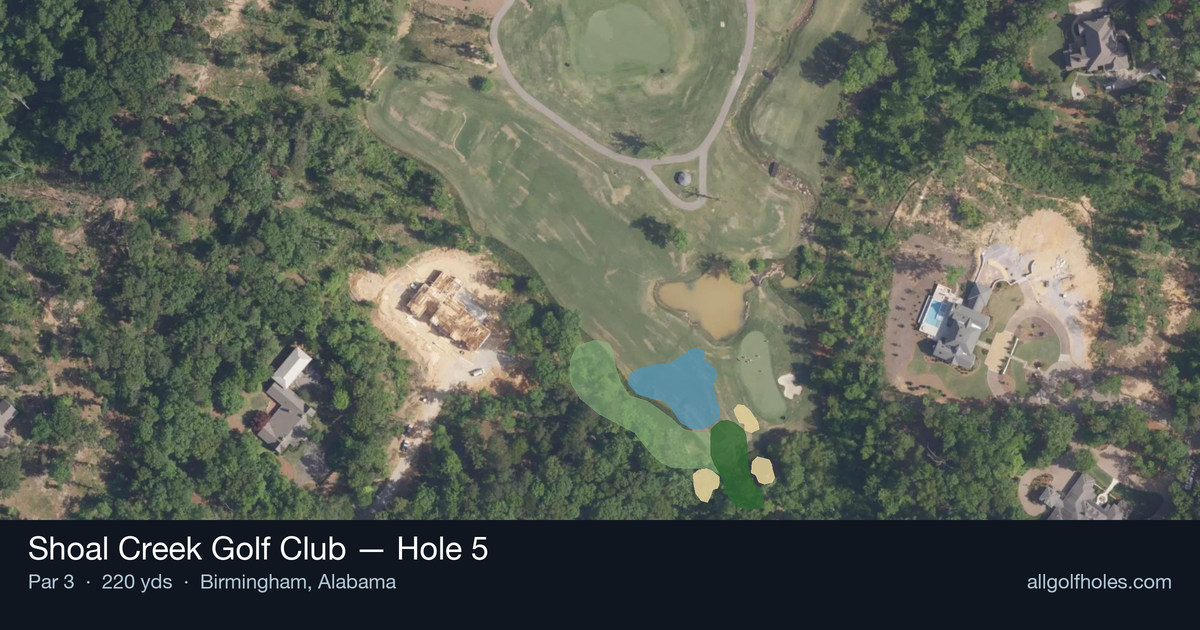
The fifth hole at Shoal Creek Golf Club presents a deceptively challenging par 3 that demands precision over power. At 190 yards, this straight shot requires golfers to navigate to a small, well-guarded green that punishes anything less than committed swings. The absence of major hazards might suggest an easier approach, but the compact target and strategic bunkering around the green complex create their own intimidation factor. Club selection becomes critical here, as the small putting surface offers little margin for error on approach shots. What makes this hole memorable is its pure test of iron play accuracy, where course management and confident execution separate good rounds from great ones at this Birmingham gem.
Off the tee
Club selection is paramount on this hole. In calm conditions, most golfers will need anywhere from a 5-iron to a fairway wood depending on their distance capabilities. Pay close attention to wind conditions, as they'll significantly impact your club choice at this length. Aim for the center of the green unless the pin position clearly favors one side. The straight layout means you don't need to work the ball - a straight, committed swing down your target line is ideal. Take one more club if you're between selections, as coming up short on a par 3 typically leads to more difficult recovery shots.
Approach & recovery
Since this is a par 3, your tee shot IS your approach shot. Focus on a smooth, controlled swing rather than trying to overpower the shot. The small green demands accuracy, so prioritize hitting your target over maximum distance. If conditions are firm, consider landing the ball short and letting it run onto the green. In softer conditions, you can be more aggressive and fly the ball directly to your target. Always factor in the pin position - with a small green, the difference between front and back pin positions becomes more significant.
On the green
Small greens typically feature more subtle breaks and faster putting surfaces. Expect the green to have some slope for drainage, so read your putts carefully from multiple angles. Lag putting becomes crucial - with limited green space, three-putts can happen quickly if you're not careful with speed control. Focus on getting your first putt within a comfortable two-putt range rather than being overly aggressive with longer putts. ## RISK VS REWARD This hole offers limited risk/reward opportunities given its straightforward design. The main decision point is club selection - being aggressive with a shorter club versus playing it safe with more club. Given the small target, the conservative approach often pays dividends. Missing the green short or long can leave challenging up-and-down opportunities that could easily lead to bogey or worse. ## DIFFERENT SKILL LEVELS **High-handicap players** should focus on making solid contact with a club they're confident with, even if it means being long or short of the green. A controlled swing with a 7-wood or hybrid might serve better than forcing a long iron. Aim for the center of the green regardless of pin position. **Low-handicap players** can be more aggressive with pin hunting, especially when the pin is accessible. They should use the small green size to their advantage by being precise with distance control and potentially using spin to stop the ball quickly. These players can also factor in subtle green contours when planning their approach angle. The relatively high handicap ranking suggests this hole plays easier than its length might indicate, making it a genuine scoring opportunity for players who execute their game plan with confidence and precision.
Hole 5 Green Complex
Mapped green boundary
Green size: 4,924 sq ft
How did Hole 5 play?
How did this hole play today?
Read 3 golfer reviews↓
What Golfers are Saying
Yet to be reviewed.
Frequently asked questions
Yardage reference: Championship tees · 220 yards.
How difficult is hole 5?
↓
This hole is a moderate challenge for most golfers. Key challenges include: water in play.
What hazards should I watch out for on hole 5?
↓
Key hazards include: water at 146.6 yards. Plan your shots to avoid these trouble spots.
How big is the green on hole 5?
↓
The green is medium-sized with moderate targets. The green is deeper than wide, so club selection is crucial. Pay attention to pin placement when selecting your approach club.
What's a good score on hole 5?
↓
This hole is a challenging par where bogey is acceptable. This longer par 3 will test your long iron or hybrid game. Par is a good score.