Hole 10 at Shoal Creek Golf Club
- Par
- 4
- Yardage
- 430 yds
- Stroke index
- 4
- Hazards
- 3 bunkers · Water
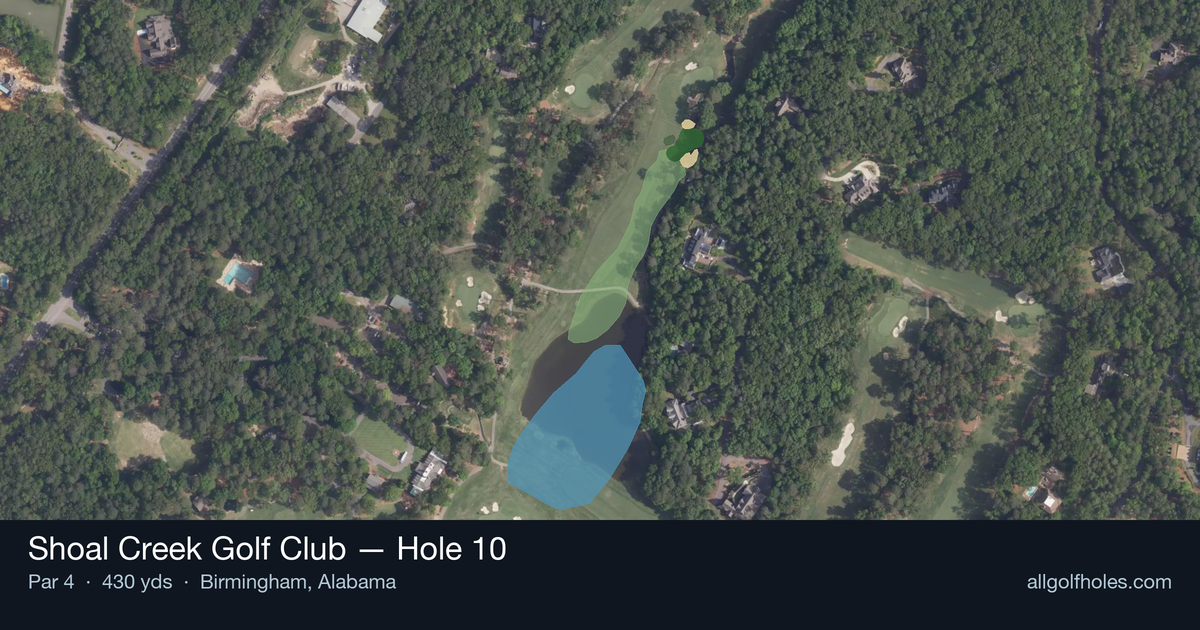
Aerial source not provided
Green size: 46 yds deep × 31 yds wide
Scorecard yardage is for Championship tees. The aerial shows its labeled reference position; distance rings measure to the green.
Championship tees · Par 4 · 430 yards
The plan for No. 10
The 10th hole at Shoal Creek Golf Club presents a deceptively challenging par 4 that demands both precision and strategy from the championship tees at 420 yards. This straight-away layout may appear straightforward, but the absence of major hazards places premium emphasis on course management and execution. The tee shot requires finding the optimal position in the fairway to set up the best angle into the small, unforgiving green complex. What makes this hole particularly demanding is the approach shot, where golfers must be precise with their club selection and ball placement to hold the compact putting surface. The elevated green and subtle undulations reward those who commit fully to their line, making this the 4th handicap hole a true test of strategic thinking and shot-making ability at one of Alabama's premier championship venues.
Off the tee
The tee shot strategy centers on positioning rather than pure distance. Target the center-right portion of the fairway to create the ideal approach angle. A well-struck driver or strong 3-wood should carry about 250-270 yards, leaving a manageable mid-iron into the green. Avoid the temptation to overpower this hole - accuracy trumps distance. The straight layout rewards players who can find and hold their target line consistently.
Approach & recovery
The approach shot is where this hole reveals its teeth. With a small green as your target, club selection becomes critical. Depending on your tee shot position, you'll likely face a mid-iron to long-iron approach. Focus on the center of the green regardless of pin position - the small target leaves little margin for error. Take one extra club and swing smoothly rather than forcing a shot. The key is committing to your yardage and trusting your swing.
On the green
The small green demands respect with your putter. Approach putts conservatively, focusing on lag putting to avoid three-putts that can derail your score. Even from relatively short distances, the compact surface can create challenging reads. Pay attention to the overall slope and grain direction during your pre-round preparation, as subtle breaks become magnified on smaller putting surfaces. ## RISK VS REWARD While this hole lacks dramatic risk/reward elements, the scoring opportunity lies in aggressive approach play when conditions favor it. Players in good position after the tee shot can attack pins more aggressively, but the small green punishes misses severely. The reward for two solid shots is a legitimate birdie chance, but the risk of missing the green entirely can lead to difficult up-and-down situations. ## DIFFERENT SKILL LEVELS **High-Handicap Players:** Focus on two conservative, well-executed shots. Use a 3-wood or hybrid off the tee for accuracy, then take plenty of club for the approach and aim for the center of the green. Accept par as an excellent score and avoid the big numbers that come from trying to be too aggressive. **Low-Handicap Players:** This hole rewards precision and course management skills. Consider the pin position when selecting your tee shot target line. With better distance control, you can be more aggressive with approach shots to accessible pins while still respecting the small target. This is a hole where your short game skills around the green become valuable if you do miss the putting surface. The 10th at Shoal Creek proves that strategic golf doesn't always require dramatic hazards - sometimes the most challenging holes are those that demand two quality shots with no room for error.
Hole 10 Green Complex
Mapped green boundary
Green size: 6,333 sq ft
How did Hole 10 play?
How did this hole play today?
Frequently asked questions
Yardage reference: Championship tees · 430 yards.
What's the best strategy off the tee?
↓
For this 420-yard par 4, most players will hit driver to set up a comfortable approach.
How difficult is hole 10?
↓
This hole is a moderate challenge for most golfers. Key challenges include: water in play.
What hazards should I watch out for on hole 10?
↓
Key hazards include: water at 104.3 yards. Plan your shots to avoid these trouble spots.
How big is the green on hole 10?
↓
The green is fairly large with multiple pin positions. Lag putting becomes important on longer putts.
Which side of the fairway is safer on hole 10?
↓
Aim for the left side of the fairway when possible. Missing right (water) brings more trouble into play.
What's a good score on hole 10?
↓
This hole is a demanding hole where bogey is not unusual. This longer par 4 will test most golfers. Focus on position over distance.