Hole 12 at Shoal Creek Golf Club
- Par
- 4
- Yardage
- 520 yds
- Stroke index
- 2
- Hazards
- 3 bunkers
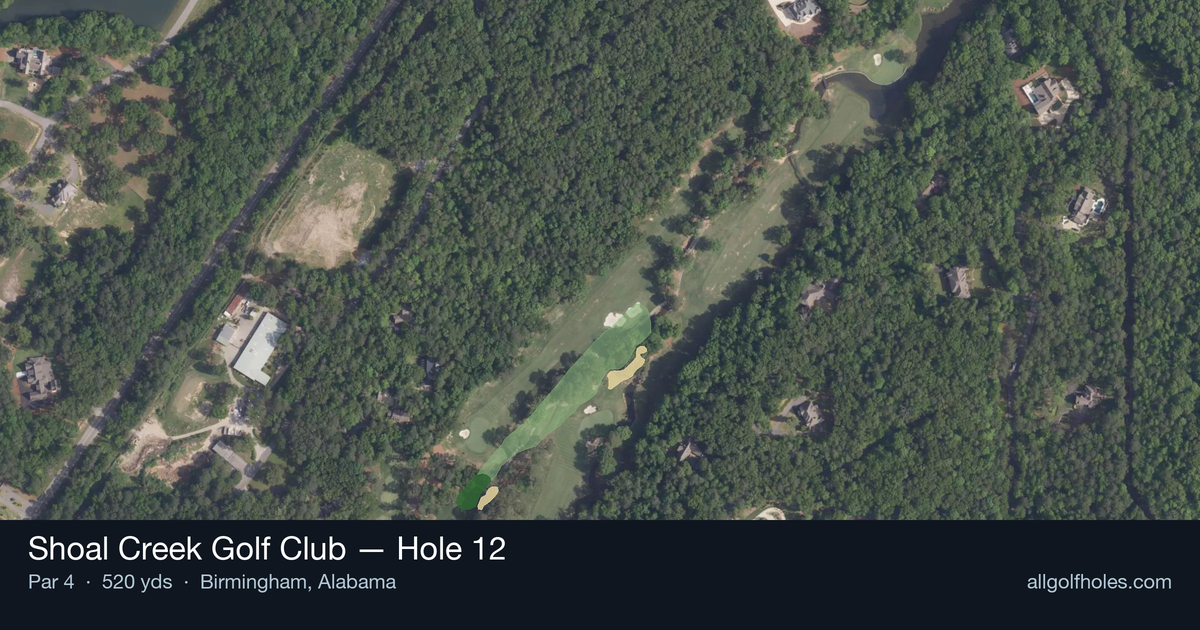
Aerial source not provided
Green size: 47 yds deep × 22 yds wide
Scorecard yardage is for Championship tees. The aerial shows its labeled reference position; distance rings measure to the green.
Championship tees · Par 4 · 520 yards
The plan for No. 12
The second-toughest hole at Shoal Creek Golf Club, this 450-yard par 4 demands precision from tee to green. This straight, no-nonsense test requires golfers to navigate a demanding layout where accuracy trumps distance. The tee shot must find the optimal position on a fairway that rewards strategic placement over pure power. With minimal hazards to distract, the challenge lies in the execution – a well-struck drive sets up a crucial approach to a small, unforgiving green complex. The putting surface's compact dimensions leave little margin for error, making club selection and distance control paramount. This hole epitomizes Shoal Creek's championship pedigree, where mental fortitude and technical precision separate good rounds from great ones.
Off the tee
Your tee shot strategy should focus on finding the optimal position in the fairway to set up the best approach angle. Given the 450-yard length, most golfers will need driver or a strong 3-wood to leave a manageable approach shot. Aim for the center of the fairway, as the straight layout provides a clear target line. The key is avoiding any rough or less favorable lies that could complicate your approach to the small green. Consider the pin position when selecting your target line - a front pin might call for a slightly more aggressive line to shorten the approach.
Approach & recovery
The approach shot is where this hole truly tests your skills. With a small green as your target, precision becomes paramount over power. Depending on your tee shot position, you'll likely face a mid-iron to long-iron approach. Focus on hitting to the center of the green rather than chasing pins, as the small putting surface leaves little margin for error. Club selection should account for any elevation changes and wind conditions, with emphasis on landing the ball softly to hold the green. A smooth, controlled swing will serve you better than an aggressive approach.
On the green
The small green demands respect with your putter. While specific break patterns aren't detailed, small greens typically feature subtle slopes that can be deceptive. Take time to read the green carefully from multiple angles, paying attention to the overall slope and drainage patterns. Conservative putting strategy works best here - aim to two-putt and avoid leaving yourself with challenging comeback putts. The key is speed control, as small greens can make distance judgment tricky. ## RISK VS REWARD This hole offers limited risk/reward opportunities, which is part of its strategic challenge. The straight layout and small green reward steady, conservative play over aggressive tactics. The main decision point comes with club selection off the tee - taking enough club to leave a comfortable approach versus playing it safe and accepting a longer second shot. Given the small green, most players should prioritize accuracy over distance. ## DIFFERENT SKILL LEVELS **High-Handicap Players:** Focus on keeping the ball in play off the tee, even if it means using a 3-wood or hybrid for better control. Accept that you may not reach the green in regulation and plan for a solid wedge third shot. Aim for the center of the green on approaches and focus on two-putting. **Low-Handicap Players:** This hole rewards your ability to execute under pressure. Use driver confidently but with a specific target in mind. Be aggressive with approach shots only when conditions favor it, and consider pin hunting when you have a shorter iron in hand. This is a hole where your course management skills and ability to execute precise shots will determine your score. The 12th at Shoal Creek exemplifies strategic golf design - no tricks or gimmicks, just a demand for solid fundamentals and smart decision-making throughout the hole.
Hole 12 Green Complex
Mapped green boundary
Green size: 5,657 sq ft
How did Hole 12 play?
How did this hole play today?
Frequently asked questions
Yardage reference: Championship tees · 520 yards.
How difficult is hole 12?
↓
This hole is a good scoring opportunity for most golfers.
How big is the green on hole 12?
↓
The green is medium-sized with moderate targets. Pay attention to pin placement when selecting your approach club.
What's a good score on hole 12?
↓
This hole is one of the tougher holes where par feels like birdie. A challenging par 4. Accept that bogey happens and avoid big numbers.