Hole 11 at Shoal Creek Golf Club
- Par
- 5
- Yardage
- 525 yds
- Stroke index
- 12
- Hazards
- 3 bunkers · Water
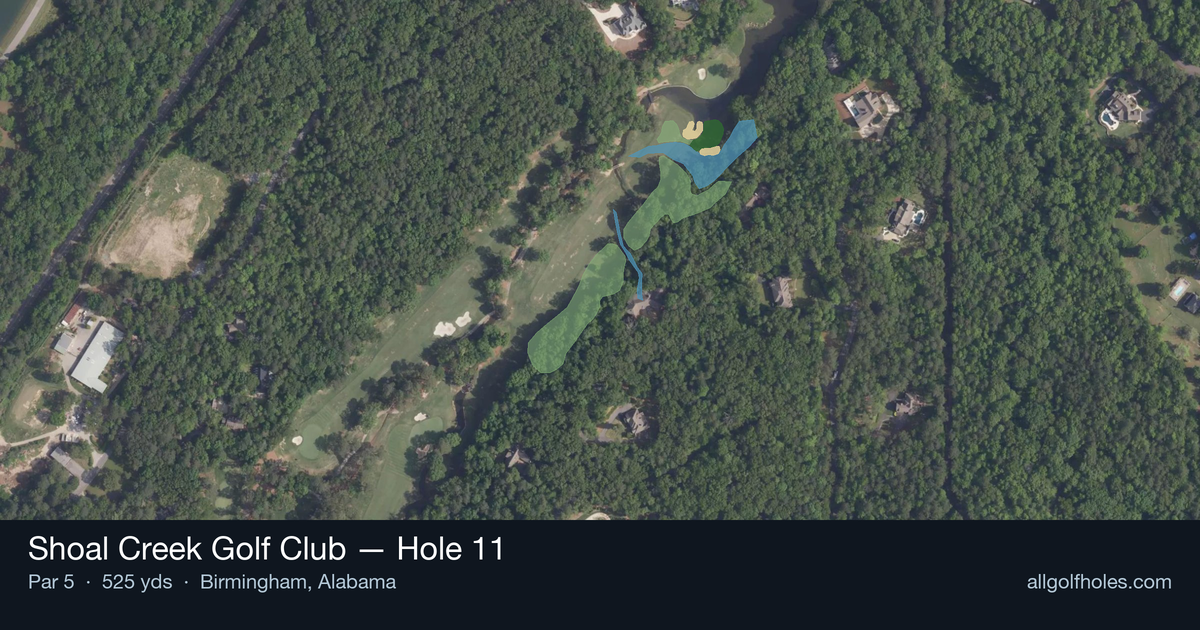
Aerial source not provided
Green size: 41 yds deep × 27 yds wide
Scorecard yardage is for Championship tees. The aerial shows its labeled reference position; distance rings measure to the green.
Championship tees · Par 5 · 525 yards
The plan for No. 11
The 11th hole at Shoal Creek Golf Club presents a tantalizing birdie opportunity that demands both power and precision on this 495-yard par 5. This straight-forward layout may appear deceptively simple, but the absence of major hazards places premium emphasis on course management and execution. The generous fairway invites aggressive tee shots, allowing longer hitters to consider reaching the small green in two with a well-positioned drive. However, the compact putting surface requires pinpoint accuracy on approach shots, as missing the target leaves challenging recovery shots. What makes this hole memorable is its risk-reward nature – players can attack aggressively for eagle chances or play conservatively for comfortable birdies, making strategic decision-making the key to success on Shoal Creek's most scoreable hole.
Off the tee
The tee shot strategy centers on maximizing distance while maintaining control. With the fairway relatively open, longer hitters should take driver and aim down the center, focusing on a smooth, controlled swing that finds the short grass. The straight design means you can commit fully to your target line without worrying about dogleg positioning. Mid-to-high handicappers might consider a 3-wood or hybrid if driver accuracy has been inconsistent, as keeping the ball in play is paramount for setting up scoring opportunities on this reachable par 5.
Approach & recovery
Your approach strategy depends entirely on your tee shot execution. Longer hitters who've driven it well may have a legitimate chance to reach this small green in two, likely requiring a mid-to-long iron depending on conditions and pin position. However, the small green size demands precision - missing could leave a difficult up-and-down. More conservative players should focus on laying up to their favorite wedge distance, typically leaving 80-100 yards for a controlled approach shot. Target the center of the fairway on your layup to ensure the best angle into the green.
On the green
The small green size makes approach shot accuracy crucial, as there's limited room for error. Focus on hitting to the center of the green regardless of pin position, as the compact putting surface means you'll rarely have an extremely long putt. Pay attention to the slope and grain direction, which can be more pronounced on smaller greens. Two-putting should be the primary goal, especially if you've successfully navigated to the green in regulation. ## RISK VS REWARD This hole presents a clear risk/reward scenario for players capable of reaching in two. The reward is significant - eagle opportunity and almost certain birdie if you find the green. The risk is manageable given the lack of major hazards, but the small green means precision is essential. Missing the green could result in a challenging short game shot that might cost you the birdie you were seeking. Players should honestly assess their current form and confidence level before attempting to go for it. ## DIFFERENT SKILL LEVELS **Low Handicappers:** Should view this as a birdie opportunity, either by going for the green in two when conditions are favorable or by executing a precise layup and wedge combination. Focus on course management based on current round momentum and pin position. **High Handicappers:** Should play this as a three-shot par 5, prioritizing keeping the ball in play off the tee, laying up to a comfortable yardage, and then focusing on finding the green with the third shot. The lack of major hazards makes this hole very manageable when played conservatively, offering an excellent chance to make par or better.
Hole 11 Green Complex
Mapped green boundary
Green size: 5,438 sq ft
How did Hole 11 play?
How did this hole play today?
Frequently asked questions
Yardage reference: Championship tees · 525 yards.
How difficult is hole 11?
↓
This hole is a moderate challenge for most golfers. Key challenges include: water in play.
What hazards should I watch out for on hole 11?
↓
Key hazards include: water at 339.2 yards. Plan your shots to avoid these trouble spots.
How big is the green on hole 11?
↓
The green is medium-sized with moderate targets. Pay attention to pin placement when selecting your approach club.
What's a good score on hole 11?
↓
This hole is a reachable par 5 with eagle chances for longer hitters. Birdie is very much in play here if you can set up a good approach.