Hole 9 at Black Desert Resort Golf Course
- Par
- 5
- Yardage
- 588 yds
- Stroke index
- 17
- Hazards
- 7 bunkers
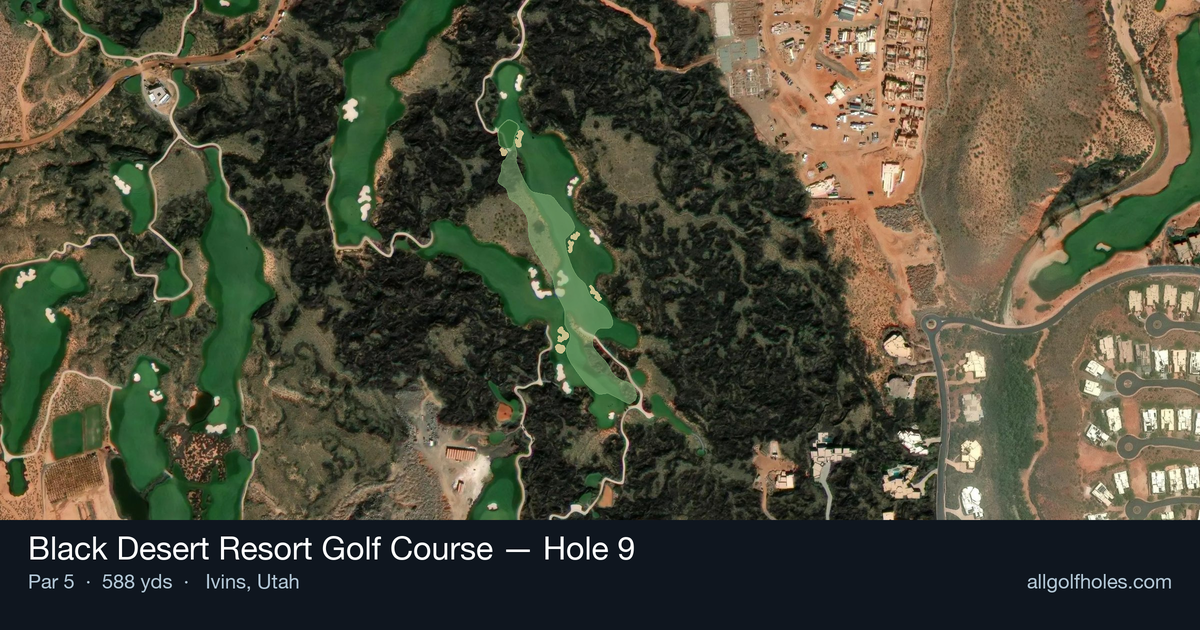
Aerial source not provided
Green size: 34 yds deep × 33 yds wide
Scorecard yardage is for Championship tees. The aerial shows its labeled reference position; distance rings measure to the green.
Championship tees · Par 5 · 588 yards
The plan for No. 9
The ninth hole at Black Desert Resort Golf Course serves as a dramatic finale to the front nine, offering a reachable par 5 that tempts aggressive players while rewarding strategic thinking. At 588 yards, this straight-away hole stretches across the stunning Utah desert landscape, framed by the iconic red rock formations that make Black Desert one of the most visually spectacular courses in the Southwest. With no significant hazards to navigate, the primary challenge lies in club selection and course management on this relatively open canvas. The small green demands precision on approach shots, particularly for those attempting to reach in two. Smart players will focus on positioning for the best angle into the compact putting surface, making this hole a true test of strategic decision-making rather than hazard avoidance.
Off the tee
**Playing Tips for Success** Start with a conservative tee shot using a 3-wood or hybrid to find the fairway center, as accuracy trumps distance on this demanding par 5. The elevated tee provides excellent views, but don't let the scenery distract from picking a specific target in the landing area around 240-260 yards out. For your second shot, resist the temptation to go for the green in two unless you're hitting from the perfect lie with favorable conditions. The smart play is laying up to your favorite wedge distance, typically 80-120 yards from the pin. This leaves you in prime position for a controlled approach shot rather than gambling with a long iron or fairway wood into trouble. Around the green, pay close attention to pin position and surrounding slopes. The putting surface likely features subtle breaks that can fool you, so take time to read your approach putt from multiple angles. If you miss the green, focus on getting your chip shot to the fat part of the putting surface rather than attacking tight pins. Avoid the cardinal sin of trying to make up for a poor drive with an overly aggressive second shot. This hole rewards patience and course management over heroic attempts. Play within your abilities, take your medicine when needed, and you'll walk away with a solid score more often than not.
Approach & recovery
Your second shot strategy depends heavily on your tee shot success and remaining distance. Most golfers should treat this as a positioning shot, advancing the ball while setting up an ideal angle and distance for the third shot. If you're within range of the green, carefully consider the small target size before attempting to reach in two. A layup to your preferred wedge distance often yields better scoring results than a risky long approach to a small green. Choose a landing area that provides a level lie and clear sight line to the pin.
On the green
The small green size demands precise distance control on your approach shot. Focus on hitting the center of the green unless the pin position clearly favors one side. With limited green space, lag putting becomes crucial - getting your first putt close is more important than being aggressive toward difficult pin positions. Read the green carefully as subtle breaks can be deceiving on smaller putting surfaces. Two-putt pars should be your baseline goal, with birdies coming from exceptional approach shots rather than risky putting. ## RISK VS REWARD This hole offers a classic risk/reward scenario for longer hitters considering going for the green in two shots. The reward is significant - a potential eagle with a good approach and successful putt. However, the small green makes this a low-percentage play even for accomplished golfers. The smarter play for most is the three-shot approach, which virtually guarantees a scoring opportunity while minimizing the risk of big numbers. Consider course conditions, your current round momentum, and match situation before choosing the aggressive line. ## DIFFERENT SKILL LEVELS **High-Handicap Players:** Embrace the three-shot strategy completely. Use your most reliable clubs off the tee and for the second shot, focusing on advancing the ball safely down the fairway. Don't worry about reaching specific distances - just move the ball forward with good contact. Your third shot should prioritize the center of the green regardless of pin position. **Low-Handicap Players:** You have more options to consider going for the green in two, but evaluate each situation carefully. The small green demands exceptional precision, so only attempt this when you're striking the ball well and conditions are favorable. When laying up, be more aggressive with your target, positioning yourself for a specific wedge distance and angle that plays to your strengths.
Watch for
- Course conditioning and mapped hazards may affect line selection; confirm from the aerial.
Hole 9 Green Complex
Mapped green boundary
Green size: 5,279 sq ft
Course coverage
Tournament and creator videos about Black Desert Resort Golf Course — shared course coverage, not hole-specific clips.
Featured by these creators
Creator videos about this course
YouTube creators who filmed or featured Black Desert Resort Golf Course. · Stats as of Oct 12, 2026 · 6d ago
Is golf vulnerable to a gambling scandal, Kapalua's out, & Black Desert delights | The Shotgun Start
First 3 holes of the back nine at Black Desert ⛳️ #golf #shorts
Black Desert Open Round 1 | SGT Tour | Ep 4
How did Hole 9 play?
How did this hole play today?
Frequently asked questions
Yardage reference: Championship tees · 588 yards.
Can this par 5 be reached in two?
↓
At 588 yards, A true three-shot hole for most players. Position your layup to leave a comfortable wedge distance.
How difficult is hole 9?
↓
This hole is a moderate challenge for most golfers. Key challenges include: long par 5, heavily bunkered.
How big is the green on hole 9?
↓
The green is medium-sized with moderate targets. The green is deeper than wide, so club selection is crucial. Pay attention to pin placement when selecting your approach club.
What's a good score on hole 9?
↓
This hole is a true three-shot hole where birdie requires execution. This longer par 5 demands patience. Two good shots set up the scoring opportunity.