Hole 2 at Black Desert Resort Golf Course
- Par
- 4
- Yardage
- 418 yds
- Stroke index
- 11
- Hazards
- 4 bunkers
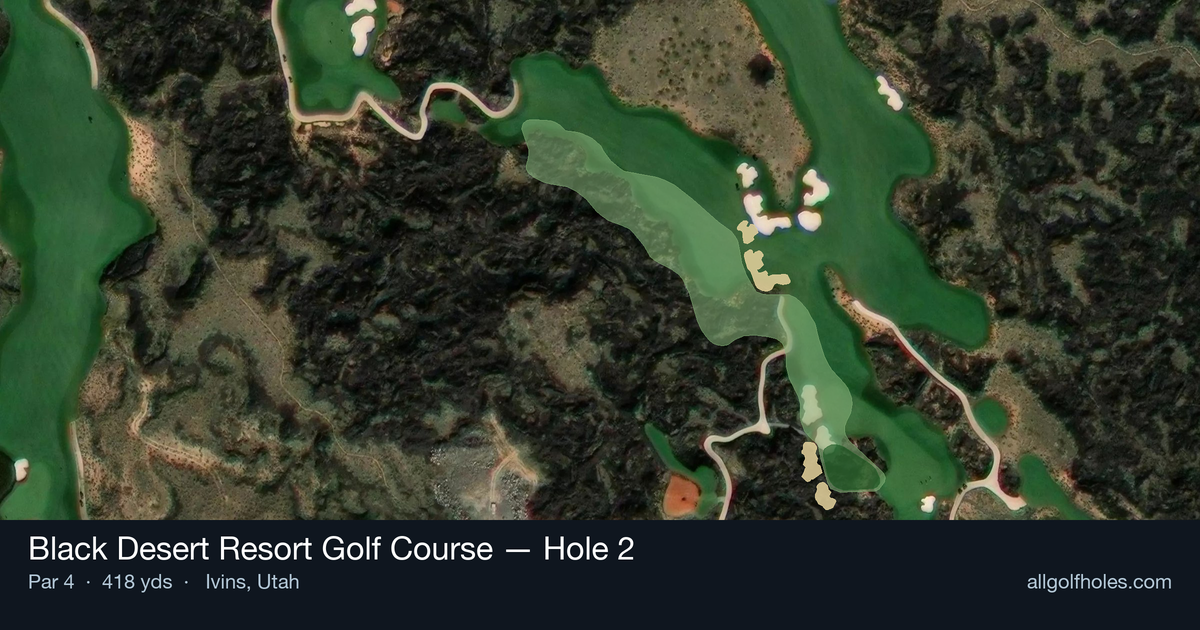
Aerial source not provided
Green size: 39 yds deep × 23 yds wide
Scorecard yardage is for Championship tees. The aerial shows its labeled reference position; distance rings measure to the green.
Championship tees · Par 4 · 418 yards
The plan for No. 2
The second hole at Black Desert Resort Golf Course presents a deceptively straightforward par 4 that demands precision over power. This 418-yard test features a straight layout through the dramatic Utah desert landscape, where the stunning red rock formations provide a breathtaking backdrop to your round. The tee shot requires accuracy to find the generous fairway, setting up a crucial approach shot to a small, well-protected green complex. Without major hazards to navigate, success hinges on course management and clean execution. The compact green rewards precise iron play, as missing the target can leave challenging recovery shots. This hole exemplifies Black Desert's philosophy of strategic golf in spectacular surroundings, where mental discipline often trumps raw distance.
Off the tee
I'd be happy to provide specific playing tips for this hole at Black Desert Resort Golf Course, but I don't see the hole data, yardages, or course layout information in your message. To give you the most accurate and actionable advice, I'll need details such as: - The hole's total yardage - Tee shot landing areas and hazards - Green size, shape, and pin positions - Any bunkers, water hazards, or elevation changes - Fairway width and optimal positioning Could you please share the specific hole information? Once I have those details, I can craft practical, yardage-specific tips covering tee shot strategy, approach club selection, short game considerations, and key trouble spots to avoid. This will ensure the advice is tailored to the actual challenges and opportunities this particular hole presents at Black Desert Resort.
Approach & recovery
The small green is the hole's primary defense, requiring precise club selection and commitment to your target. From a good drive, you'll likely have anywhere from a wedge to a mid-iron depending on your distance off the tee. The key is taking enough club to ensure you reach the putting surface, as coming up short leaves a difficult chip shot. Focus on the center of the green regardless of pin position – the small target makes pin-hunting a risky proposition for most players. Pay attention to wind conditions, as the desert setting can create swirling breezes that affect shorter approach shots more than you might expect.
On the green
The compact putting surface demands respect, as three-putts can quickly turn a scoring opportunity into a bogey or worse. Without specific knowledge of the green's contours, play conservatively by aiming for the center of the green on approaches and focusing on lag putting to ensure you're always putting uphill on your second putt. The small size means that even modest slopes can create significant break, so take time to read your putts carefully. Desert greens often play faster than they appear, particularly later in the day. ## RISK VS REWARD This hole rewards aggressive play off the tee while demanding conservative approach strategy. The risk-reward calculation favors taking driver to get as close as possible, leaving shorter, more precise approach shots. However, the reward diminishes quickly if you get too aggressive with pin positions on the small green. The biggest reward comes from proper positioning rather than heroic shots – a well-placed drive followed by a committed approach to the center of the green sets up realistic birdie opportunities. ## DIFFERENT SKILL LEVELS **High Handicappers:** Take driver off the tee to minimize the length of your approach shot. Aim for the center of the fairway and don't worry about perfect positioning. On your approach, always take one more club than you think you need and aim for the middle of the green. Two-putt pars are excellent scores here. **Low Handicappers:** This is a prime birdie opportunity where course management pays dividends. Use driver aggressively to get within wedge range, then focus on precise distance control on your approach. You can be slightly more aggressive with pin positions, but respect the small target. This hole should yield several birdies per round if played strategically. The absence of major hazards makes this hole more about precision than power, rewarding players who can combine distance off the tee with accuracy on approach shots.
Watch for
- Course conditioning and mapped hazards may affect line selection; confirm from the aerial.
Hole 2 Green Complex
Mapped green boundary
Green size: 5,010 sq ft
Course coverage
Tournament and creator videos about Black Desert Resort Golf Course — shared course coverage, not hole-specific clips.
Featured by these creators
Creator videos about this course
YouTube creators who filmed or featured Black Desert Resort Golf Course. · Stats as of Oct 12, 2026 · 6d ago
Is golf vulnerable to a gambling scandal, Kapalua's out, & Black Desert delights | The Shotgun Start
First 3 holes of the back nine at Black Desert ⛳️ #golf #shorts
Black Desert Open Round 1 | SGT Tour | Ep 4
How did Hole 2 play?
How did this hole play today?
Frequently asked questions
Yardage reference: Championship tees · 418 yards.
What's the best strategy off the tee?
↓
For this 418-yard par 4, most players will hit driver to set up a comfortable approach.
How difficult is hole 2?
↓
This hole is a moderate challenge for most golfers. Key challenges include: heavily bunkered.
How big is the green on hole 2?
↓
The green is medium-sized with moderate targets. Pay attention to pin placement when selecting your approach club.