Hole 3 at Sedgefield Country Club
- Par
- 3
- Yardage
- 176 yds
- Stroke index
- 17
- Hazards
- 5 bunkers
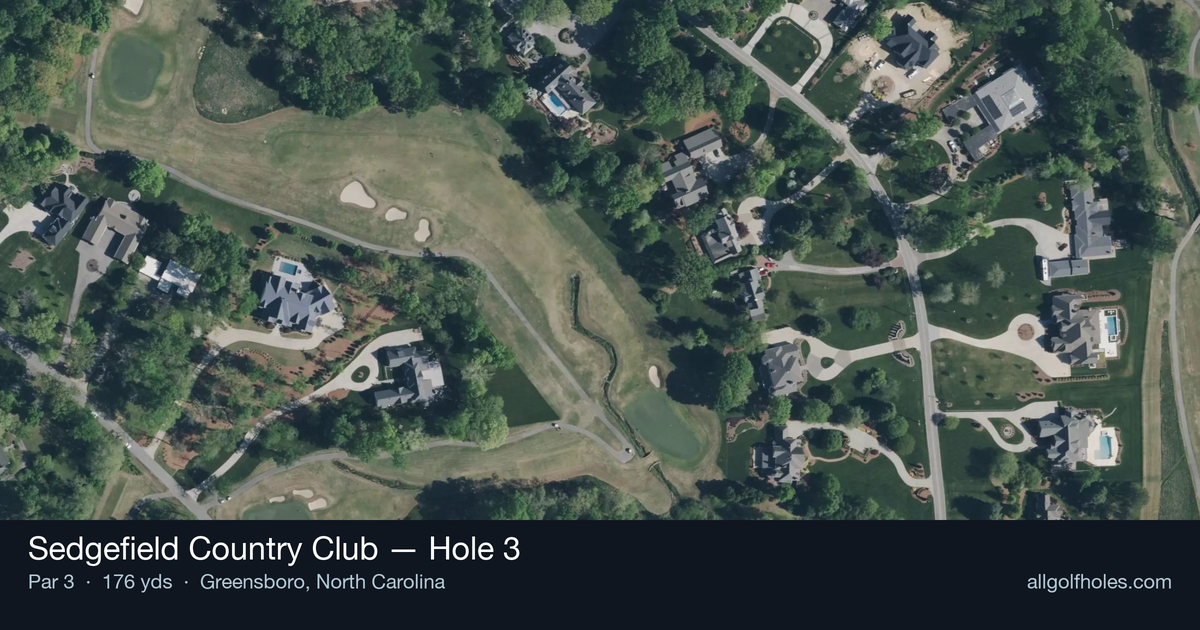
Aerial source not provided
Green size: 36 yds deep × 32 yds wide
Scorecard yardage is for Championship tees. The aerial shows its labeled reference position; distance rings measure to the green.
Championship tees · Par 3 · 176 yards
The plan for No. 3
The third hole at Sedgefield Country Club exemplifies Donald Ross's masterful touch with short par 3s, demanding precision over power from the championship tees at 176 yards. This deceptively challenging one-shotter features Ross's signature small, subtly contoured green that rewards accurate iron play while punishing wayward shots. The absence of major hazards might fool golfers into complacency, but the compact putting surface requires committed club selection and precise execution. As the 17th handicap hole, it appears straightforward on the scorecard, yet the combination of distance control and green-reading skills needed to score well here reflects the strategic brilliance that makes this PGA Tour venue a perennial favorite. A well-struck mid-iron sets up birdie opportunities, while anything less than committed contact often leads to challenging recovery shots around the green complex.
Off the tee
Club selection is critical on this hole - most players will need a mid-iron to long-iron depending on conditions and pin position. Take one extra club and swing smoothly rather than forcing a shorter iron. Aim for the center of the green regardless of pin position, as the small target leaves little margin for error. Pay attention to wind conditions, which can significantly impact club selection on this length of shot. The straight layout means you can commit fully to your target line without worrying about doglegs or hidden trouble.
Approach & recovery
Since this is a par 3, your tee shot IS your approach shot. Focus on landing the ball on the green rather than trying to get close to challenging pin positions. The small green size means even a shot to the center will leave you with a manageable putt. Consider the firmness of the green when selecting your trajectory - a higher shot will hold better on firm conditions, while a lower trajectory might be preferable in softer conditions.
On the green
Donald Ross greens are known for their subtle undulations and strategic contours. Even though this green is small, expect some slope that will influence your putting. Take time to read the overall slope of the green from behind your ball. Pace is crucial on smaller greens - you want to ensure your first putt reaches the hole, as short putts on sloped greens can leave difficult second attempts. Leave yourself below the hole when possible, as uphill putts are generally easier to control on Ross-designed surfaces. ## RISK VS REWARD The primary risk/reward decision comes with pin position and club selection. When the pin is tucked in a corner, resist the temptation to fire directly at it - the small green provides little bailout area. The reward for conservative play to the center is a guaranteed scoring opportunity, while aggressive play toward difficult pins can lead to short-sided situations or missed greens entirely. Given the hole's handicap rating, playing for the center of the green and two-putting for par is a winning strategy. ## DIFFERENT SKILL LEVELS **High-Handicap Players:** Focus entirely on hitting the green, regardless of pin position. Take enough club to comfortably reach the center of the green and make a confident swing. Don't worry about spin or trajectory - solid contact and direction are your priorities. If you miss the green, focus on getting your next shot close rather than trying to hole out. **Low-Handicap Players:** You can be more aggressive with pin hunting, especially when the pin is in the center third of the green. Consider how the pin position affects your angle for the next shot if you do miss. Use your distance control skills to dial in the exact yardage, and don't be afraid to take dead aim when conditions favor it. This is a hole where your superior ball-striking should translate to birdie opportunities. This hole rewards patience and precision over aggression - embrace the scoring opportunity it presents while respecting the challenge of Donald Ross's thoughtful design.
Watch for
- Course conditioning and mapped hazards may affect line selection; confirm from the aerial.
Hole 3 Green Complex
Mapped green boundary
Green size: 6,533 sq ft
Course coverage
Tournament and creator videos about Sedgefield Country Club — shared course coverage, not hole-specific clips.
Tournament coverage
Wyndham Championship highlights
Wyndham Championship | Final Round Highlights
2025
How did Hole 3 play?
How did this hole play today?
Frequently asked questions
Yardage reference: Championship tees · 176 yards.
What club should I use on this par 3?
↓
At 176 yards, most golfers will need a mid-iron (7-iron to 8-iron) to reach this green. Adjust for elevation, wind, and pin position.
How difficult is hole 3?
↓
This hole is a moderate challenge for most golfers. Key challenges include: heavily bunkered.
What hazards should I watch out for on hole 3?
↓
Key hazards include: 5 greenside bunkers. Plan your shots to avoid these trouble spots.
How big is the green on hole 3?
↓
The green is fairly large with multiple pin positions. Lag putting becomes important on longer putts.
What's a good score on hole 3?
↓
This hole is a solid par with birdie chances for precise approach shots. Making par is a good result here. Focus on hitting the green and avoiding three-putts.