Hole 17 at Baltusrol Golf Club (Lower Course)
- Par
- 5
- Yardage
- 570 yds
- Stroke index
- 6
- Hazards
- 11 bunkers
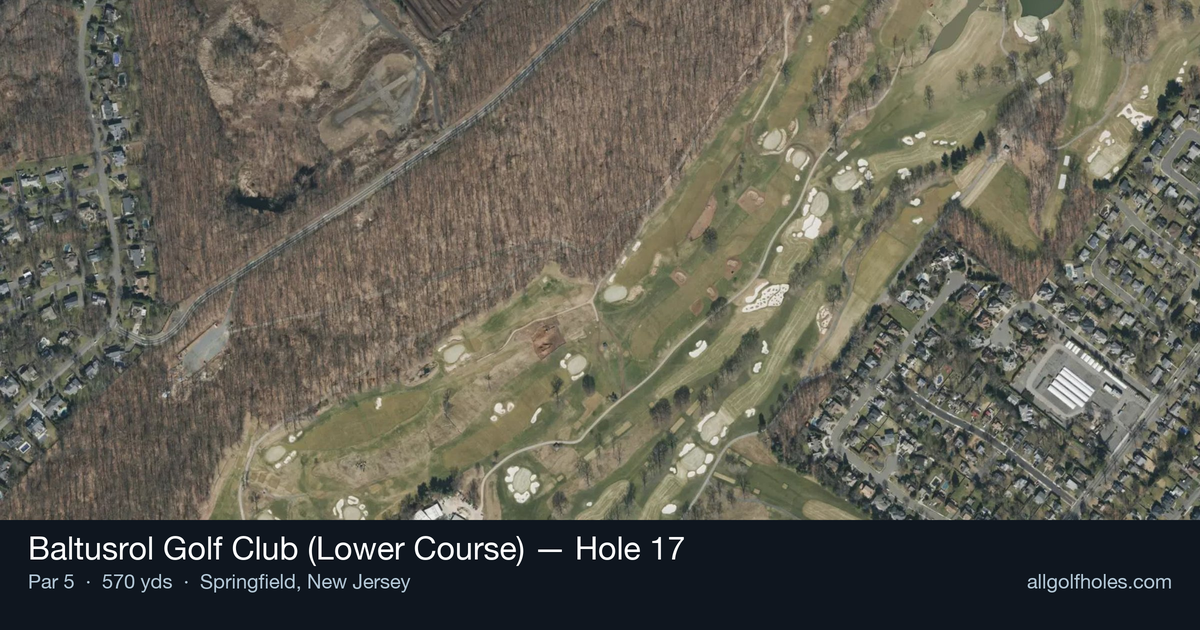
Aerial source not provided
Green size: 36 yds deep × 29 yds wide
Scorecard yardage is for Championship tees. The aerial shows its labeled reference position; distance rings measure to the green.
Championship tees · Par 5 · 570 yards
The plan for No. 17
This penultimate par-5 at Baltusrol represents A.W. Tillinghast's ultimate test of strategic golf course management, demanding three precise shots to navigate successfully. At 570 yards, this classic three-shot hole puts a premium on accuracy and smart positioning, with the legendary Great Hazard and formidable greenside bunkers waiting to punish wayward shots.
Off the tee
The opening shot sets up the entire hole's strategic framework. Target the center-right portion of the fairway to provide the best angle for your second shot over the Great Hazard. A well-struck driver or strong 3-wood should find the fairway comfortably, but accuracy is paramount - missing the fairway makes the crucial second shot exponentially more difficult. The fairway bunkers added during recent renovations lurk in the landing zone, so commit fully to your target line rather than steering the ball.
Approach & recovery
The second shot represents the hole's defining strategic moment. Playing over Tillinghast's famous Great Hazard requires a confident strike with a mid to long iron, depending on your tee shot position. Favor the left side of the fairway with your layup to open up the best angle to the green. This positioning shot should leave you with a comfortable wedge distance for your third, ideally around 100-120 yards from the pin. Avoid the temptation to get too aggressive here - a well-positioned layup sets up a much better scoring opportunity than a risky attempt to reach in two.
On the green
The small green features Tillinghast's distinctive ramp approach that has been restored to its original dimensions, creating unique putting challenges depending on pin position. The putting surface rewards approach shots from the proper angle, but can be treacherous when attacked from poor positions. Focus on getting your third shot below the hole when possible, as uphill putts on this green are much more manageable than downhill attempts.
Watch for
- This straight par-5 features Tillinghast's signature Great Hazard that must be navigated on the second shot, along with recently restored fairway bunkers and intimidating greenside sand complexes.
- Target the center-right portion of the fairway to provide the best angle for your second shot over the Great Hazard.
- The fairway bunkers added during recent renovations lurk in the landing zone, so commit fully to your target line rather than steering the ball.
Hole 17 Green Complex
Mapped green boundary
Green size: 6,132 sq ft
How did Hole 17 play?
How did this hole play today?
Frequently asked questions
Yardage reference: Championship tees · 570 yards.
Can this par 5 be reached in two?
↓
At 570 yards, A true three-shot hole for most players. Position your layup to leave a comfortable wedge distance.
How difficult is hole 17?
↓
This hole is a moderate challenge for most golfers. Key challenges include: long par 5, heavily bunkered.
How big is the green on hole 17?
↓
The green is fairly large with multiple pin positions. The green is deeper than wide, so club selection is crucial. Lag putting becomes important on longer putts.
What's a good score on hole 17?
↓
This hole is a true three-shot hole where birdie requires execution. This longer par 5 demands patience. Two good shots set up the scoring opportunity.