Hole 11 at Baltusrol Golf Club (Lower Course)
- Par
- 4
- Yardage
- 422 yds
- Stroke index
- 4
- Hazards
- 10 bunkers
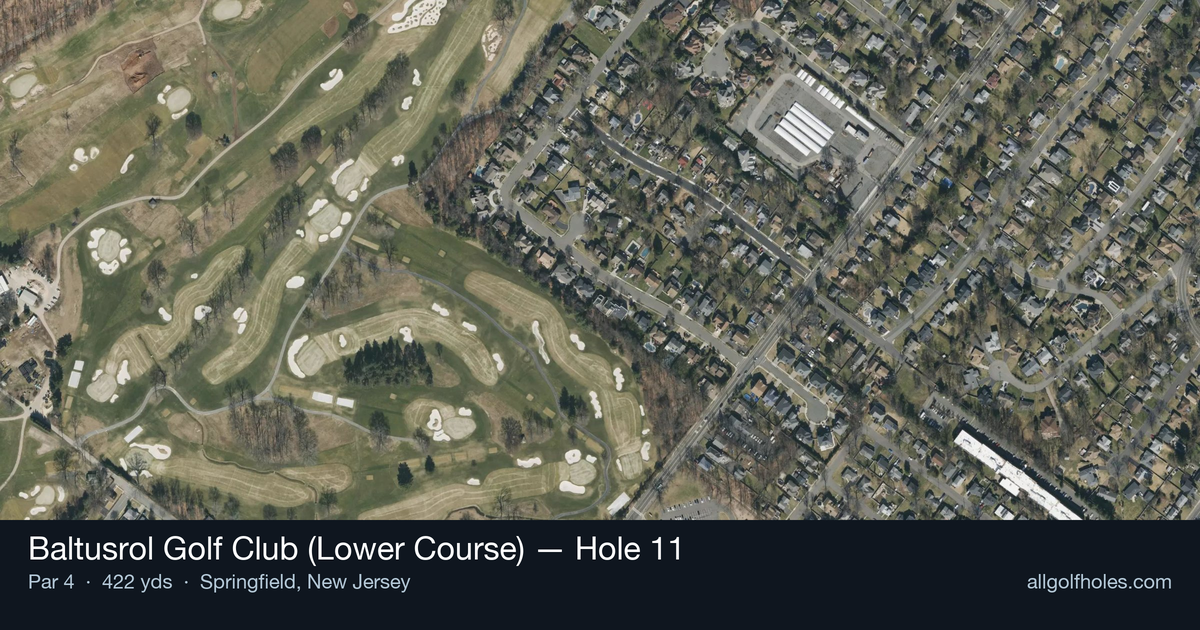
Aerial source not provided
Green size: 34 yds deep × 42 yds wide
Scorecard yardage is for Championship tees. The aerial shows its labeled reference position; distance rings measure to the green.
Championship tees · Par 4 · 422 yards
The plan for No. 11
This mid-length par 4 at Baltusrol's legendary Lower Course demands precision and smart course management to set up a scoring opportunity. With its straight layout and small green target, the key to success lies in finding the optimal position off the tee and executing a controlled approach to the compact putting surface.
Off the tee
Your tee shot strategy should prioritize position over power on this hole. The straight layout allows for an aggressive target line down the center of the fairway, but club selection becomes crucial based on your approach shot preferences. Most players will benefit from a controlled driver or strong 3-wood that leaves a comfortable mid-iron distance to the green. The key is avoiding any rough or fairway irregularities that could complicate your approach angle. Consider the pin position when selecting your target line—if the flag is tucked on one side of the small green, positioning yourself on the opposite side of the fairway can open up the angle.
Approach & recovery
The approach shot is where this hole shows its teeth. With a small green as your target, precision is paramount in your club selection and execution. A mid-iron to long-iron will typically be required, depending on conditions and tee shot position. Focus on the center of the green regardless of pin position—the compact putting surface leaves little margin for error. Take one extra club and swing smoothly rather than forcing a shot that could miss the green entirely. The straight hole layout means you'll have a clear view of your target, so trust your yardage and commit to your club selection.
On the green
The small green demands respect with your putting approach. While specific break patterns aren't detailed, expect subtle undulations typical of Tillinghast's design philosophy. Focus on lag putting to the center of the green when facing longer putts—the compact surface means even a poor lag putt shouldn't leave you with an overly challenging second putt. When the pin is accessible, be aggressive with makeable birdie attempts, as the smaller target rewards precise putting.
Watch for
- The 11th hole represents a classic Tillinghast design challenge where accuracy trumps distance. At 422 yards with a handicap rating of 4, this hole requires two well-executed shots to reach the small green in regulation. The straight layout…
Hole 11 Green Complex
Mapped green boundary
Green size: 8,568 sq ft
How did Hole 11 play?
How did this hole play today?
Frequently asked questions
Yardage reference: Championship tees · 422 yards.
What's the best strategy off the tee?
↓
For this 422-yard par 4, most players will hit driver to set up a comfortable approach.
How difficult is hole 11?
↓
This hole is a moderate challenge for most golfers. Key challenges include: heavily bunkered, large green requiring good lag putting.
How big is the green on hole 11?
↓
The green is large and can play quite long. Three-putt territory if you don't manage your approach distance well.