Hole 17 at Shadow Creek Golf Course
- Par
- 3
- Yardage
- 154 yds
- Stroke index
- 16
- Hazards
- 4 bunkers · Water
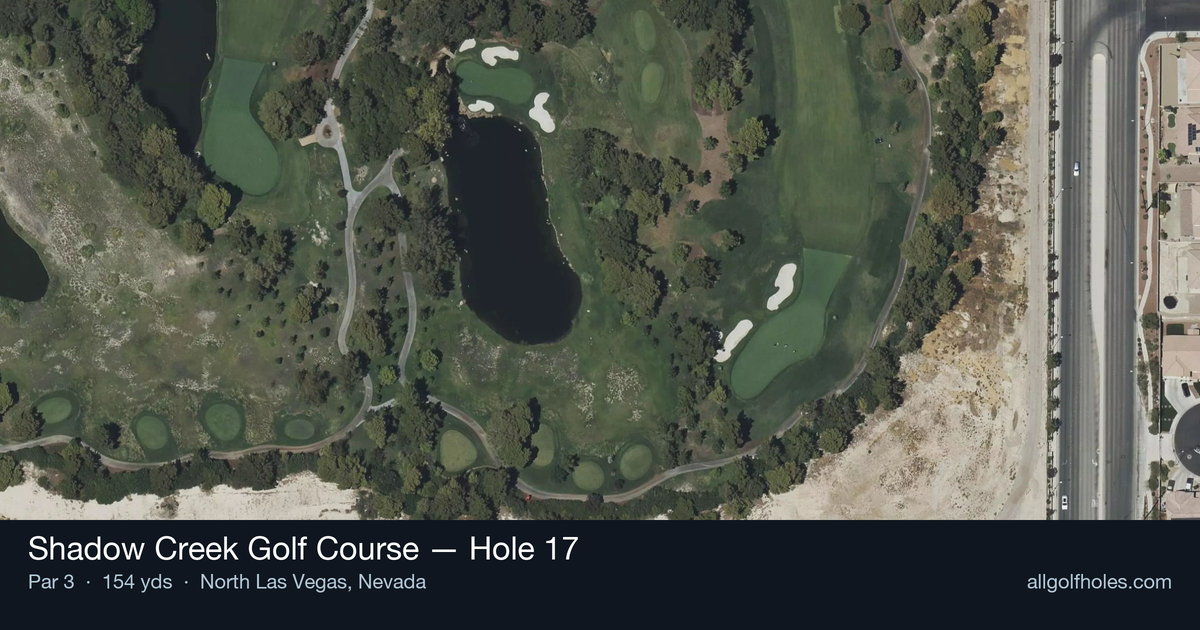
Aerial source not provided
Green size: 21 yds deep × 26 yds wide
Scorecard yardage is for Championship tees. The aerial shows its labeled reference position; distance rings measure to the green.
Championship tees · Par 3 · 154 yards
The plan for No. 17
Shadow Creek Golf Course hole 17 stands as the signature par 3 and arguably the most stunning hole in the Las Vegas desert. This dramatic downhill tee shot drops 30 feet to a tiny green nestled behind a shimmering lake, creating one of golf's most visually spectacular moments. At 154 yards, club selection becomes critical as the elevation change can deceive even experienced players. The intimate green complex demands precision, leaving no margin for error with water guarding the front and sides. Tom Fazio's masterpiece transforms the Nevada landscape into golf theater, where every tee shot feels like a defining moment. This signature hole exemplifies why Shadow Creek remains among America's most coveted golf experiences.
Off the tee
The tee shot is everything on this par 3, requiring precision over power. Club selection becomes critical with the significant elevation drop - expect to hit 1-2 clubs less than the yardage suggests. A smooth 8 or 9-iron for most players will handle the distance better than a forced wedge. Target the center of the green regardless of pin position, as the small putting surface offers little margin for error. The water hazard lurking behind the green makes distance control paramount - better to be slightly short than long. Take extra time to assess wind conditions, as desert breezes can dramatically affect ball flight on this exposed tee shot.
Approach & recovery
Since this is a par 3, your approach shot is your tee shot. Focus on tempo and balance rather than trying to get cute with pin-seeking shots. The elevated tee provides an excellent view of the entire green complex, so use this vantage point to identify the safest landing area. Pay special attention to your follow-through and finish - the dramatic setting can be distracting, but maintaining focus through impact is crucial for solid contact. The downhill lie effect means the ball will fly higher and land softer, so trust your club selection and swing smoothly.
On the green
The tiny green demands respect with your putting approach. Expect subtle breaks that can be difficult to read from the elevated tee, so take time to walk around and assess the slopes once you reach the green. The small size means most putts will be relatively short, but the premium on accuracy makes every stroke count. Pin positions near the water create additional pressure, but resist the urge to be overly aggressive. Two-putting from anywhere on this green represents solid course management, especially given the difficulty of the tee shot required to reach it. ## RISK VS REWARD The primary risk/reward decision centers on pin position and your confidence level. When the pin is tucked near the water, the conservative play to the center of the green becomes even more attractive. The reward for aggressive pin-seeking is minimal compared to the severe penalty for missing long or right. The elevation advantage can tempt players to be overly aggressive with club selection, but the smart play prioritizes finding the green over getting close to difficult pins. A 30-foot putt beats a drop shot every time. ## DIFFERENT SKILL LEVELS **High-Handicap Players:** Focus entirely on finding the green with a conservative club selection. Aim for the center regardless of pin position and take the elevation into account by selecting one club less than normal. A bogey here keeps you in the round, while chasing difficult pins can lead to big numbers. **Low-Handicap Players:** You can be slightly more aggressive with pin positions, but respect the water hazard. Use the elevation to your advantage with controlled draws or fades to access certain pin positions, but never at the expense of green-finding accuracy. Your superior distance control allows for more precise club selection, but the fundamental strategy remains conservative. This hole rewards patience, precision, and smart course management over heroic shot-making. Embrace the stunning setting, but keep your strategic focus on the small target ahead.
Watch for
- Course conditioning and mapped hazards may affect line selection; confirm from the aerial.
Hole 17 Green Complex
Mapped green boundary
Green size: 1,956 sq ft
How did Hole 17 play?
How did this hole play today?
Frequently asked questions
Yardage reference: Championship tees · 154 yards.
What club should I use on this par 3?
↓
At 154 yards, most golfers will need a mid-iron (7-iron to 8-iron) to reach this green. Adjust for elevation, wind, and pin position.
How difficult is hole 17?
↓
This hole is one of the tougher holes on the course for most golfers. Key challenges include: water in play, heavily bunkered, small green.
What hazards should I watch out for on hole 17?
↓
Key hazards include: 4 greenside bunkers; water at 95.3 yards. Plan your shots to avoid these trouble spots.
How big is the green on hole 17?
↓
The green is small and requires precision. The green is wider than it is deep, rewarding shots that find the correct tier. Expect challenging pin positions with limited room for error.
What's a good score on hole 17?
↓
This hole is a solid par with birdie chances for precise approach shots. Making par is a good result here. Focus on hitting the green and avoiding three-putts.