Hole 9 of 18 · Mullen, Nebraska

Hole 9 at Sand Hills Golf Club

Par
4
Yards
402
Handicap
12
Bunkers
6
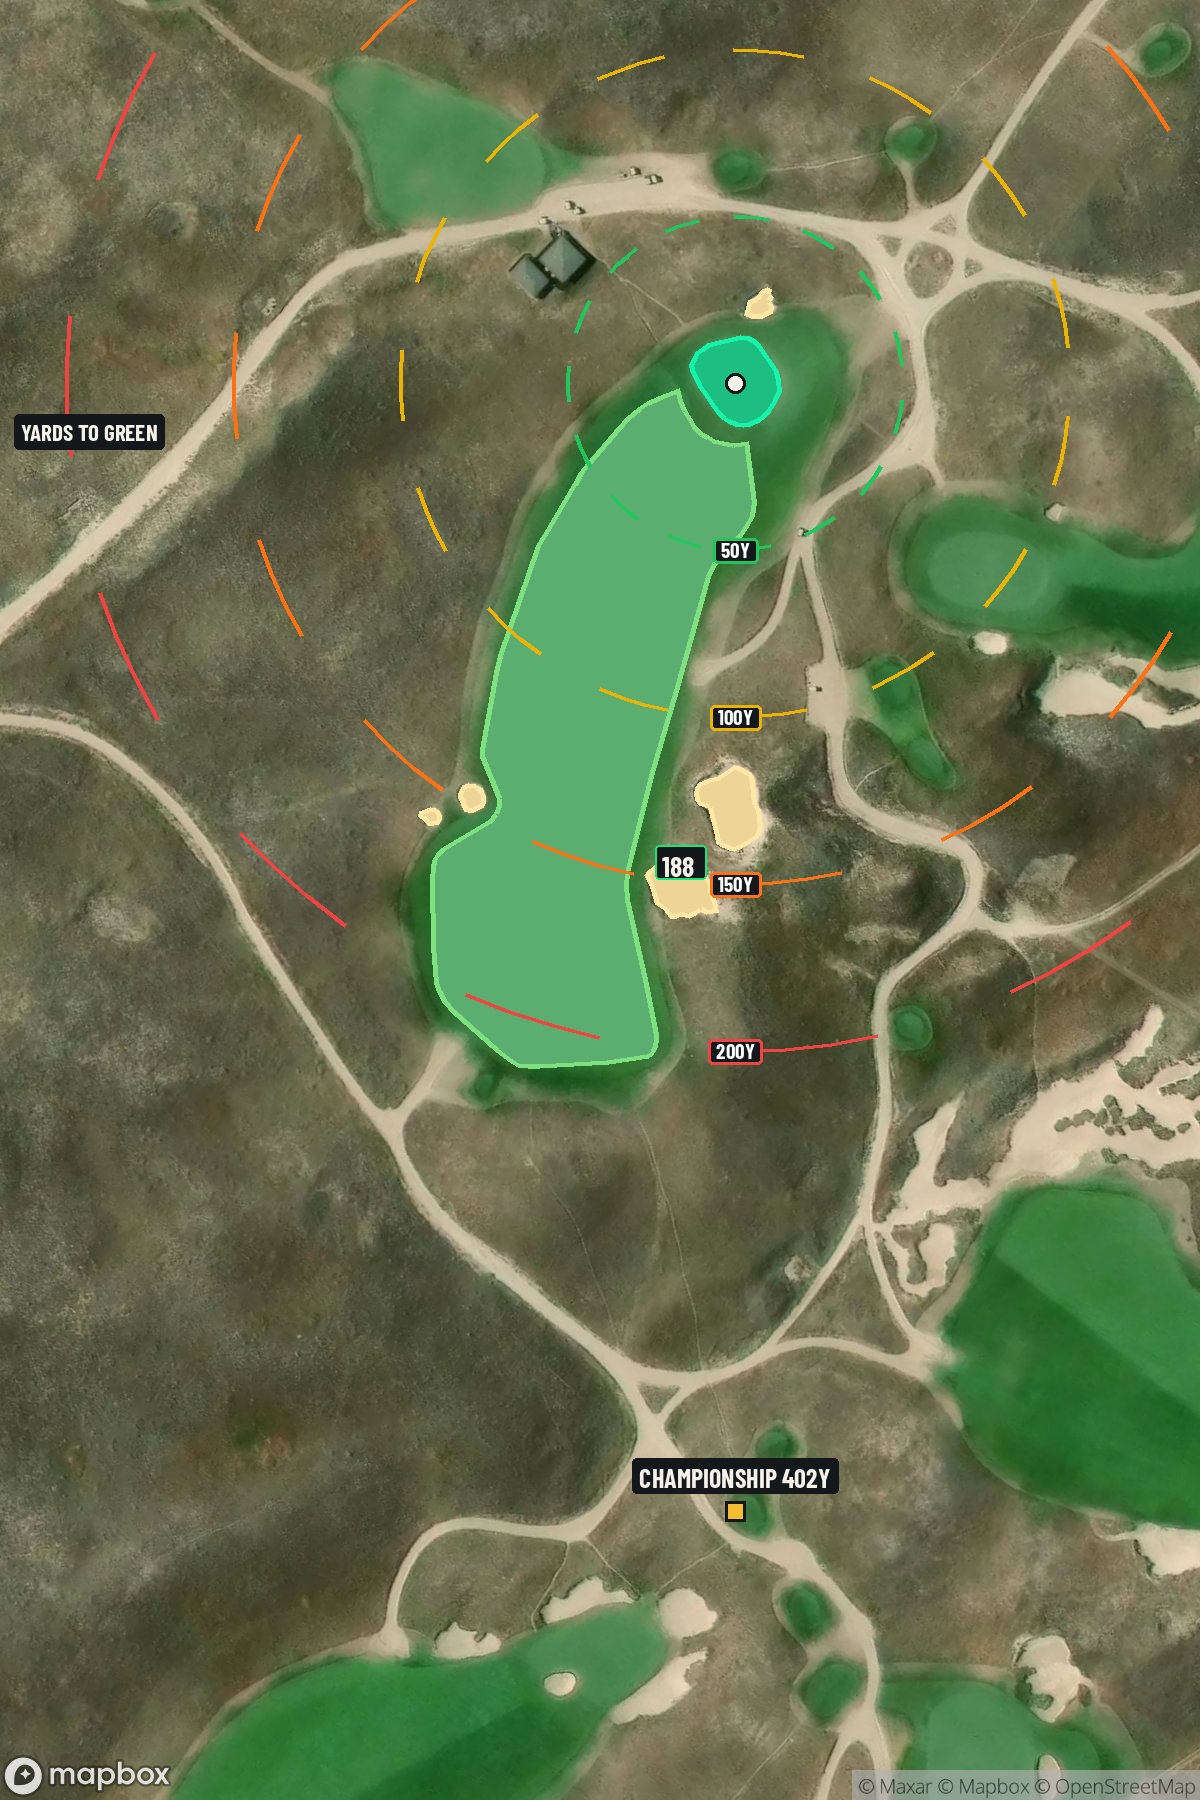
Hole 9 aerial at Sand Hills Golf Club
Map distances from Championship tee · 402 yds

The map's printed distances are measured from the Championship tee to the green; they do not move when you change tees.

Green size: 28 yds deep × 27 yds wide

Mapbox Satellite composite · capture date not provided. Green at the top.

Where this map comes from

Satellite photo
Date not published
Mapbox satellite
Green contours
2023–2024 survey
USGS lidar survey
Report a map problem
100%
Hole 9 aerial at Sand Hills Golf Club

The plan for No. 9

The play: The ninth hole at Sand Hills Golf Club serves as a compelling finale to the front nine, presenting a straightforward 402-yard par 4 that exemplifies the course's minimalist philosophy in Nebraska's stunning Sandhills region. This deceptively simple layout offers a generous fairway that welcomes aggressive tee shots, allowing players to position themselves for an optimal approach to the small, subtly contoured green. Without traditional hazards cluttering the landscape, the hole's primary defense lies in its natural undulations and the precision required for the approach shot. The compact green demands accuracy over power, rewarding thoughtful course management and crisp iron play. Sand Hills Golf Club hole 9 captures the essence of links-style golf, where strategic thinking trumps brute force in this pristine wilderness setting.

Shot by shot

  1. Off the tee

    Your tee shot strategy should focus on positioning rather than distance. With no major hazards to navigate, aim for the center of the fairway and prioritize finding the short grass. A well-struck driver or 3-wood should leave you with a comfortable mid-iron approach - the key is avoiding the rough, which will complicate your approach to the small green. The straight layout allows you to be aggressive with your target line down the middle, but don't sacrifice accuracy for extra distance.

  2. Approach & recovery

    The approach shot is where this hole shows its teeth. That small green demands precision, making club selection and distance control critical. Aim for the center of the green regardless of pin position - the compact putting surface means you're never too far from any hole location. Take one extra club and swing smoothly rather than forcing a shot, as coming up short or flying the green will leave difficult recovery shots. Pay attention to wind conditions, as they'll have a magnified effect on your ball flight into this smaller target.

  3. On the green

    With a small green at Sand Hills, speed control becomes paramount in your putting strategy. The putting surface likely features subtle breaks that can be deceiving, so take time to read your putt from multiple angles. Focus on lagging longer putts to within tap-in range rather than being aggressive - three-putts from this small surface are particularly frustrating given the scoring opportunity this hole presents. Most putts will be relatively straight, but don't underestimate the importance of starting your ball on the correct line. ## RISK VS REWARD This hole offers a classic risk/reward scenario in club selection rather than target selection. The temptation might be to hit driver and leave yourself a short iron, but the small green actually plays better with a controlled mid-iron from the optimal distance. Consider laying back with a 3-wood or hybrid off the tee to ensure you're hitting from the fairway, then commit to a confident approach shot. The reward for two well-executed shots is a legitimate birdie opportunity on a hole where par should always be achievable. ## DIFFERENT SKILL LEVELS **High-handicap players** should treat this as a two-shot par 4, focusing on fairway first, green second. Use whatever club gives you the best chance of finding the fairway off the tee, even if it's a hybrid or long iron. For the approach, take plenty of club and aim for the center of the green - the small target makes precision more important than getting close to the pin. **Low-handicap players** can be more aggressive in their approach, using this hole as a scoring opportunity. Consider the pin position when selecting your tee shot - a back pin might call for a shorter tee shot to leave a full wedge, while a front pin could reward a longer drive and controlled short iron. The key is committing to your yardages and trusting your distance control into the small green. This hole exemplifies Sand Hills' philosophy of strategic golf - simple in concept but demanding in execution, rewarding thoughtful course management over raw power.

  4. Watch for

    • Course conditioning and mapped hazards may affect line selection; confirm from the aerial.

The green on No. 9

Mapped boundary
Wide × deepyards
27×28
Areasq ft
4,389

Gear for Hole 9

We may earn a commission when you buy through these links.

Course coverage

Tournament and creator videos about Sand Hills Golf Club — shared course coverage, not hole-specific clips.

Featured by these creators

Creator videos about this course

YouTube creators who filmed or featured Sand Hills Golf Club. · Stats as of Nov 16, 2026 · 6d ago

Explore golf creators →

The Story of Sand Hills | Designing Golf

Kapalua, Sand Hills, & 35 Years at Skokie Country Club | The Fried Egg Golf Podcast

Golfer feedback

How did Hole 9 play?

⚡ Quick Golfer Pulse

How did this hole play today?

1-tap anonymous vote

Frequently asked questions

Yardage reference: Championship tees · 402 yards.

What's the best strategy off the tee?

↓

For this 402-yard par 4, most players will hit driver to set up a comfortable approach.

How difficult is hole 9?

↓

This hole is a moderate challenge for most golfers. Key challenges include: small green.

How big is the green on hole 9?

↓

The green is small and requires precision. Expect challenging pin positions with limited room for error.