Hole 3 of 18 · Owings Mills, Maryland
Hole 3 at Caves Valley Golf Club
- Par
- 5
- Yards
- 519
- Handicap
- 13
- Bunkers, water
- 9
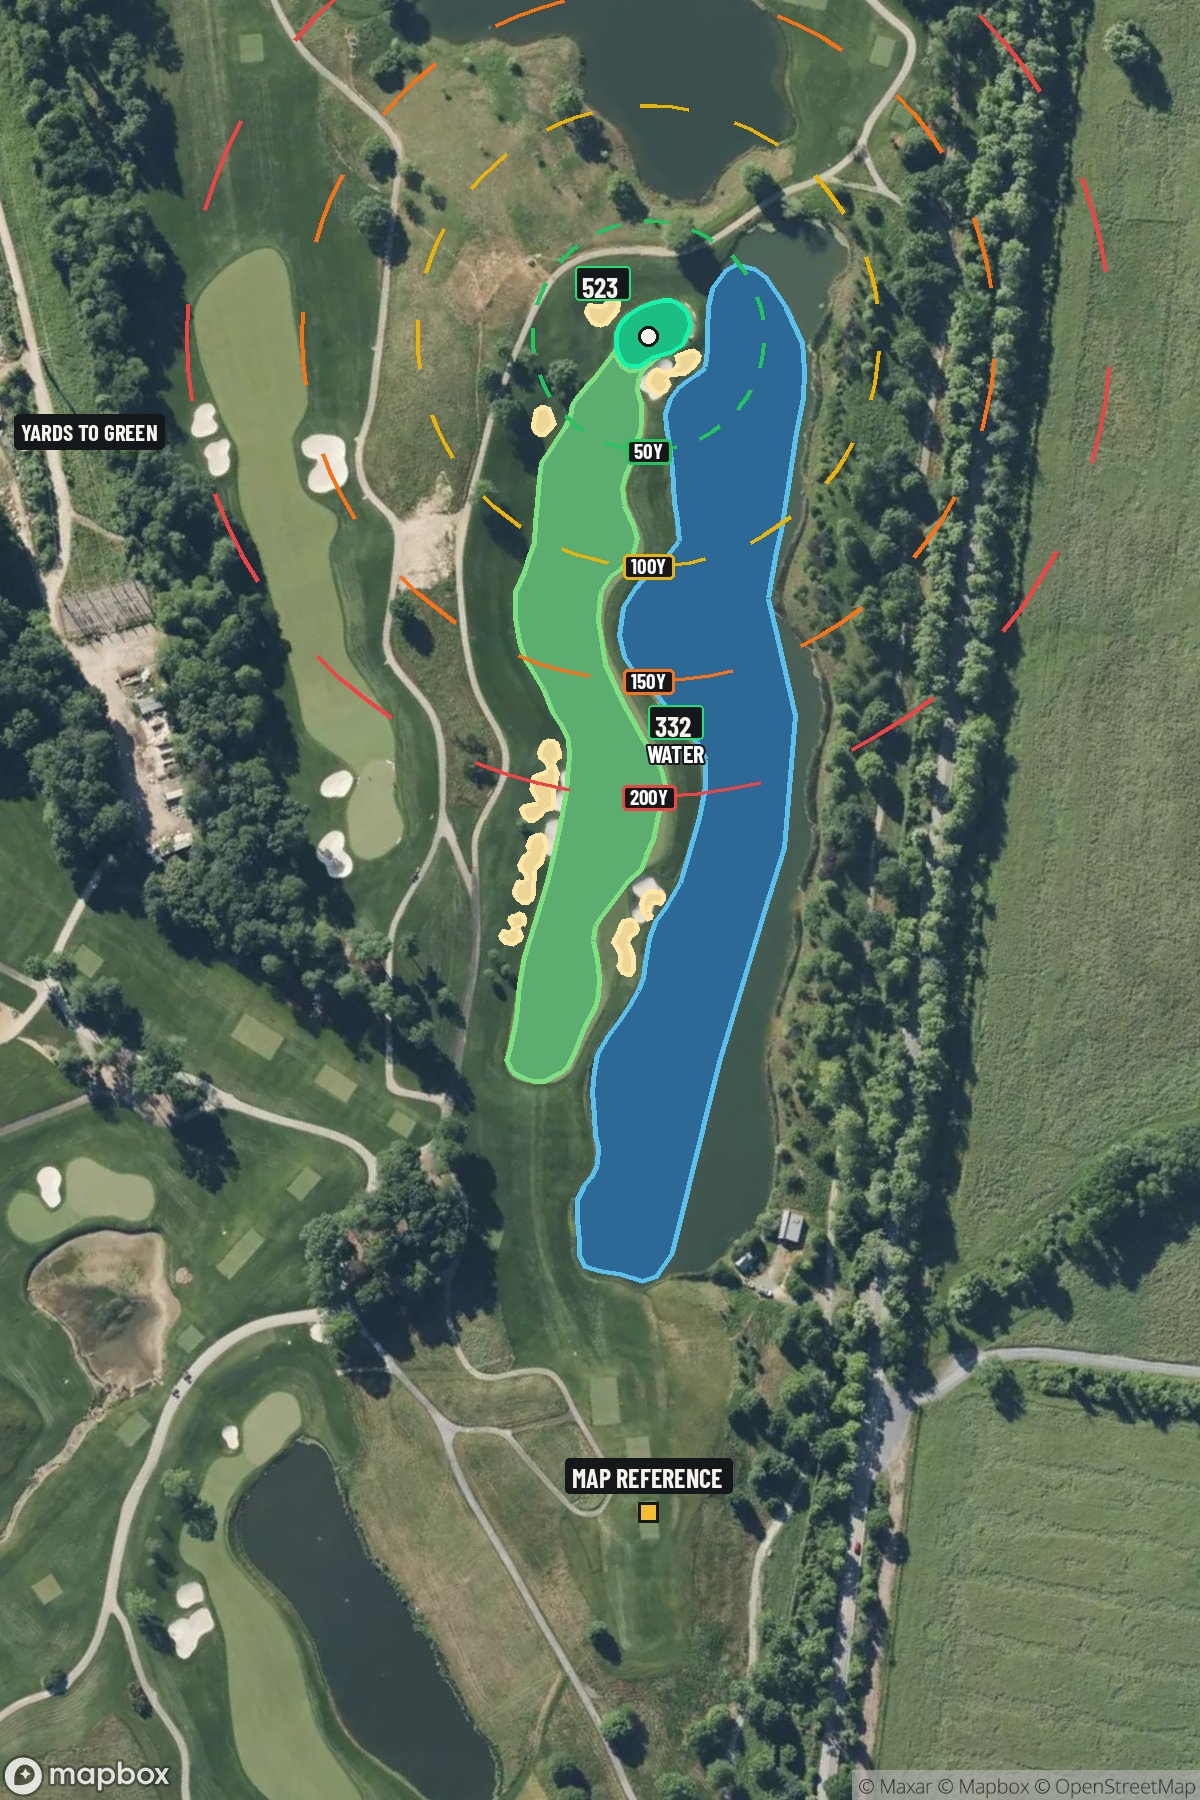
Map distances from Map reference tee
The map's printed distances are measured from the Map reference tee to the green; they do not move when you change tees. Your Championship yardage is in the tiles above.
Green size: 31 yds deep × 34 yds wide
Mapbox Satellite composite · capture date not provided. Green at the top.
Where this map comes from
- Satellite photo
- Date not published
- Mapbox satellite
- Green contours
- 2024 survey
- USGS lidar survey
The plan for No. 3
These notes were written before the current map. Where their distances differ, trust the map.
The play: The third hole at Caves Valley Golf Club presents a classic risk-reward par 5 that demands both power and precision across its 519 yards. This straight-away layout appears deceptively simple from the tee, but the absence of significant hazards creates its own strategic challenge—rewarding aggressive play while punishing poor execution. The generous fairway invites drivers to open up, making this an excellent birdie opportunity for longer hitters who can reach the small green complex in two shots. The compact putting surface becomes the hole's primary defense, requiring pinpoint accuracy on approach shots to avoid challenging recovery situations. With its mid-range handicap rating, this hole perfectly balances accessibility for all skill levels while still demanding respect and course management to score well.
Shot by shot
The green on No. 3
Mapped boundary- Wide × deepyards
- 34×31
- Areasq ft
- 5,830
Gear for Hole 3
9bunkers
Bring a sand wedge you trust
 Titleist Vokey SM10 Tour Chrome$180 MSRPCheck priceCompare all picks →
Waterin play on this hole
Pack extra balls
 Titleist Pro V1$55 MSRPCheck priceCompare all picks →
We may earn a commission when you buy through these links.
Course coverage
Tournament and creator videos about Caves Valley Golf Club — shared course coverage, not hole-specific clips.
Featured by these creators
Creator videos about this course
YouTube creators who filmed or featured Caves Valley Golf Club. · Stats as of Nov 16, 2026 · 6d ago
Burger Dog inflation, BMW at Caves Valley Conundrums, Versant gets the U.S. Open | The Shotgun Start
How did Hole 3 play?
How did this hole play today?
Frequently asked questions
Yardage reference: Championship tees · 519 yards.
Can this par 5 be reached in two?
↓
At 519 yards, Reachable in two for longer hitters. Consider laying up short of hazards if going for it is risky.
How difficult is hole 3?
↓
This hole is a moderate challenge for most golfers. Key challenges include: water in play.
How big is the green on hole 3?
↓
The green is medium-sized with moderate targets. The green is deeper than wide, so club selection is crucial. Pay attention to pin placement when selecting your approach club.
What's a good score on hole 3?
↓
This hole is a solid birdie opportunity with smart layup strategy. Most golfers can reach in three. Position your layup to leave a comfortable wedge.