Hole 7 at TPC of Louisiana
- Par
- 5
- Yardage
- 561 yds
- Stroke index
- 15
- Hazards
- 6 bunkers
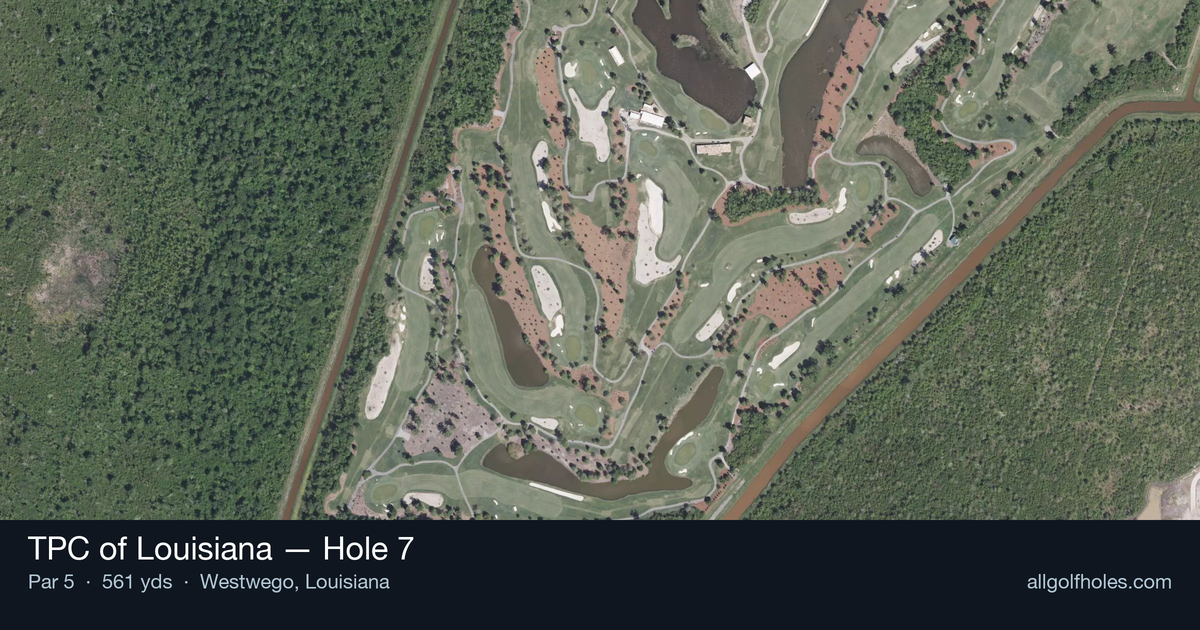
Aerial source not provided
Green size: 32 yds deep × 28 yds wide
Scorecard yardage is for Championship tees. The aerial shows its labeled reference position; distance rings measure to the green.
Championship tees · Par 5 · 561 yards
The plan for No. 7
TPC of Louisiana hole 7 presents a deceptively challenging par 5 that embodies Pete Dye's strategic design philosophy in its purest form. Stretching 561 yards down a straight corridor, this hole demands precision over power, with the architect's signature bunkering creating multiple decision points from tee to green. The generous fairway invites aggressive tee shots, but players must navigate strategically placed hazards that punish wayward approaches. The small green complex requires surgical accuracy on the final approach, rewarding those who position themselves correctly through the first two shots. As the 15th handicap hole, it offers birdie opportunities for well-executed strategy, yet Pete Dye's devilish design ensures that careless play results in bogey or worse.
Off the tee
Your tee shot strategy should prioritize finding the fairway and setting up the ideal angle for your second shot. Driver is the obvious choice for most players, but course management suggests focusing on the center-left portion of the fairway to avoid any right-side trouble. The straight layout means you can be aggressive with your target line, but remember that Pete Dye courses often feature subtle undulations that can kick balls into unexpected areas. Aim for a controlled draw or straight ball flight to maximize distance while maintaining accuracy.
Approach & recovery
Your second shot becomes the crucial setup shot on this par-5. Most players will be hitting a mid-iron to long-iron, depending on driving distance and conditions. The goal is positioning yourself within comfortable wedge range of the small green - typically around 100-120 yards out. Favor the center of the fairway to give yourself the best angle into the green, as small greens at Pete Dye courses often feature challenging pin positions that require precise approach angles. Avoid the temptation to go for the green in two unless you're absolutely confident in your long iron or hybrid accuracy.
On the green
The small green size demands pinpoint accuracy on your approach shot. Pete Dye's signature contoured greens mean you'll face challenging reads and potential three-putts if you're not careful with your approach positioning. Focus on hitting your wedge to the fat part of the green rather than attacking tight pin positions. When putting, expect subtle breaks that may not be immediately obvious - take extra time to read the green from multiple angles, especially on longer putts where the small surface can make distance control tricky. ## RISK VS REWARD The primary risk/reward decision comes on your second shot: laying up versus going for the green in two. With no major hazards listed, the main penalty for an aggressive miss is likely finding Pete Dye's strategic bunkering or rough around the green. For longer hitters, going for the green in favorable conditions can set up eagle opportunities, but the small green size means even good shots can bounce off into collection areas. The safer play - positioning your second shot for a comfortable wedge - typically yields more consistent scoring. ## DIFFERENT SKILL LEVELS **High-Handicap Players:** Focus on three solid shots rather than trying to reach in two. Use your most reliable fairway wood or long iron for your second shot, aiming for the 100-yard marker to leave a comfortable wedge approach. The straight layout works in your favor - commit to center-fairway targets on every shot. **Low-Handicap Players:** This hole offers legitimate birdie and eagle chances. Consider going for the green in two when conditions favor accuracy, but only with clubs you can control precisely. Your superior short game skills make attacking tight pin positions more viable, but respect the small green size and focus on leaving makeable putts rather than forcing difficult approaches. The 15 handicap ranking suggests this hole plays easier than most, making it a crucial scoring opportunity in your round. Smart course management and commitment to your chosen strategy will typically yield better results than overly aggressive play.
Watch for
- Course conditioning and mapped hazards may affect line selection; confirm from the aerial.
Hole 7 Green Complex
Mapped green boundary
Green size: 4,010 sq ft
How did Hole 7 play?
How did this hole play today?
Frequently asked questions
Yardage reference: Championship tees · 561 yards.
Can this par 5 be reached in two?
↓
At 561 yards, A true three-shot hole for most players. Position your layup to leave a comfortable wedge distance.
How difficult is hole 7?
↓
This hole is a moderate challenge for most golfers. Key challenges include: long par 5, heavily bunkered, small green.
How big is the green on hole 7?
↓
The green is small and requires precision. The green is deeper than wide, so club selection is crucial. Expect challenging pin positions with limited room for error.
What's a good score on hole 7?
↓
This hole is a true three-shot hole where birdie requires execution. This longer par 5 demands patience. Two good shots set up the scoring opportunity.