Hole 6 at TPC of Louisiana
- Par
- 4
- Yardage
- 476 yds
- Stroke index
- 1
- Hazards
- 5 bunkers · Water
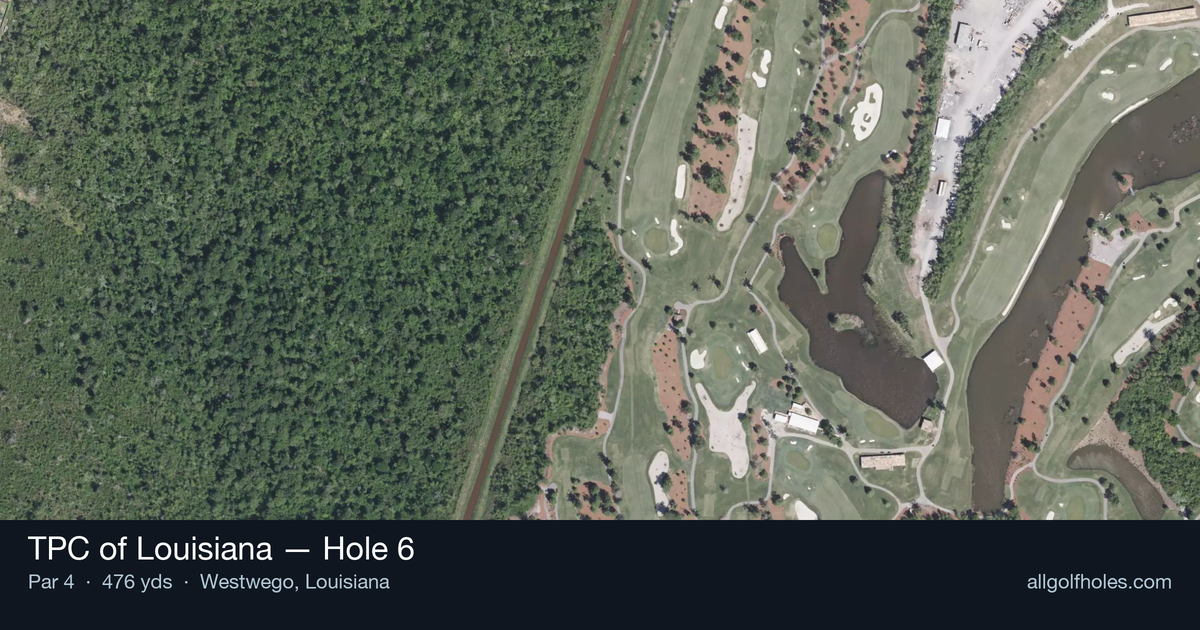
Aerial source not provided
Green size: 36 yds deep × 27 yds wide
Scorecard yardage is for Championship tees. The aerial shows its labeled reference position; distance rings measure to the green.
Championship tees · Par 4 · 476 yards
The plan for No. 6
The most demanding test at TPC of Louisiana, this 476-yard par 4 earns its status as the #1 handicap hole through sheer length and Pete Dye's strategic design philosophy. The straight layout may appear straightforward, but distance control becomes paramount on this marathon hole that challenges even Tour professionals during the PGA Tour's annual visit. A powerful tee shot down the generous fairway sets up a demanding long iron or hybrid approach to a compact, well-defended green complex. The small putting surface demands precision, as missing the target leaves difficult recovery shots around Dye's characteristically contoured surrounds. This hole exemplifies why TPC of Louisiana has earned its reputation as Louisiana's premier championship test, rewarding only the most committed swings.
Off the tee
The tee shot strategy centers on finding the optimal position for your approach while navigating any subtle Pete Dye design elements in the landing zone. With the hole's straight layout, your target line should focus on the center-left portion of the fairway, giving you the best angle into the small green. Driver may be necessary for many players to leave a manageable approach distance, but accuracy is paramount. If conditions are firm or you're struggling with driver accuracy, consider a 3-wood or hybrid that ensures you stay in play while still leaving a reasonable approach distance. The key is avoiding any trouble that could lead to a big number on this already challenging hole.
Approach & recovery
The approach shot to this small green is where the hole's true challenge reveals itself. With limited green surface area, precision becomes critical, and Pete Dye's contoured green design likely creates challenging pin positions and collection areas around the putting surface. Depending on your tee shot success, you'll likely face a mid-iron to long-iron approach. Focus on the center of the green regardless of pin position, as the small target demands conservative aim points. Take one extra club to ensure you reach the putting surface, as coming up short on a Pete Dye design often means facing a difficult recovery shot. Pay attention to wind conditions, as they can significantly impact club selection on longer approach shots. When in doubt, favor the safe play to the center of the green rather than attacking challenging pin positions.
On the green
Pete Dye's signature green contouring means putting strategy becomes crucial for scoring. The small green likely features subtle breaks and collection areas that can make seemingly simple putts quite challenging. Study the green carefully during your approach to identify the general slope and any obvious tiers or ridges. On small greens, lag putting becomes essential - focus on two-putting rather than being aggressive with longer attempts. The premium on accuracy extends to putting, where leaving yourself in good position for your next putt often matters more than attacking the hole. ## RISK VS REWARD This hole presents a classic Pete Dye risk/reward scenario disguised as a straightforward par 4. The primary risk/reward decision comes with tee shot club selection - taking driver for a shorter approach versus playing more conservatively for position. The reward for an aggressive, accurate tee shot is a shorter iron into the small green, significantly improving your birdie chances. However, the risk of missing the fairway and facing a long recovery shot to a small target can quickly turn this into a bogey or worse. Given the #1 handicap rating, the percentages often favor the conservative approach. ## DIFFERENT SKILL LEVELS **High-Handicap Players:** Focus entirely on keeping the ball in play and advancing it toward the green in regulation. Consider laying up to your favorite wedge distance if a long approach seems daunting. The small green makes up-and-down challenging, so prioritize reaching the putting surface in regulation, even if it means a longer putt. **Low-Handicap Players:** This hole rewards precision and course management skills. Consider the pin position and wind conditions when selecting your tee shot strategy. With a small green, approach shot accuracy becomes paramount - take enough club and aim for the center of the green. Your short game skills may be tested around this Pete Dye green, so practice those recovery shots. **Playing Tips:** Regardless of skill level, respect this hole's difficulty. The #1 handicap rating exists for a reason, and even tour professionals approach this hole with caution. Par is always a good score here, and sometimes bogey isn't the end of the world on such a demanding test.
Watch for
- Course conditioning and mapped hazards may affect line selection; confirm from the aerial.
Hole 6 Green Complex
Mapped green boundary
Green size: 4,479 sq ft
How did Hole 6 play?
How did this hole play today?
Frequently asked questions
Yardage reference: Championship tees · 476 yards.
What's the best strategy off the tee?
↓
For this 476-yard par 4, most players will hit driver to set up a comfortable approach.
How difficult is hole 6?
↓
This hole is one of the tougher holes on the course for most golfers. Key challenges include: long par 4, water in play, heavily bunkered, small green.
How big is the green on hole 6?
↓
The green is small and requires precision. Expect challenging pin positions with limited room for error.
What's a good score on hole 6?
↓
This hole is one of the tougher holes where par feels like birdie. A challenging par 4. Accept that bogey happens and avoid big numbers.