Hole 11 at Aviara Golf Club at Four Seasons Resort
- Par
- 3
- Yardage
- 189 yds
- Stroke index
- 18
- Hazards
- 4 bunkers · Water
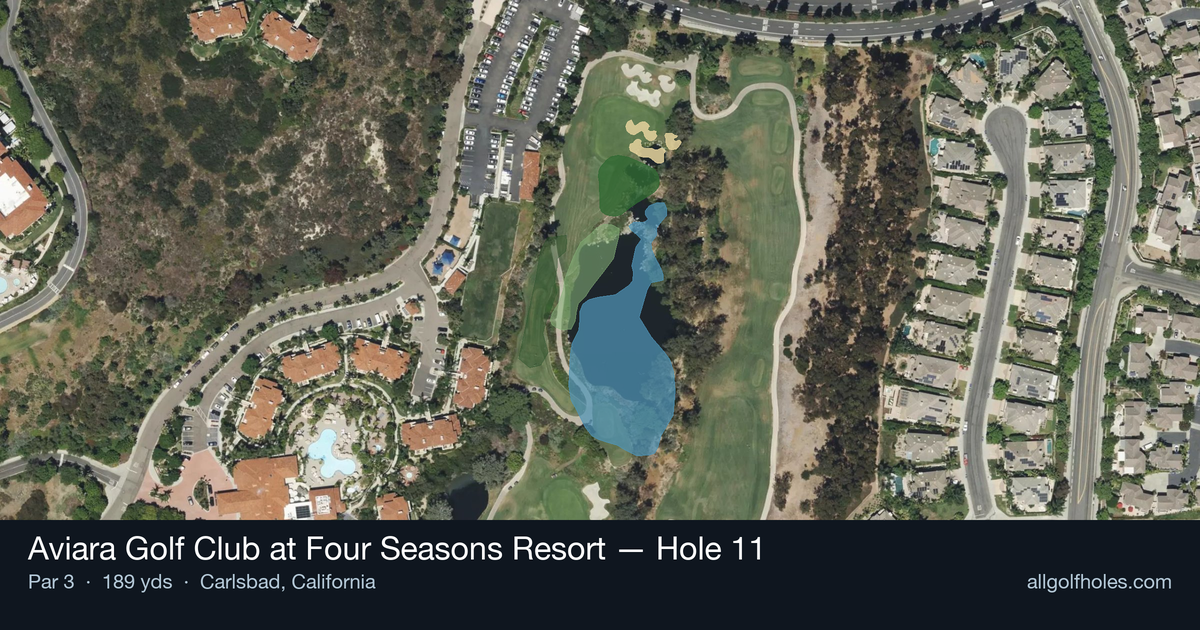
Aerial source not provided
Green size: 35 yds deep × 36 yds wide
Scorecard yardage is for Championship tees. The aerial shows its labeled reference position; distance rings measure to the green.
Championship tees · Par 3 · 189 yards
The plan for No. 11
The 18th handicap hole at Aviara Golf Club at Four Seasons Resort proves that simplicity can be deceptive. This 189-yard par 3 presents a clean, straightforward test where precision trumps power. With minimal hazards to distract the eye, golfers face the pure challenge of finding the correct club and committing to their tee shot. The small green demands accuracy, leaving little margin for error on approach shots that drift offline. Set against Aviara's stunning Carlsbad landscape, this hole rewards confident ball-striking and punishes indecision. While it may appear benign compared to the resort course's more dramatic holes, the elevated green complex and subtle undulations make par a satisfying achievement that often proves more elusive than expected.
Off the tee
From the tee, focus on making a smooth, controlled swing with your selected iron. Club selection should prioritize reaching the center of the green rather than attacking pins. A 6 or 7-iron will likely be the play for most golfers, though stronger players might find themselves between clubs. When in doubt, take the longer club and swing easier - the small green rewards accuracy over aggressive play. Aim for the middle of the green regardless of pin position, as the lack of hazards means your primary concern is simply finding the putting surface.
Approach & recovery
Since this is a par-3, your tee shot serves as your approach. The straight layout means you can commit fully to your target line without worrying about doglegs or hidden trouble. Focus on a balanced finish and maintaining your spine angle through impact. The small green demands precise distance control, so take practice swings that match your intended tempo. Consider wind conditions carefully, as even a slight breeze can significantly affect ball flight on a shot of this length.
On the green
With a small green, expect subtle breaks and potentially quick putting surfaces typical of resort courses. Read putts carefully from multiple angles, as the limited green space means most putts will have some break. Focus on speed control over line - on smaller greens, getting the pace right becomes even more critical. Leave approach putts short of the hole when possible, as the small surface area makes three-putts more likely if you're aggressive with longer putts. ## RISK VS REWARD This hole offers minimal risk/reward scenarios, which is actually its strategic beauty. The absence of hazards means you can play aggressively to certain pin positions without fear of penalty strokes. However, the small green size provides natural protection, rewarding conservative play to the center over aggressive pin-hunting. The main decision point comes with club selection - taking enough club to comfortably reach the green versus trying to dial in exact yardages. ## DIFFERENT SKILL LEVELS **High-handicap players** should embrace the conservative approach this hole rewards. Aim for the center of the green with a club that gets you there comfortably, even if it means being 20-30 feet from the pin. Focus on making solid contact rather than perfect distance control. A two-putt par represents excellent scoring on this hole. **Low-handicap players** can be more aggressive with pin positions, especially when the flag is in the center portion of the green. Consider wind conditions and green firmness when deciding whether to attack pins near the edges. This hole presents a legitimate birdie opportunity with precise iron play, making it crucial to take advantage of the scoring chance it provides. The beauty of Hole 11 lies in its straightforward nature - execute a quality iron shot, and you'll walk away satisfied with your score.
Watch for
- Course conditioning and mapped hazards may affect line selection; confirm from the aerial.
Hole 11 Green Complex
Mapped green boundary
Green size: 6,529 sq ft
How did Hole 11 play?
How did this hole play today?
Frequently asked questions
Yardage reference: Championship tees · 189 yards.
What club should I use on this par 3?
↓
At 189 yards, most golfers will need a long iron or hybrid (5-iron to 6-iron) to reach this green. Adjust for elevation, wind, and pin position.
How difficult is hole 11?
↓
This hole is a moderate challenge for most golfers. Key challenges include: water in play.
What hazards should I watch out for on hole 11?
↓
Key hazards include: water at 114.6 yards. Plan your shots to avoid these trouble spots.
How big is the green on hole 11?
↓
The green is fairly large with multiple pin positions. Lag putting becomes important on longer putts.