Hole 12 at Aviara Golf Club at Four Seasons Resort
- Par
- 4
- Yardage
- 405 yds
- Stroke index
- 12
- Hazards
- 5 bunkers · Water
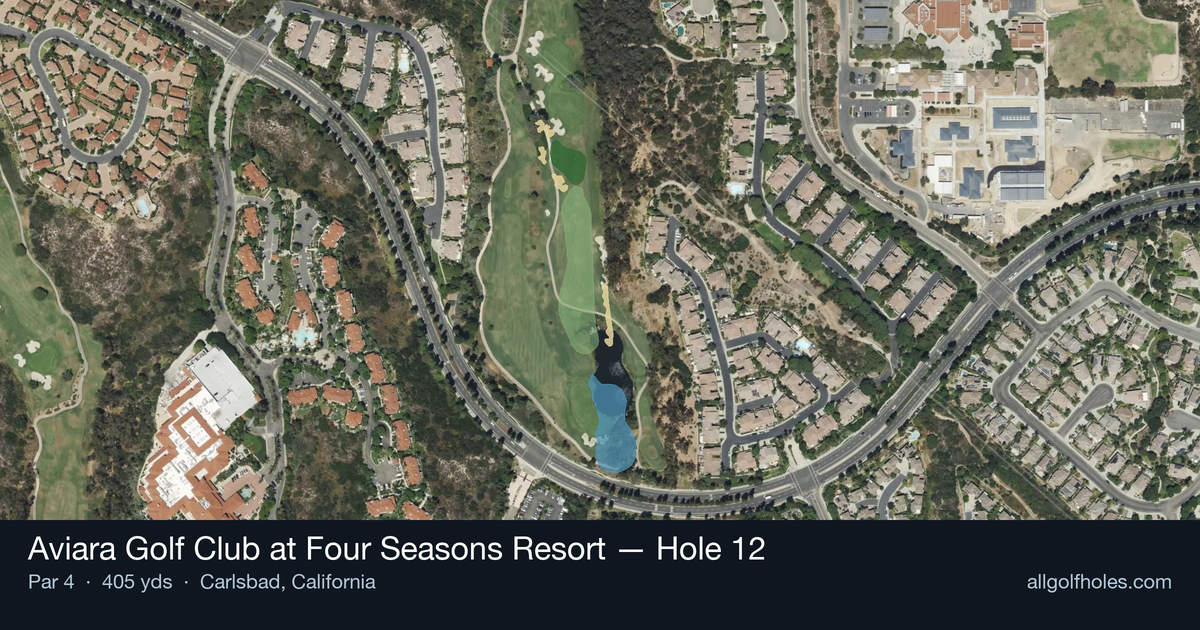
Aerial source not provided
Green size: 55 yds deep × 40 yds wide
Scorecard yardage is for Championship tees. The aerial shows its labeled reference position; distance rings measure to the green.
Championship tees · Par 4 · 405 yards
The plan for No. 12
The 12th hole at Aviara Golf Club at Four Seasons Resort presents a deceptively challenging par 4 that rewards precision over power. At 405 yards, this straight hole demands accuracy from tee to green, with its most notable feature being the small, well-protected putting surface that serves as the ultimate test. The generous fairway allows players to find their preferred angle, but the approach shot becomes increasingly critical as golfers must navigate to a compact green complex. With minimal hazards cluttering the landscape, this hole relies on strategic positioning and course management rather than dramatic obstacles. The small green size transforms what appears to be a straightforward par 4 into a true test of iron play, making it a memorable challenge that exemplifies Aviara's commitment to thoughtful golf course design.
Off the tee
The tee shot strategy revolves around setting up an ideal approach distance rather than maximizing distance. For most players, a controlled driver or strong 3-wood targeting the center-left portion of the fairway provides the best angle into the small green. The straight layout eliminates directional concerns, allowing you to focus purely on distance control and positioning. Avoid the urge to bomb driver here – a well-placed shot leaving 130-150 yards to the pin often yields better results than a longer drive that creates an awkward wedge distance or difficult lie.
Approach & recovery
With the small green as your target, precision becomes everything on the approach shot. The lack of significant hazards means you can be aggressive with your line, but club selection must be spot-on. Take one extra club and swing smoothly rather than forcing a shot – the small green punishes approaches that come in hot or with too much spin. Aim for the center of the green regardless of pin position, as the compact putting surface makes recovery shots challenging. Pay attention to wind conditions, as they'll have a magnified effect on a smaller target.
On the green
The small green demands respect with your putter selection and read preparation. Expect subtle breaks that can be deceiving given the green's size – what appears straight often has more movement than anticipated. Focus on speed control above all else, as running putts past the pin on a small green leaves difficult comeback attempts. When facing longer putts, prioritize getting within the "circle of confidence" rather than being overly aggressive. The green's compact nature means most putts will have some break, so take time to read the entire surface. ## RISK VS REWARD This hole's risk/reward equation is more subtle than dramatic. The primary reward comes from aggressive approach shots aimed at tucked pins, but the small green severely punishes misses. The safer play involves aiming for the center of the green regardless of pin position, accepting longer putts in exchange for avoiding costly recovery shots. For longer hitters, the temptation exists to overpower the tee shot, but this often creates awkward yardages that complicate the approach. ## DIFFERENT SKILL LEVELS **High Handicappers:** Focus on finding the fairway with your most reliable club, even if it's a hybrid or long iron. Leave yourself a comfortable approach distance with a club you trust, and always aim for the center of the green. Two-putt pars are excellent scores here. **Low Handicappers:** This hole rewards precision and course management skills. Consider the pin position when selecting your tee shot strategy, and don't hesitate to take dead aim at favorable pins with a well-struck approach. The small green makes birdie opportunities precious, so capitalize when you have a good look. The 12th hole at Aviara exemplifies how strategic golf course design can create challenge without relying on penal hazards – sometimes the most demanding opponent is simply a small target that demands your best swing.
Watch for
- Course conditioning and mapped hazards may affect line selection; confirm from the aerial.
Hole 12 Green Complex
Mapped green boundary
Green size: 9,516 sq ft
How did Hole 12 play?
How did this hole play today?
Frequently asked questions
Yardage reference: Championship tees · 405 yards.
What's the best strategy off the tee?
↓
For this 405-yard par 4, most players will hit driver to set up a comfortable approach.
How difficult is hole 12?
↓
This hole is a moderate challenge for most golfers. Key challenges include: water in play, large green requiring good lag putting.
What hazards should I watch out for on hole 12?
↓
Key hazards include: water at 115.3 yards. Plan your shots to avoid these trouble spots.
How big is the green on hole 12?
↓
The green is large and can play quite long. Three-putt territory if you don't manage your approach distance well.