Hole 6 at Shoal Creek Golf Club
- Par
- 5
- Yardage
- 540 yds
- Stroke index
- 13
- Hazards
- 4 bunkers · Water
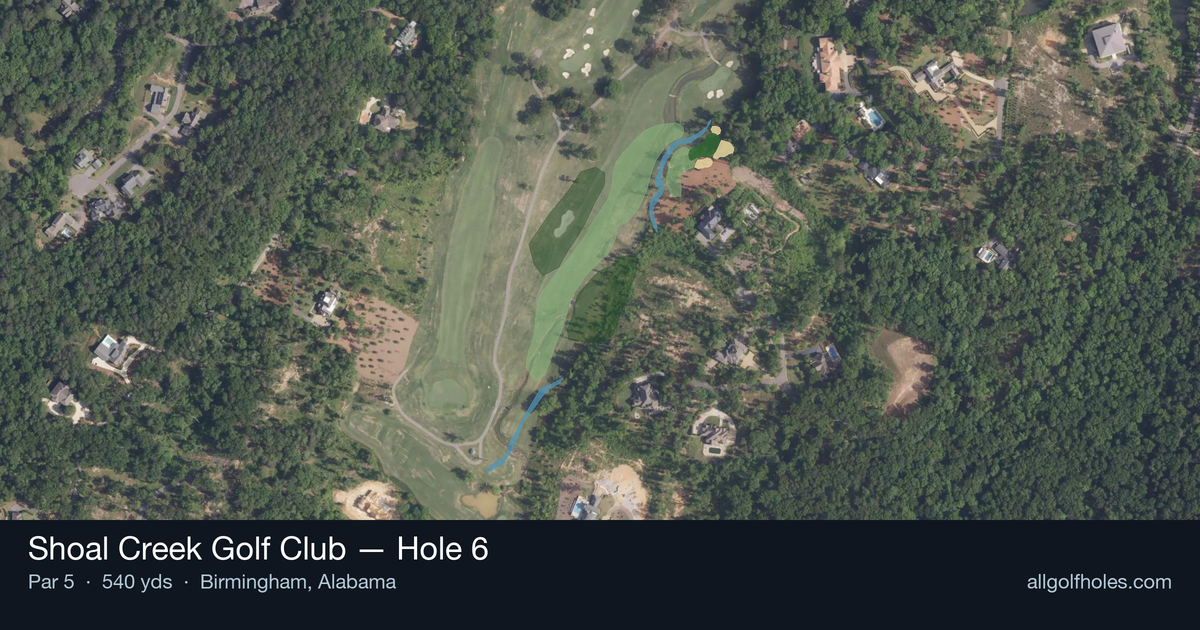
Aerial source not provided
Green size: 41 yds deep × 27 yds wide
Scorecard yardage is for Championship tees. The aerial shows its labeled reference position; distance rings measure to the green.
Championship tees · Par 5 · 540 yards
The plan for No. 6
The sixth hole at Shoal Creek Golf Club presents a strategic par 5 that rewards thoughtful course management over pure power. At 530 yards, this straight-away layout appears deceptively simple, but the small green demands precision on the approach shot. The generous fairway invites aggressive tee shots, allowing longer hitters to consider reaching the green in two with a well-positioned drive. However, the compact putting surface punishes wayward approaches, making course position more critical than distance. With minimal hazards to navigate, golfers can focus on executing their game plan, whether laying up for a comfortable wedge or taking on the challenge of a long iron approach. This hole epitomizes Shoal Creek's strategic design philosophy.
Off the tee
Your tee shot strategy should focus on finding the center of the fairway to set up the ideal angle for your second shot. A driver or strong 3-wood works well here, as the straight layout and absence of major trouble allows you to be aggressive off the tee. Target the middle of the fairway, as this positioning will give you the best look at the green for your third shot. The key is avoiding any rough or uneven lies that could complicate your layup strategy.
Approach & recovery
Most players will need to think of this as a two-shot approach to the green. Your second shot should be played as a strategic layup, positioning yourself at your favorite wedge distance - typically between 80-120 yards from the pin. Focus on finding level ground in the fairway rather than trying to get as close as possible. For your third shot into the small green, club selection becomes critical. Take one extra club to ensure you reach the putting surface, as short shots will likely roll back off the green.
On the green
The small green size means your approach shots must be precise, but it also means shorter putts once you're on the surface. Focus on getting your ball to the center of the green on your approach, as this gives you the best chance for a manageable two-putt. Pay attention to any subtle slopes, as even small greens can have significant breaks that affect longer putts. ## RISK VS REWARD The main risk/reward decision comes on your second shot - whether to lay up to your comfort zone or try to get closer to the green. Given the small target, the conservative play of laying up to your favorite wedge distance typically offers the best scoring opportunity. Longer hitters might consider going for the green in two under ideal conditions, but the small target makes this a low-percentage play for most golfers. ## DIFFERENT SKILL LEVELS **High-Handicap Players:** Play this as a straight three-shot hole. Use a fairway wood or hybrid off the tee for accuracy, lay up to about 100 yards with your second shot, then hit a comfortable wedge to the center of the green. Focus on avoiding big numbers rather than chasing birdies. **Low-Handicap Players:** You can be more aggressive off the tee with driver, and may consider going for the green in two when conditions are favorable. However, the small green still favors the layup approach - position your second shot at your most reliable scoring distance and attack the pin with a confident wedge shot. This hole exemplifies smart golf strategy - the absence of major hazards means bogey should never be in play if you maintain good course management and execute your shots with confidence.
Hole 6 Green Complex
Mapped green boundary
Green size: 4,484 sq ft
How did Hole 6 play?
How did this hole play today?
Frequently asked questions
Yardage reference: Championship tees · 540 yards.
Can this par 5 be reached in two?
↓
At 530 yards, A true three-shot hole for most players. Position your layup to leave a comfortable wedge distance.
How difficult is hole 6?
↓
This hole is a moderate challenge for most golfers. Key challenges include: water in play, small green.
What hazards should I watch out for on hole 6?
↓
Key hazards include: water at 111.2 yards. Plan your shots to avoid these trouble spots.
How big is the green on hole 6?
↓
The green is small and requires precision. Expect challenging pin positions with limited room for error.
What's a good score on hole 6?
↓
This hole is a solid birdie opportunity with smart layup strategy. Most golfers can reach in three. Position your layup to leave a comfortable wedge.