Hole 7 at TPC San Antonio (Oaks Course)
- Par
- 3
- Yardage
- 207 yds
- Stroke index
- 17
- Hazards
- 7 bunkers
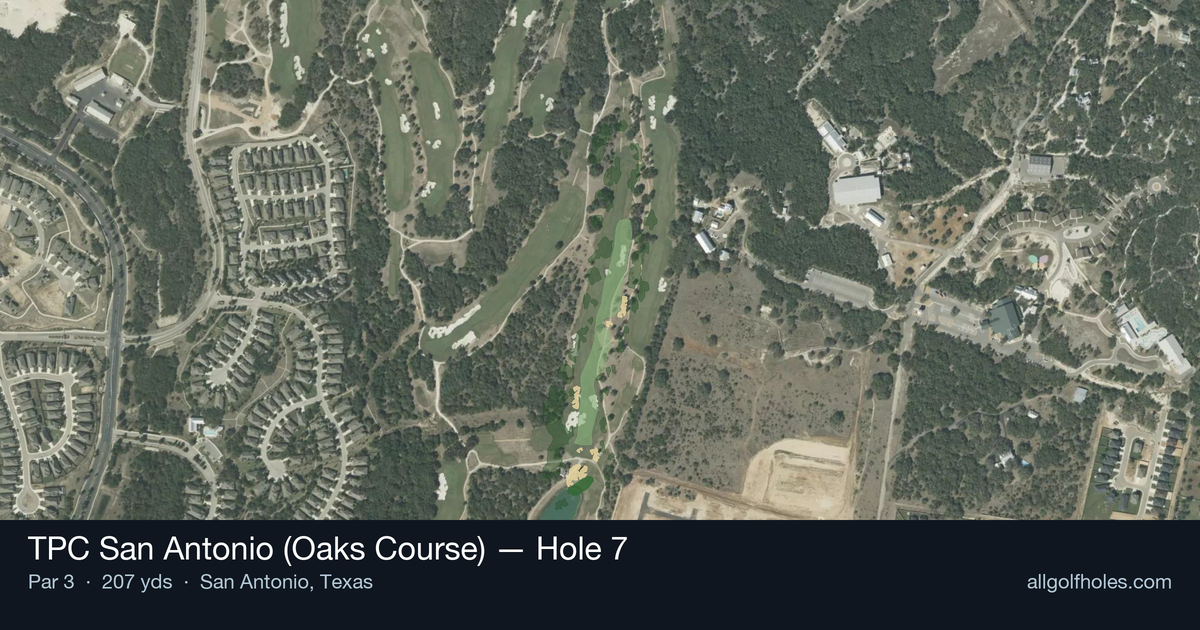
Aerial source not provided
Green size: 39 yds deep × 47 yds wide
Scorecard yardage is for Championship tees. The aerial shows its labeled reference position; distance rings measure to the green.
Championship tees · Par 3 · 207 yards
The plan for No. 7
TPC San Antonio (Oaks Course) hole 7 presents a deceptively challenging par 3 that demands precision over power. At 207 yards, this straight shot requires golfers to commit fully to their club selection, as the small green offers little margin for error. Despite the absence of major hazards, the compact putting surface creates its own intimidation factor, rewarding accurate iron play while punishing anything off-line. The elevated tee provides excellent visibility of the target, but the green's subtle contours can turn a well-struck shot into a difficult two-putt scenario. This hole exemplifies how strategic course design can create challenge through precision rather than penal features, making it a memorable test of accuracy.
Off the tee
Club selection is paramount on this hole. Most players will be looking at anything from a 5-iron to a 7-iron depending on wind conditions and pin position. The key is committing to your yardage and making a smooth, controlled swing rather than trying to muscle a shorter iron. Aim for the center of the green unless the pin is tucked in a corner, in which case assess the risk versus reward of going directly at it. With minimal hazards protecting the green, missing short or long isn't catastrophic, but the small target means precision is essential.
Approach & recovery
Since this is a par 3, your tee shot is your approach. Focus on tempo and balance rather than power. Take one extra club if you're between distances - it's better to have a controlled swing with a longer iron than to force a shorter one. Pay attention to wind direction, as it can significantly affect club selection on a shot of this length. The straight layout means you don't have to worry about doglegs or hidden trouble spots.
On the green
The small green size means you'll likely face relatively short putts if you hit the putting surface. However, small greens often feature subtle breaks that can be tricky to read. Take time to study the slope from multiple angles, especially since par is well within reach. Speed control becomes critical on smaller greens where running putts off the back or coming up short can leave difficult recovery shots. ## RISK VS REWARD This hole offers a clear risk/reward scenario: the reward of an easy par or potential birdie if you hit the green, versus the risk of a bogey or worse if you miss the small target. With limited hazards, the main risk is simply missing the green entirely. The straightforward nature of the hole means there aren't complex strategic decisions - it's about execution of a fundamental golf shot. ## DIFFERENT SKILL LEVELS **High Handicappers:** Focus on making solid contact and getting the ball airborne toward the green. Don't worry about pin-hunting - aim for the center of the green and be happy with any putt for par. Consider taking an extra club to ensure you reach the green rather than coming up short. **Low Handicappers:** This is a hole where you should expect to make par and have a realistic chance at birdie. Be more aggressive with pin positions unless they're in particularly challenging spots. Use your course management skills to factor in conditions and choose the club that gives you the best chance of hitting and holding the green. The 7th hole represents a classic scoring opportunity where good course management and solid execution should yield positive results. Stay committed to your club selection and trust your swing.
Watch for
- Course conditioning and mapped hazards may affect line selection; confirm from the aerial.
Hole 7 Green Complex
Mapped green boundary
Green size: 6,429 sq ft
Course coverage
Tournament and creator videos about TPC San Antonio (Oaks Course) — shared course coverage, not hole-specific clips.
Tournament coverage
Valero Texas Open highlights
Valero Texas Open | Final Round Highlights
2025
How did Hole 7 play?
How did this hole play today?
Frequently asked questions
Yardage reference: Championship tees · 207 yards.
What club should I use on this par 3?
↓
At 207 yards, most golfers will need a long iron or hybrid (5-iron to 6-iron) to reach this green. Adjust for elevation, wind, and pin position.
How big is the green on hole 7?
↓
The green is fairly large with multiple pin positions. Lag putting becomes important on longer putts.