Hole 6 at TPC San Antonio (Oaks Course)
- Par
- 4
- Yardage
- 403 yds
- Stroke index
- 11
- Hazards
- 3 bunkers
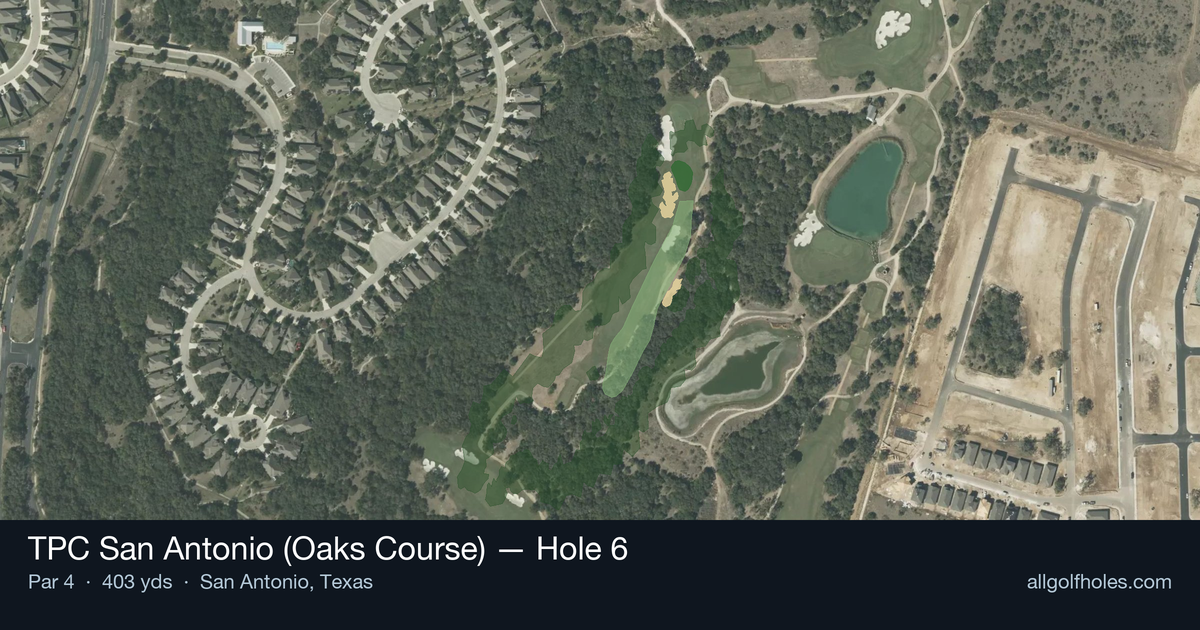
Aerial source not provided
Green size: 28 yds deep × 30 yds wide
Scorecard yardage is for Championship tees. The aerial shows its labeled reference position; distance rings measure to the green.
Championship tees · Par 4 · 403 yards
The plan for No. 6
The sixth hole at TPC San Antonio's Oaks Course presents a deceptively straightforward par 4 that demands precision over power. This 403-yard test features a generous fairway that invites aggressive tee shots, but the real challenge lies in the approach to a small, well-defended green complex. Without significant hazards cluttering the landscape, golfers must rely on course management and accurate iron play to score well. The straight layout allows players to see their target clearly, but the compact green demands a committed approach shot with proper distance control. What makes this hole memorable is its emphasis on fundamental golf skills—reward awaits those who execute solid tee shots and precise approaches to the demanding putting surface.
Off the tee
The straight layout allows for an aggressive tee shot strategy. With no major hazards threatening the landing zone, focus on maximizing distance while maintaining accuracy. A driver or strong 3-wood should be the club of choice for most players, aiming down the center of the fairway. The key is positioning yourself in the prime landing area, typically around 250-280 yards from the tee, which sets up an optimal approach distance. Favor the center-left portion of the fairway if possible, as this often provides the best angle into most pin positions on small greens.
Approach & recovery
The approach shot is where this hole's true challenge reveals itself. With a small green as your target, precision trumps power on the second shot. Depending on your tee shot position, you'll likely face a mid-iron to short-iron approach. Take extra care with club selection, as the compact green offers little margin for error. Aim for the center of the green regardless of pin position - with such a small target, going flag-hunting can lead to trouble. Pay attention to wind conditions, as they'll have a significant impact on club selection for this approach distance.
On the green
The small green size means putting strategy becomes crucial for scoring. Focus on lag putting to ensure two-putts, as three-putting from anywhere on this green would be particularly costly on a scoring hole. Read putts carefully, as subtle breaks can be magnified on a compact surface. When the pin is tucked near an edge, be content with putting to the fat part of the green rather than chasing difficult pin positions. ## RISK VS REWARD This hole presents a classic risk/reward scenario. The absence of major hazards encourages aggressive play, particularly off the tee where maximizing distance sets up shorter, more manageable approach shots. However, the small green serves as the hole's primary defense - being too aggressive with approach shots can lead to missed greens and difficult up-and-downs. The reward for solid execution is significant, as this represents one of the better birdie opportunities on the course. ## DIFFERENT SKILL LEVELS **Low Handicap Players:** Take advantage of this scoring opportunity by playing aggressively off the tee with driver, then focus on sticking a wedge or short-iron close to the pin. Your precision with shorter clubs should allow you to attack pin positions more directly. **High Handicap Players:** Play conservatively smart - use your most reliable tee shot club (even if it's a 3-wood or hybrid) to ensure you're in the fairway, then focus on finding the center of the green with your approach. Don't let the birdie opportunity create pressure that leads to poor swings. Par is an excellent score here, and bogey isn't devastating given the hole's moderate handicap rating. The key to success on this hole is recognizing it as a genuine scoring opportunity while respecting the precision required on the approach shot to the small green target.
Watch for
- Course conditioning and mapped hazards may affect line selection; confirm from the aerial.
Hole 6 Green Complex
Mapped green boundary
Green size: 3,983 sq ft
Course coverage
Tournament and creator videos about TPC San Antonio (Oaks Course) — shared course coverage, not hole-specific clips.
Tournament coverage
Valero Texas Open highlights
Valero Texas Open | Final Round Highlights
2025
How did Hole 6 play?
How did this hole play today?
Frequently asked questions
Yardage reference: Championship tees · 403 yards.
What's the best strategy off the tee?
↓
For this 403-yard par 4, most players will hit driver to set up a comfortable approach.
How difficult is hole 6?
↓
This hole is a moderate challenge for most golfers. Key challenges include: small green.
How big is the green on hole 6?
↓
The green is small and requires precision. The green is deeper than wide, so club selection is crucial. Expect challenging pin positions with limited room for error.