Hole 1 at TPC San Antonio (Oaks Course)
- Par
- 4
- Yardage
- 454 yds
- Stroke index
- 7
- Hazards
- 3 bunkers
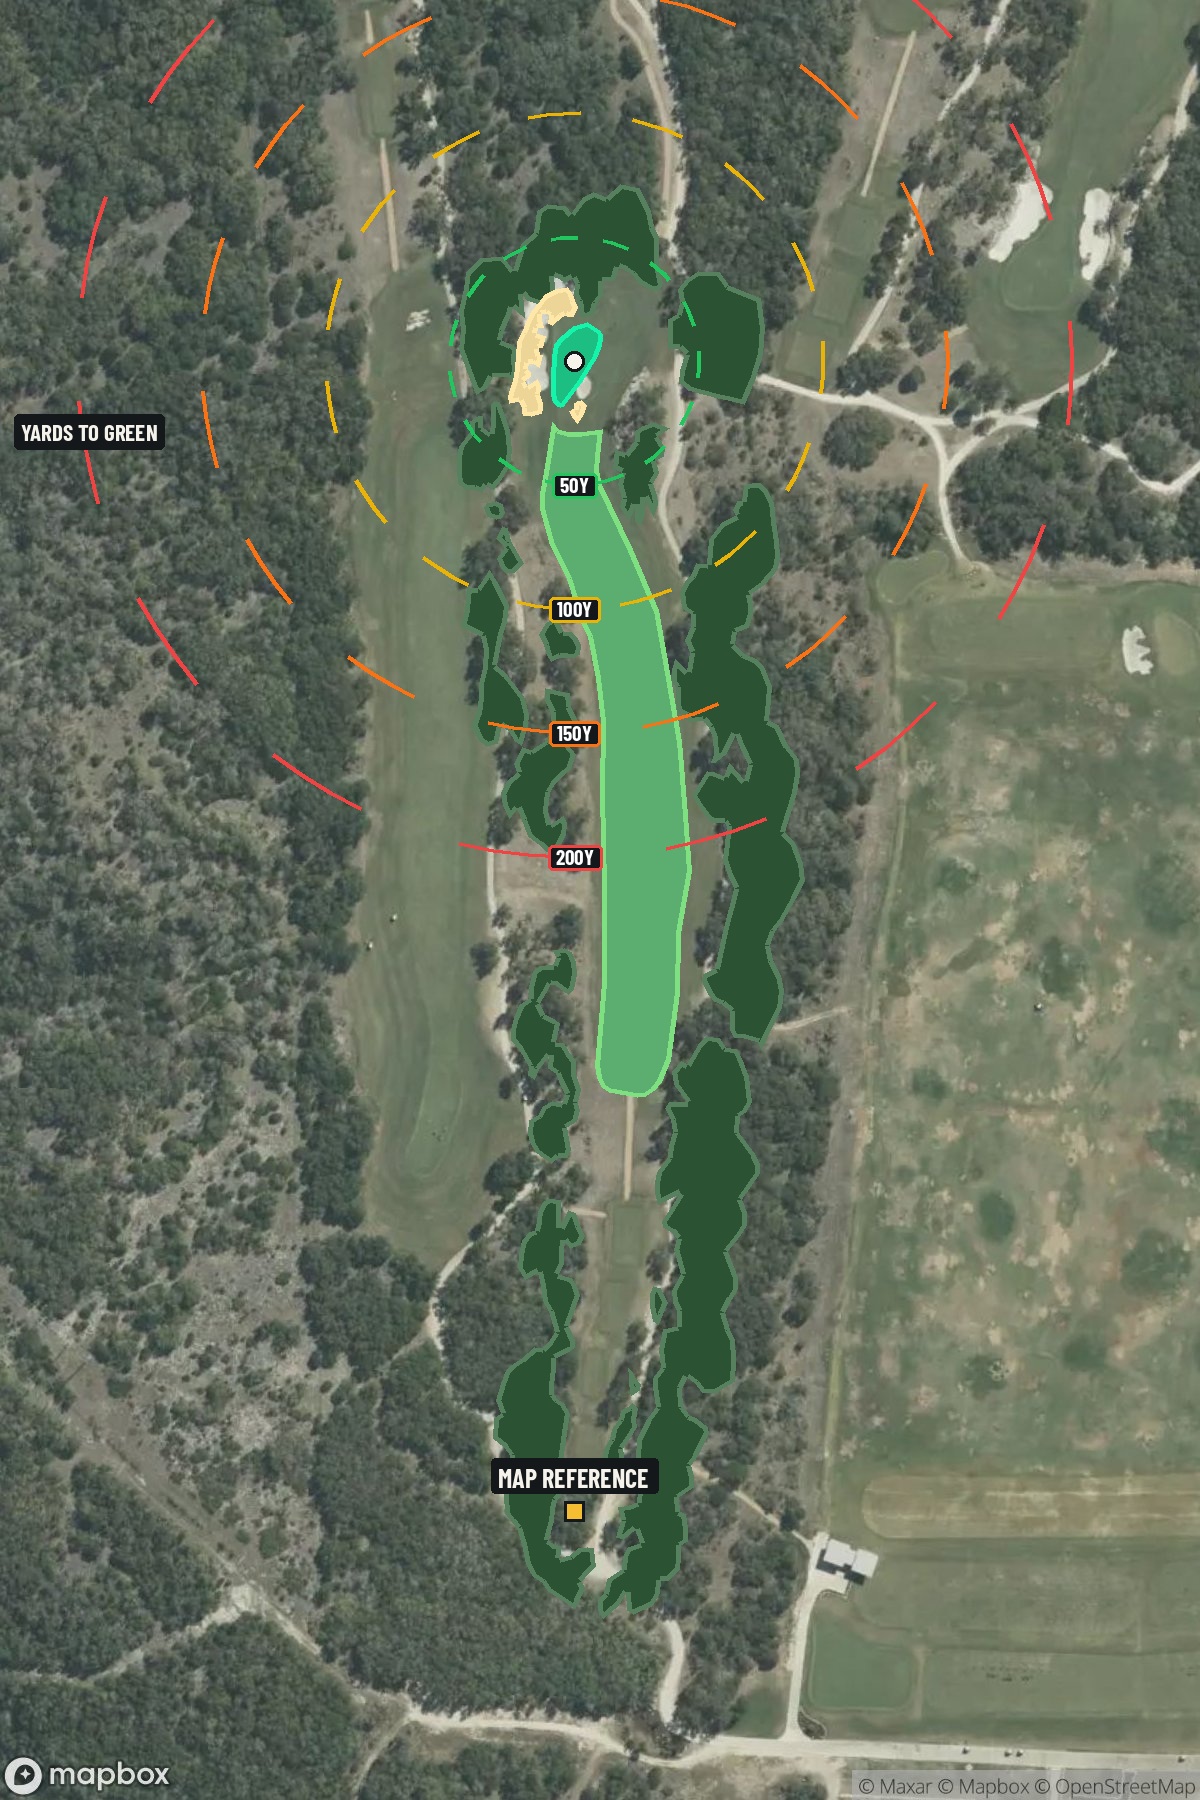 Hole 1 map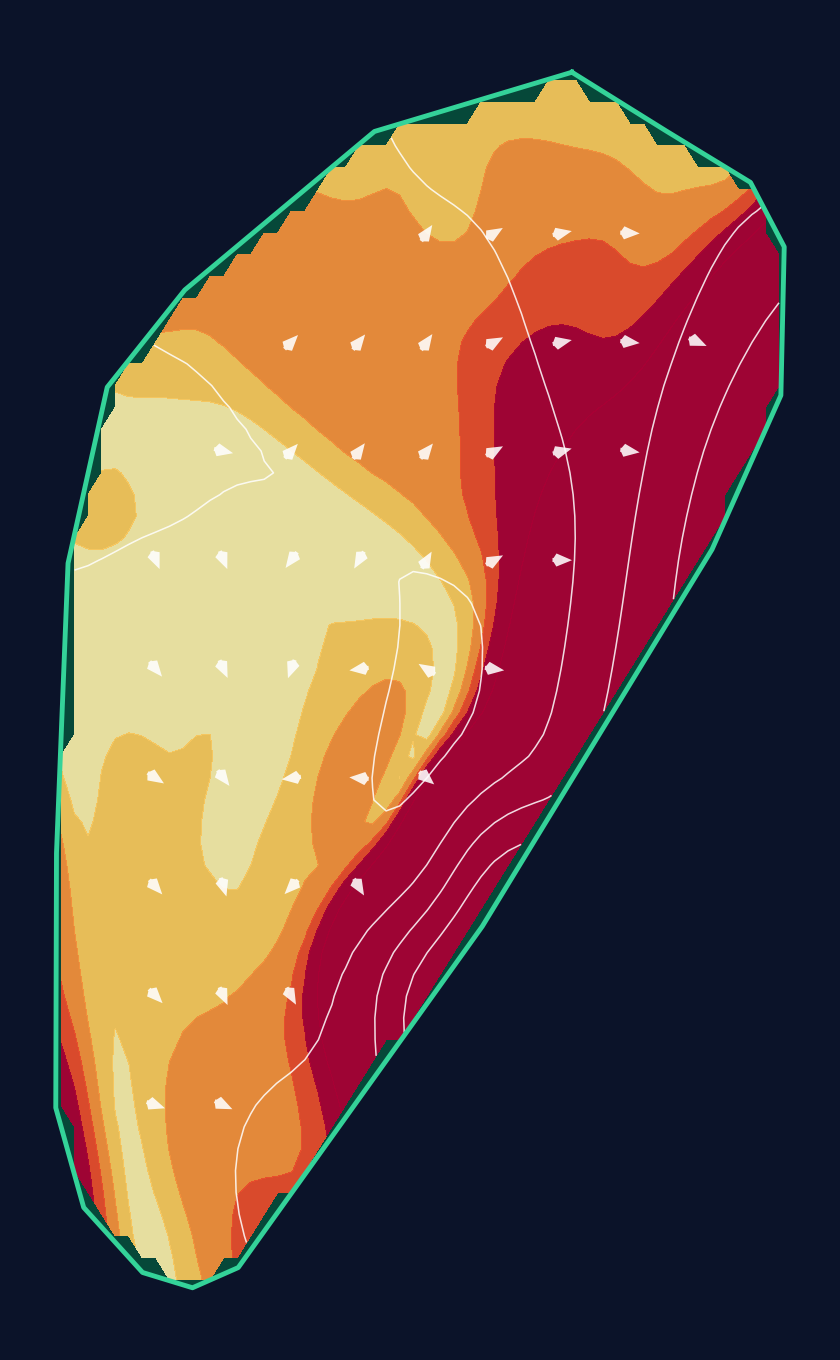
21 yd wide × 34 yd deep · 4.2 ft total elevation range
Light = gentler slope · Red = steeper slope
White lines: 1 foot of elevation. Arrows: downhill. General terrain, not a pin read.
Approach from bottom
Contour source
USGS one meter x55y329 TX Central B2 2017 · collection 2017
Map source & reference
Mapbox Satellite composite · capture date not provided. Green at the top; the labeled map reference is below.
Scorecard yardage is for Championship tees. The aerial shows its labeled reference position; distance rings measure to the green.
Championship tees · Par 4 · 454 yards
The plan for No. 1
The opening hole at TPC San Antonio's Oaks Course presents a deceptively challenging welcome to this acclaimed Texas venue. This straight par 4 stretching 454 yards demands precision from the first swing, as the small green complex requires an accurate approach shot to find the putting surface. Without major hazards to distract, golfers must focus on course management and club selection, making the tee shot critical for setting up a favorable angle. The compact green rewards those who can dial in their distance control, while wayward approaches face challenging up-and-downs. It's a classic risk-versus-reward opener that sets the tone for the strategic demands ahead on this tournament-tested layout.
Off the tee
The key to this opener is establishing a comfortable rhythm while positioning yourself for the best approach angle. With the straight layout, focus your target line down the center-right portion of the fairway, which typically provides the most favorable angle into the small green. Most players should consider a controlled driver or strong 3-wood, aiming to leave themselves with a comfortable mid-iron approach. The landing zone around 250-280 yards out offers the ideal position, though longer hitters may want to dial back slightly to ensure they stay in the optimal approach distance range. Avoid the temptation to bomb your opening drive - accuracy trumps distance on this hole, especially with that small green waiting ahead.
Approach & recovery
The approach shot is where this hole shows its teeth. The small green demands precision, making your second shot the scoring opportunity or the potential trouble spot. From the ideal driving position, you'll typically face a mid-iron to short-iron approach. Focus on the center of the green regardless of pin position - the small target makes going flag-hunting risky, especially early in the round when your feel for distance might still be developing. The green's compact size means any shot that finds the putting surface gives you a reasonable birdie chance. Pay attention to wind direction and strength, as the elevated approach can be significantly affected by Texas breezes. Take one extra club if there's any doubt about your distance.
On the green
With limited real estate to work with, putting strategy becomes about lag putting and avoiding three-putts. The small green typically features subtle breaks that can be deceptive, so take time to read your putt carefully. From longer distances, focus on getting your first putt close rather than trying to hole everything. The green's size means most putts will be relatively straight, but don't underestimate how slope can affect shorter putts on a well-maintained TPC surface. ## RISK VS REWARD This hole offers a classic risk/reward scenario in club selection rather than target selection. The aggressive play is taking driver to get closer to the green, potentially leaving a short iron approach. However, this increases the risk of missing the optimal landing zone and facing a more difficult approach angle or distance. The conservative approach of laying back with a 3-wood or hybrid provides more control and consistency, though it means accepting a longer approach shot. Given the small green, many players find the conservative route actually provides better scoring opportunities. ## DIFFERENT SKILL LEVELS **High-Handicap Players:** Focus on keeping the ball in play off the tee with your most reliable club, even if that's a hybrid or long iron. From there, aim for the center of the green with whatever club gets you there comfortably. Don't be afraid to take extra club on the approach - being long is often better than being short on this hole. **Low-Handicap Players:** You can be more aggressive with driver placement, using the straight layout to your advantage. Consider pin position more heavily in your approach strategy, but still respect the small target. This hole often rewards those who can dial in their iron distances precisely. The opening hole at TPC San Antonio's Oaks Course rewards patience and precision over power. Start your round with smart course management, and you'll likely find yourself in good position to attack the remaining holes with confidence.
Watch for
- Course conditioning and mapped hazards may affect line selection; confirm from the aerial.
Hole 1 Green Complex & Slope
USGS 3DEP terrain analysis
Green size: 3,102 sq ft
Course coverage
Tournament and creator videos about TPC San Antonio (Oaks Course) — shared course coverage, not hole-specific clips.
Tournament coverage
Valero Texas Open highlights
Valero Texas Open | Final Round Highlights
2025
How did Hole 1 play?
How did this hole play today?
Frequently asked questions
Yardage reference: Championship tees · 454 yards.
What's the best strategy off the tee?
↓
For this 454-yard par 4, most players will hit driver to set up a comfortable approach.
How difficult is hole 1?
↓
This hole is a moderate challenge for most golfers. Key challenges include: long par 4, small green.
How big is the green on hole 1?
↓
The green is small and requires precision. The green is deeper than wide, so club selection is crucial. Expect challenging pin positions with limited room for error.
What's a good score on hole 1?
↓
This hole is one of the tougher holes where par feels like birdie. A challenging par 4. Accept that bogey happens and avoid big numbers.