Hole 7 at Sedgefield Country Club
- Par
- 3
- Yardage
- 225 yds
- Stroke index
- 15
- Hazards
- Water
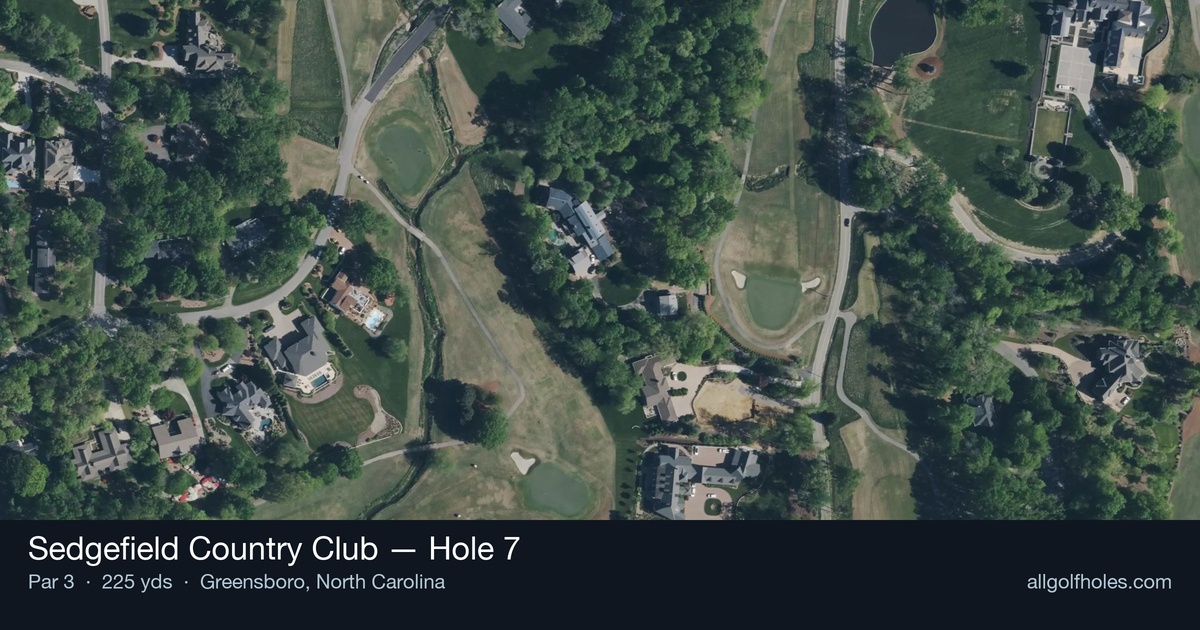
Aerial source not provided
Green size: 41 yds deep × 27 yds wide
Scorecard yardage is for Championship tees. The aerial shows its labeled reference position; distance rings measure to the green.
Championship tees · Par 3 · 225 yards
The plan for No. 7
Sedgefield Country Club hole 7 presents a demanding par 3 that epitomizes Donald Ross's strategic design philosophy on this historic Wyndham Championship venue. At 225 yards, this tee shot requires precision and power to navigate to the characteristically small, undulating green complex. True to Ross's signature style, the putting surface slopes forward with subtle breaks that can catch unwary approach shots, demanding accurate distance control and proper club selection. The green's intimate size leaves little margin for error, making course management crucial for avoiding difficult recovery situations. This straightforward yet deceptive hole rewards committed swings while punishing indecision, creating the kind of strategic tension that defines championship-caliber golf architecture and makes each visit to Sedgefield's seventh a memorable test of skill.
Off the tee
Club selection is critical on this lengthy par-3. Most golfers will need anywhere from a long iron to a hybrid or fairway wood, depending on conditions and pin position. The straight layout allows you to aim directly at your target, but consider the wind carefully - this distance magnifies any crosswind effects. Take one extra club and make a smooth, committed swing rather than forcing a shorter iron. Focus on a penetrating ball flight that can hold the green, as the forward-sloping putting surface tends to reject high, soft shots that don't have enough forward momentum.
Approach & recovery
Since this is a par-3, your tee shot IS your approach shot. The small green size demands precision in both distance and direction. Aim for the center of the green unless the pin is accessible, as the undulating surface can quickly move balls toward the edges. Be particularly aware of front pin positions, where the forward slope can help draw the ball toward the hole, but also be mindful that shots coming up short may roll back off the green. The key is landing the ball with enough forward trajectory to stay on the putting surface.
On the green
Donald Ross's signature small, undulating greens are on full display here. The forward slope mentioned in course descriptions means many putts will have subtle breaks toward the front of the green. Pay close attention to pin positions that might be cut near edges where the green "falls off" - these require extra precision in your lag putting. Read the green from multiple angles, as the undulations can create optical illusions. Focus on speed control, as the sloping nature means pace is often more important than line on longer putts. ## RISK VS REWARD The primary risk/reward decision comes with club selection and target line. Playing aggressively at tucked pins offers birdie opportunities but increases the chance of missing the small target entirely. The conservative play is always the center of the green, accepting a potential two-putt par. With no major hazards, the biggest risk is simply missing the green and facing a challenging up-and-down from the surrounding area. ## DIFFERENT SKILL LEVELS **High-Handicap Players:** Focus entirely on finding the green. Use whatever club gives you the best chance to reach the putting surface - even if it's a fairway wood or hybrid. Aim for the largest part of the green and don't worry about pin hunting. A bogey here isn't disastrous given the 15 handicap ranking. **Low-Handicap Players:** This hole offers a genuine birdie opportunity with proper execution. Study the pin position carefully and consider how the green's slope will affect your ball. You have the skill to attack certain pins, but respect the Donald Ross design - even tour professionals treat these small greens with caution. Factor in conditions like wind and green firmness when deciding between aggressive and conservative target lines. The 7th hole at Sedgefield exemplifies why Donald Ross designs have stood the test of time. Success requires both physical execution and mental discipline - commit to your club selection, trust your target line, and respect the subtle complexities of the putting surface.
Watch for
- Course conditioning and mapped hazards may affect line selection; confirm from the aerial.
Hole 7 Green Complex
Mapped green boundary
Green size: 6,180 sq ft
Course coverage
Tournament and creator videos about Sedgefield Country Club — shared course coverage, not hole-specific clips.
Tournament coverage
Wyndham Championship highlights
Wyndham Championship | Final Round Highlights
2025
How did Hole 7 play?
How did this hole play today?
Frequently asked questions
Yardage reference: Championship tees · 225 yards.
What club should I use on this par 3?
↓
At 225 yards, most golfers will need a fairway wood or hybrid to reach this green. Adjust for elevation, wind, and pin position.
How difficult is hole 7?
↓
This hole is one of the tougher holes on the course for most golfers. Key challenges include: long par 3, water in play.
What hazards should I watch out for on hole 7?
↓
Key hazards include: water at 227.2 yards. Plan your shots to avoid these trouble spots.
How big is the green on hole 7?
↓
The green is fairly large with multiple pin positions. Lag putting becomes important on longer putts.
What's a good score on hole 7?
↓
This hole is a challenging par where bogey is acceptable. This longer par 3 will test your long iron or hybrid game. Par is a good score.