Hole 12 at Sedgefield Country Club
- Par
- 3
- Yardage
- 245 yds
- Stroke index
- 16
- Hazards
- 2 bunkers · Water
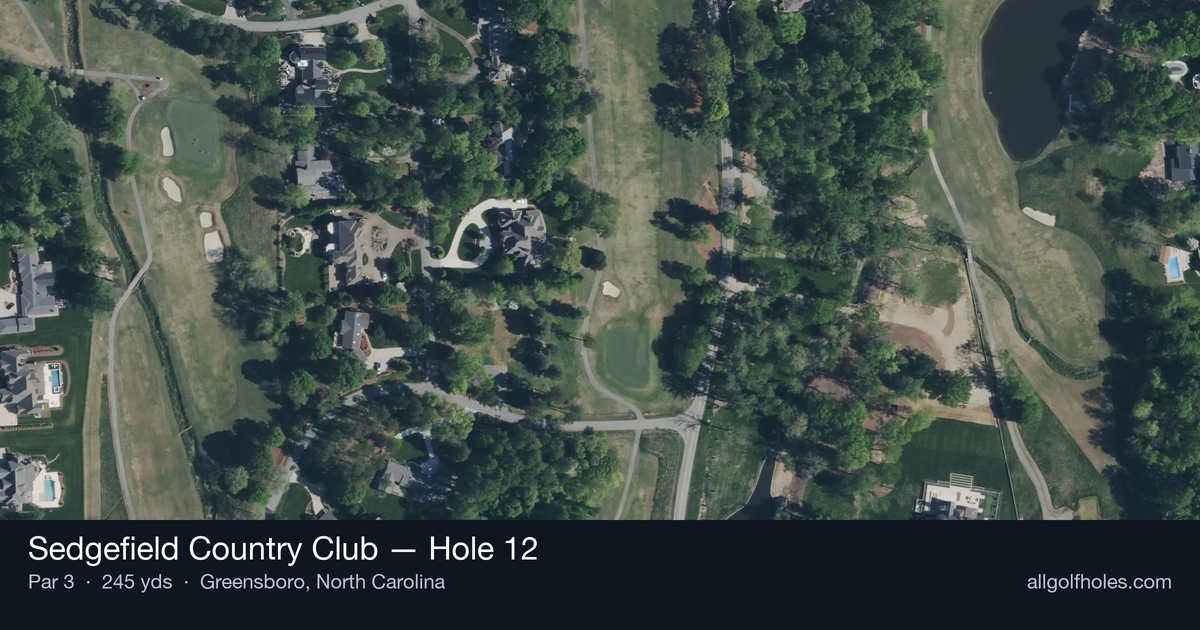
Aerial source not provided
Green size: 32 yds deep × 32 yds wide
Scorecard yardage is for Championship tees. The aerial shows its labeled reference position; distance rings measure to the green.
Championship tees · Par 3 · 245 yards
The plan for No. 12
Sedgefield Country Club hole 12 stands as the most demanding of the par 3s, stretching 245 yards and featuring Pete Dye's signature railroad ties that frame this intimidating one-shot test. This lengthy par 3 demands precise club selection and unwavering commitment, as the small green complex offers little margin for error. The railroad tie construction creates both visual intimidation and strategic consequences for wayward shots, embodying Dye's philosophy of risk-reward golf architecture. With its substantial length requiring long irons or hybrids for most players, accurate distance control becomes paramount on this unforgiving hole. The combination of distance, target size, and Dye's characteristic penal design makes this hole a true separator, where even accomplished golfers often settle for bogey and move on.
Off the tee
Club selection is paramount on this lengthy par 3. Most golfers will need anything from a 4-iron to a hybrid or fairway wood depending on wind conditions and pin position. The target line is straightforward down the middle, but the small green demands precision. Take extra time to factor in wind direction and speed, as the long carry amplifies any miscalculation. Consider taking one more club than you think you need and making a smooth, controlled swing rather than forcing a shorter iron. The railroad ties that frame this hole create both visual intimidation and real penalty areas, so commit fully to your club choice and swing with confidence.
Approach & recovery
Since this is a par 3, your tee shot is your approach shot. The key is understanding that the small green size leaves little room for error. Aim for the center of the green regardless of pin position, as the compact target makes going flag-hunting a dangerous proposition. If the pin is tucked behind trouble, play to the fat part of the green and rely on your putting to get close. The straight hole layout means you won't have to worry about doglegs or blind shots, allowing you to focus entirely on distance control and accuracy.
On the green
The small green at the 12th typically features subtle breaks that can be deceptive given the green's compact nature. Take time to read the slope carefully, as even small putts can have significant break on Dye's undulating surfaces. The key putting strategy is to get your first putt close rather than trying to make everything. Two-putting from anywhere on this green should be considered a victory, especially when the pin is in a challenging position. Pay attention to grain direction if playing in warmer months, as this can affect ball roll significantly. ## RISK VS REWARD Unlike many holes that offer multiple strategic options, the 12th presents a straightforward risk/reward equation: either you hit the green or you don't. The reward for finding the putting surface is a legitimate birdie opportunity, while missing the target typically results in a difficult up-and-down for par. The railroad ties and surrounding trouble areas mean that conservative play toward the center of the green is almost always the percentage play. Aggressive shots at tucked pins rarely pay off given the small margin for error. ## DIFFERENT SKILL LEVELS **High-Handicap Players**: Focus on making solid contact and getting the ball airborne rather than worrying about pin-hunting. Use a club that you're confident will carry the distance, even if it means taking a longer iron or hybrid. Aim for the middle of the green and accept that par is an excellent score on this demanding hole. **Low-Handicap Players**: While you have the skill to work the ball and attack pins, this hole rewards disciplined course management. Consider the risk/reward of going at tight pins versus playing to the center. Your superior ball-striking ability gives you more club options, but don't let that lead to overconfidence. Even tour professionals treat this as a demanding par 3 where par is often a good score. The 12th hole at Sedgefield exemplifies Pete Dye's design philosophy of creating memorable, challenging golf holes that test every aspect of your game. Success here comes from respecting the hole's difficulty and executing a well-planned, conservative strategy.
Watch for
- Course conditioning and mapped hazards may affect line selection; confirm from the aerial.
Hole 12 Green Complex
Mapped green boundary
Green size: 5,829 sq ft
Course coverage
Tournament and creator videos about Sedgefield Country Club — shared course coverage, not hole-specific clips.
Tournament coverage
Wyndham Championship highlights
Wyndham Championship | Final Round Highlights
2025
How did Hole 12 play?
How did this hole play today?
Frequently asked questions
Yardage reference: Championship tees · 245 yards.
What club should I use on this par 3?
↓
At 245 yards, most golfers will need a fairway wood or hybrid to reach this green. Adjust for elevation, wind, and pin position.
How difficult is hole 12?
↓
This hole is one of the tougher holes on the course for most golfers. Key challenges include: long par 3, water in play.
What hazards should I watch out for on hole 12?
↓
Key hazards include: 2 greenside bunkers; water at 163.3 yards. Plan your shots to avoid these trouble spots.
How big is the green on hole 12?
↓
The green is medium-sized with moderate targets. Pay attention to pin placement when selecting your approach club.
What's a good score on hole 12?
↓
This hole is a challenging par where bogey is acceptable. This longer par 3 will test your long iron or hybrid game. Par is a good score.