Hole 1 at TPC of Louisiana
- Par
- 4
- Yardage
- 399 yds
- Stroke index
- 9
- Hazards
- 5 bunkers
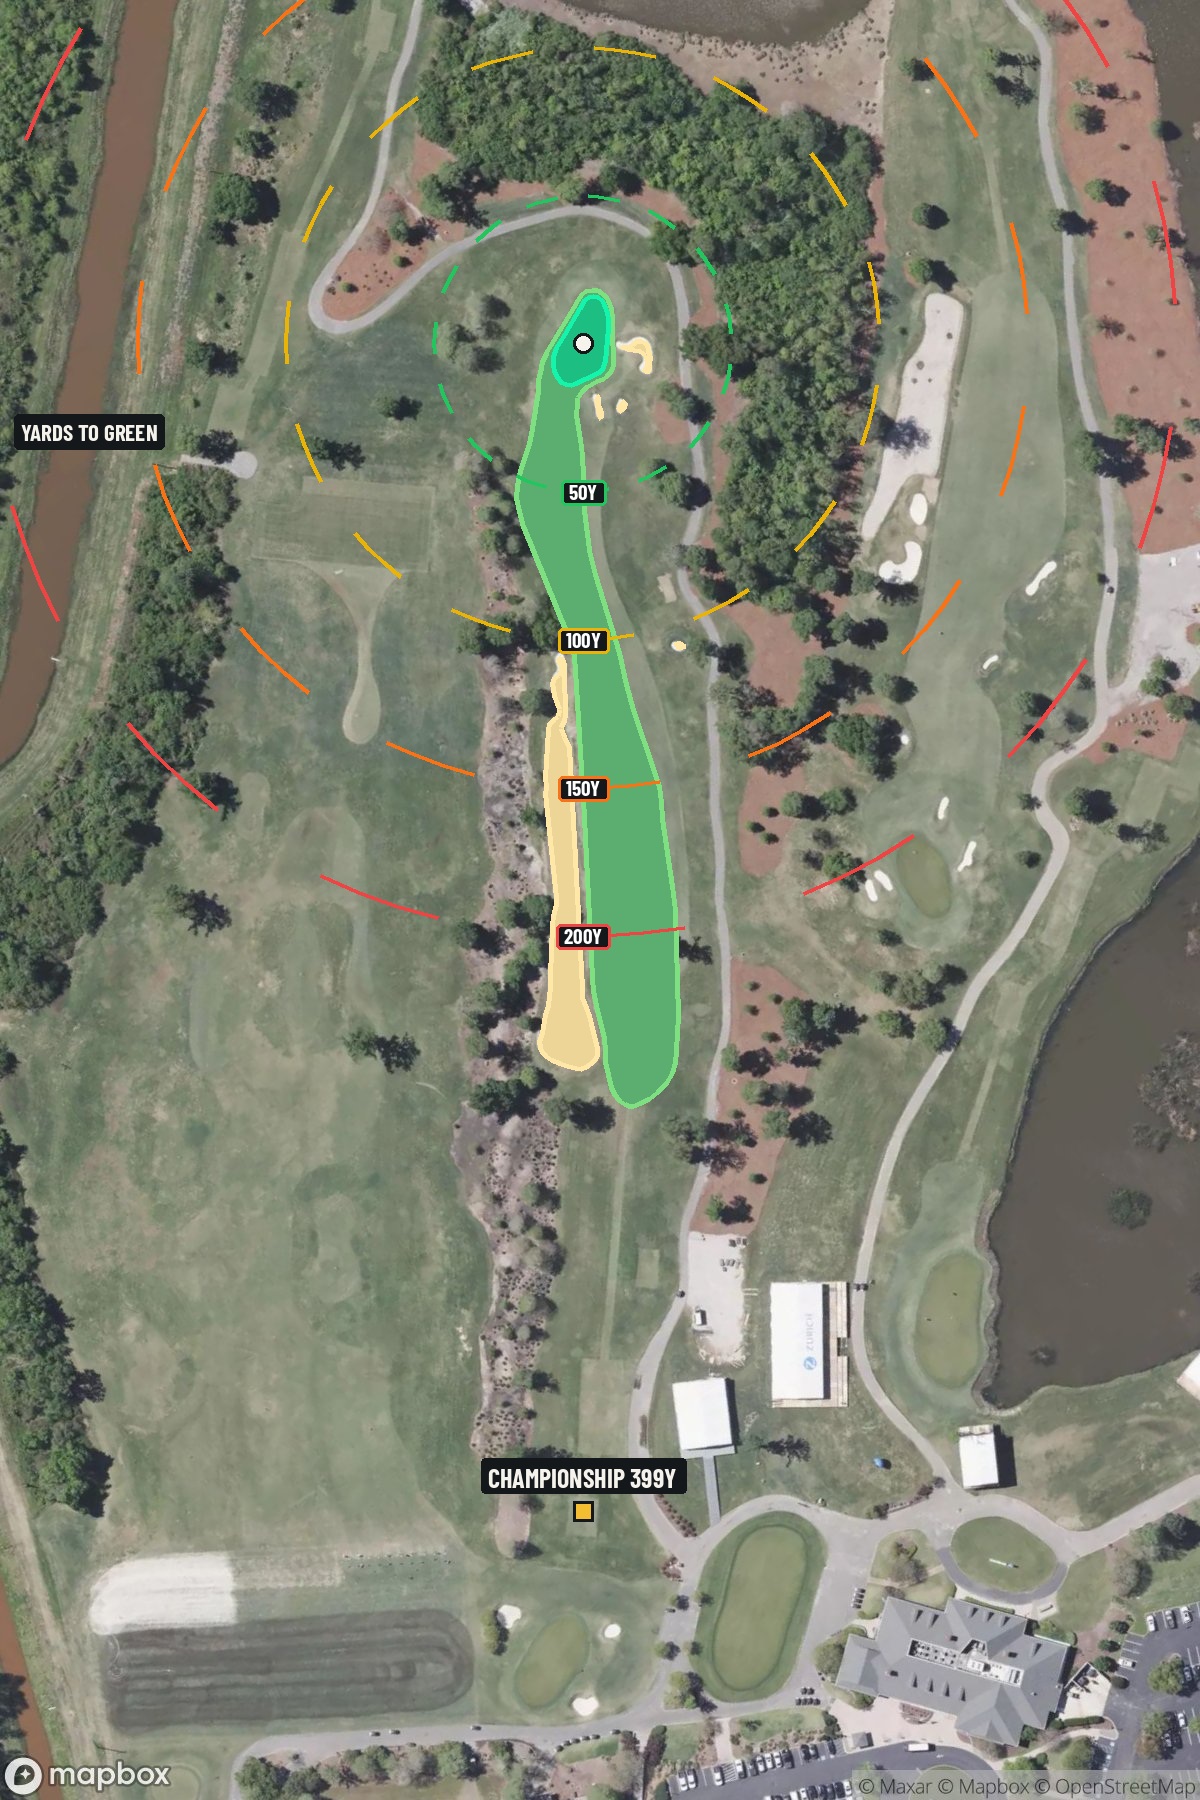 Hole 1 map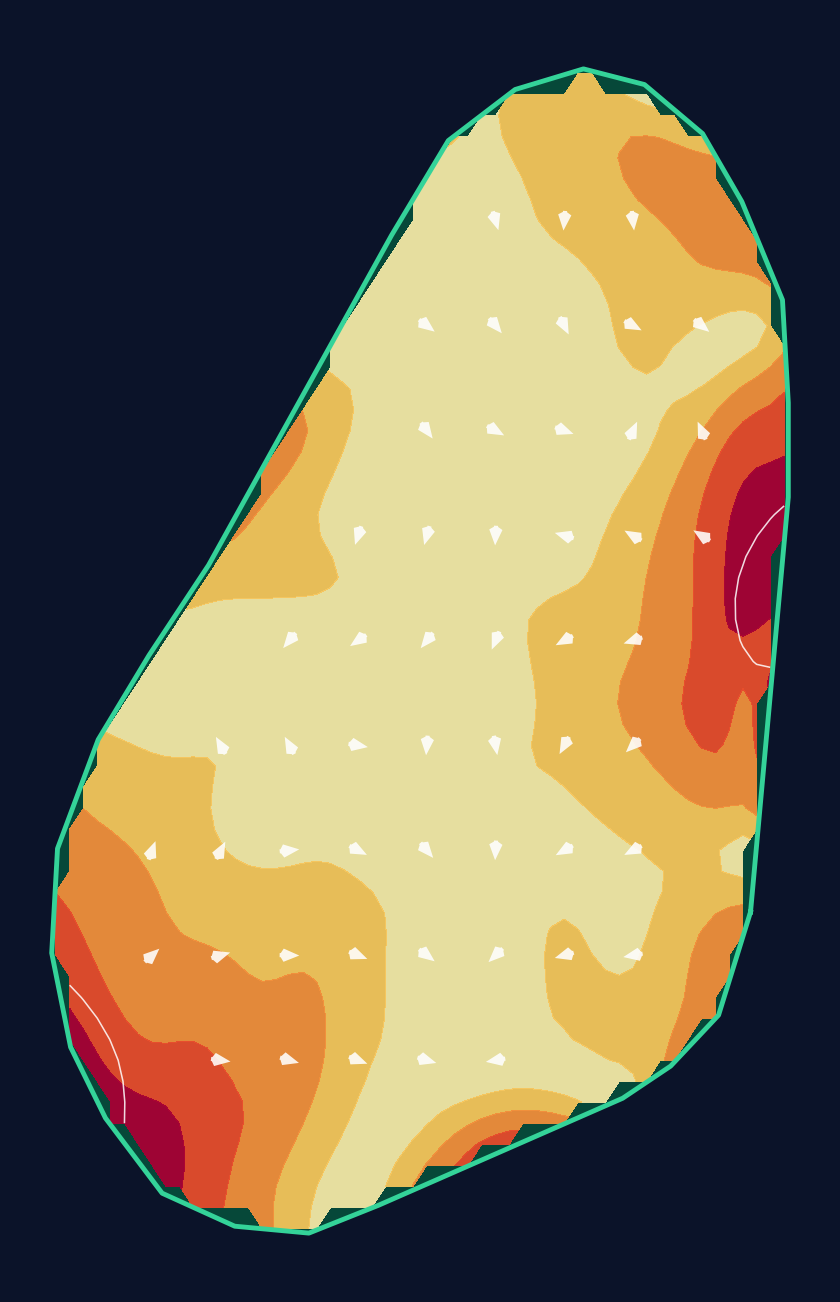
20 yd wide × 31 yd deep · 1.2 ft total elevation range
Light = gentler slope · Red = steeper slope
White lines: 1 foot of elevation. Arrows: downhill. General terrain, not a pin read.
Approach from bottom
Contour source
USGS one meter x77y332 LA UpperDeltaPlain 2017 · collection 2017
Map source & reference
Mapbox Satellite composite · capture date not provided. Green at the top; the labeled map reference is below.
Scorecard yardage is for Championship tees. The aerial shows its labeled reference position; distance rings measure to the green.
Championship tees · Par 4 · 399 yards
The plan for No. 1
TPC of Louisiana hole 1 sets the tone for Pete Dye's masterful design, welcoming players with a deceptively straightforward par 4 that demands precision from the opening tee shot. This 399-yard opener features Dye's signature strategic bunkering positioned to catch wayward drives, while the generous fairway rewards accurate placement. The approach shot plays to a compact green complex that showcases the architect's trademark contouring, requiring golfers to commit to their yardage and club selection. Though relatively hazard-free compared to the water-laden challenges ahead, this opening hole establishes the mental discipline required to navigate one of Louisiana's most famous PGA Tour venues, setting up the round with classic Pete Dye strategic thinking.
Off the tee
Your tee shot strategy should prioritize finding the fairway and setting up an optimal approach angle. With no significant hazards listed, the primary focus becomes positioning your drive in the ideal landing zone for your preferred approach distance. Most players will benefit from a conservative approach off the tee, using a fairway wood or hybrid if driver tends to create distance control issues. The key is leaving yourself a comfortable yardage for your approach - typically something in the 100-150 yard range where you can be most precise with your club selection and target line.
Approach & recovery
The approach shot is where this hole reveals its teeth. The small green demands pinpoint accuracy, making club selection and commitment to your target line absolutely critical. Plan to aim for the center of the green regardless of pin position, as Pete Dye's contoured greens can severely punish approaches that miss the putting surface. A mid-iron to short-iron approach (depending on your tee shot placement) should allow for the precision needed. Focus on a smooth, controlled swing rather than trying to attack every pin position - the small target rewards patience over aggression.
On the green
Expect Pete Dye's signature green contouring to create challenging reads and potential three-putt scenarios. The small green size means you'll likely face shorter putts, but don't be fooled - these surfaces can be deceptively tricky. Take time to read the slopes carefully, as subtle breaks can dramatically affect your putts. Lag putting becomes crucial here; getting your first putt close to the hole is more important than being aggressive, especially early in the round when you're still getting a feel for the green speeds. ## RISK VS REWARD This hole offers a classic risk/reward scenario in club selection and target selection. The reward for precision is clear - a makeable birdie putt to start your round positively. However, the risk of missing the small green can lead to difficult up-and-downs and momentum-killing bogeys. The smart play is to take what the hole gives you: favor the center of the fairway off the tee and the center of the green on approach, building confidence for the more demanding holes ahead. ## DIFFERENT SKILL LEVELS **High-handicap players** should treat this as a par 4.5, focusing entirely on avoiding big numbers. Use whatever club gives you the most confidence off the tee, even if it's a hybrid or long iron. On the approach, aim for the largest part of the green and accept a two-putt par as a victory. Course management trumps distance here. **Low-handicap players** can be more aggressive in their target selection while still respecting the small green. Consider the pin position in your approach strategy, but maintain discipline - even tour professionals treat Pete Dye greens with respect. This hole rewards the patient, strategic mindset that will serve you well throughout the round at this PGA Tour venue.
Watch for
- Course conditioning and mapped hazards may affect line selection; confirm from the aerial.
Hole 1 Green Complex & Slope
USGS 3DEP terrain analysis
Green size: 3,024 sq ft
How did Hole 1 play?
How did this hole play today?
Frequently asked questions
Yardage reference: Championship tees · 399 yards.
What's the best strategy off the tee?
↓
For this 399-yard par 4, most players will hit driver to set up a comfortable approach.
How difficult is hole 1?
↓
This hole is a moderate challenge for most golfers. Key challenges include: heavily bunkered, small green.
How big is the green on hole 1?
↓
The green is small and requires precision. Expect challenging pin positions with limited room for error.
What's a good score on hole 1?
↓
This hole is a medium-length test where par is a solid result. A straightforward par 4 where course management pays off.