Hole 10 at Standard Country Club, The
- Par
- 4
- Yardage
- 376 yds
- Stroke index
- 16
- Hazards
- 4 bunkers
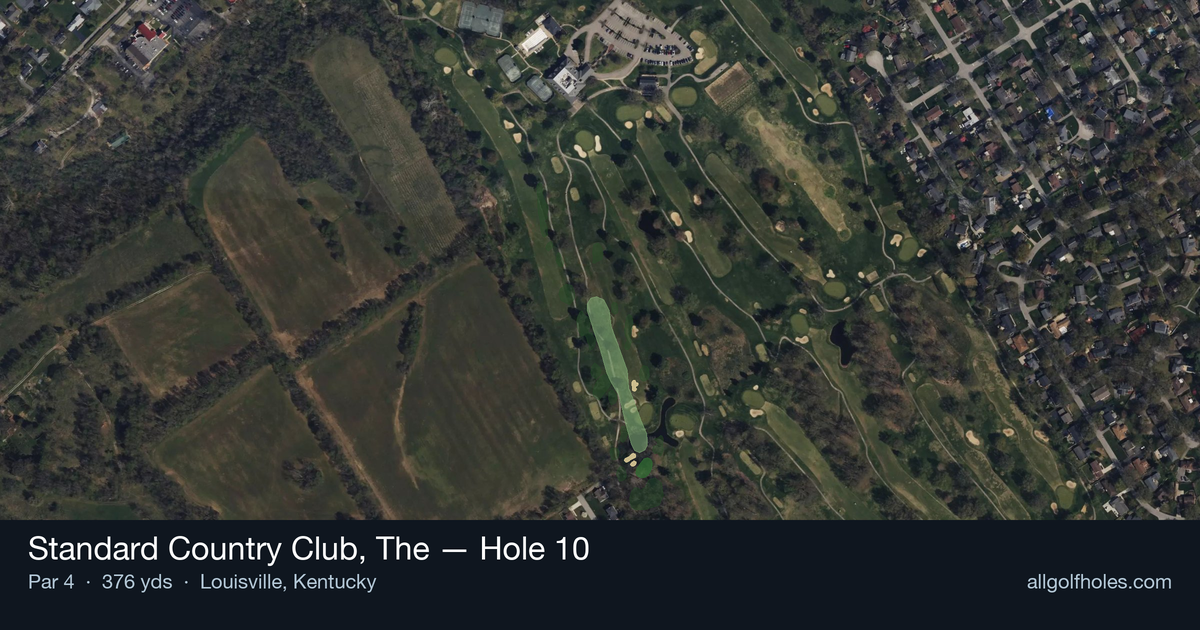
Aerial source not provided
Green size: 25 yds deep × 27 yds wide
Scorecard yardage is for Championship tees. The aerial shows its labeled reference position; distance rings measure to the green.
Championship tees · Par 4 · 376 yards
The plan for No. 10
The 10th hole at Standard Country Club presents a deceptively straightforward par 4 that rewards precision over power. At 376 yards, this straight-away layout appears generous from the tee, but the small green demands accuracy on the approach shot. With no significant hazards to complicate matters, golfers can focus purely on execution and course management. The relatively high handicap ranking of 16 suggests this hole offers scoring opportunities for players who can find the proper angles. What makes Standard Country Club, The hole 10 memorable is its emphasis on fundamentals – a well-struck tee shot sets up a manageable approach to the compact putting surface, where pin placement becomes the primary strategic consideration.
Off the tee
The tee shot strategy centers on finding the optimal position for your approach. With no major hazards to navigate, drivers can be aggressive, aiming down the center of the fairway to maximize distance and leave a shorter iron into the green. The straight layout eliminates concerns about doglegs or corner-cutting opportunities, making this a power play for longer hitters. Position yourself in the fairway's center, roughly 250-280 yards out, to set up the best angle into the small green. Less confident drivers might consider a 3-wood or hybrid to ensure fairway position, as accuracy becomes crucial when attacking a smaller target.
Approach & recovery
The approach shot is where this hole's challenge reveals itself. The small green requires precise club selection and committed swings. From the typical landing zone, expect to hit anything from a 7-iron to a wedge depending on your tee shot distance and conditions. Aim for the center of the green regardless of pin position - the small target makes pin-hunting risky for most players. Focus on solid contact and proper distance control rather than trying to get cute with spin or trajectory. The green's size means there's little room for error, so take one more club if you're between selections and swing smoothly.
On the green
While the green shape is unknown, small greens typically feature subtle breaks that can be deceptive. Read putts carefully, as shorter putts on small surfaces can still have significant break. Focus on speed control - with limited green space, pace becomes critical for both making putts and avoiding three-putts. Lag putting to the center of the green from longer distances, and be aggressive on shorter birdie attempts since the green's size limits severe slopes. ## RISK VS REWARD This hole offers excellent risk/reward opportunities for confident players. The lack of hazards means aggressive drives face minimal penalty, and the reward is a short iron approach to a makeable birdie. However, the small green punishes loose approach shots, potentially leading to difficult up-and-downs. The key decision point comes with approach club selection - taking enough club to reach the green versus risking flying it and facing a challenging recovery. ## DIFFERENT SKILL LEVELS **Low Handicappers** should view this as a birdie hole. Drive aggressively, take dead aim at the green center, and expect to have makeable birdie putts. Use the lack of trouble to your advantage and attack confidently. **Mid Handicappers** should focus on two solid shots - fairway first, then green in regulation. Don't get greedy with pin positions; aim for the green's center and take your pars with occasional birdie opportunities. **High Handicappers** can build confidence here by playing conservatively off the tee if needed, then focusing on getting on the green with the approach. The small target might be intimidating, but the lack of major trouble means missed shots won't be severely penalized. This is an excellent hole for working on course management and building momentum for the back nine.
Watch for
- Course conditioning and mapped hazards may affect line selection; confirm from the aerial.
Hole 10 Green Complex
Mapped green boundary
Green size: 3,459 sq ft
How did Hole 10 play?
How did this hole play today?
Frequently asked questions
Yardage reference: Championship tees · 376 yards.
What's the best strategy off the tee?
↓
For this 376-yard par 4, most players will hit 3-wood or driver to set up a comfortable approach.
How difficult is hole 10?
↓
This hole is a good scoring opportunity for most golfers. Key challenges include: small green.
How big is the green on hole 10?
↓
The green is small and requires precision. Expect challenging pin positions with limited room for error.
What's a good score on hole 10?
↓
This hole is a medium-length test where par is a solid result. A straightforward par 4 where course management pays off.