Hole 9 at Standard Country Club, The
- Par
- 4
- Yardage
- 427 yds
- Stroke index
- 7
- Hazards
- 3 bunkers · Water
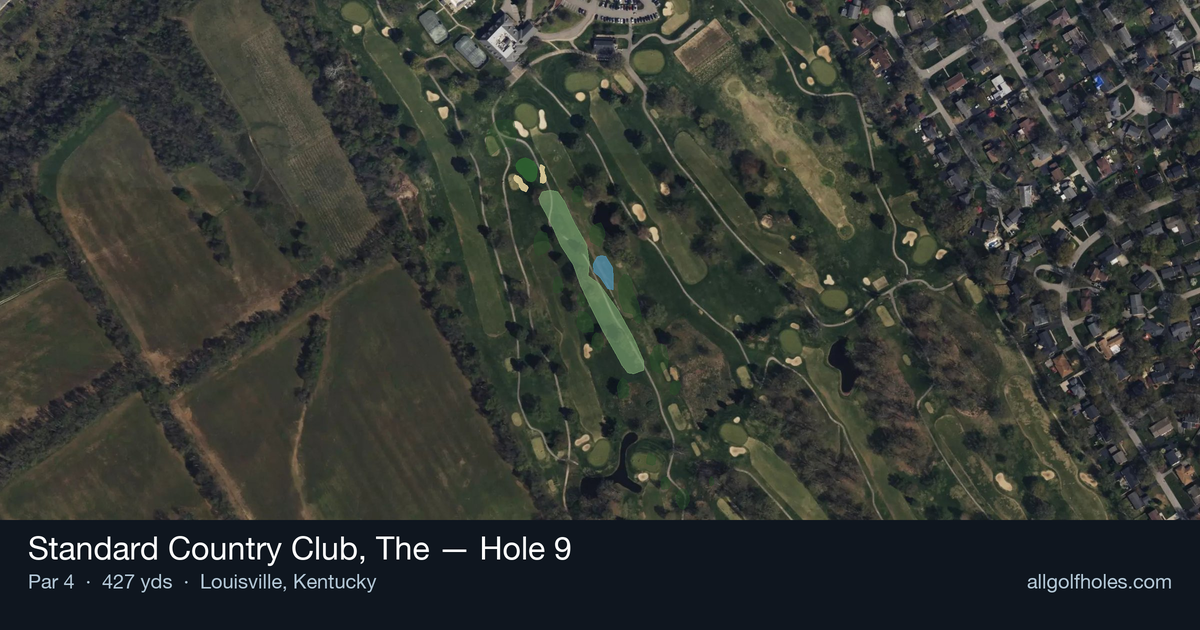
Aerial source not provided
Green size: 28 yds deep × 22 yds wide
Scorecard yardage is for Championship tees. The aerial shows its labeled reference position; distance rings measure to the green.
Championship tees · Par 4 · 427 yards
The plan for No. 9
The ninth hole at Standard Country Club, The serves as a demanding finale to the front nine, presenting a straight-away par 4 that challenges golfers with precision over power. At 427 yards, this handicap-7 hole requires a well-positioned tee shot down a generous fairway that gradually narrows as it approaches the green complex. The absence of major hazards might suggest simplicity, but the hole's true test lies in the approach shot to a small, subtly contoured green that demands accuracy and proper distance control. Players must resist the temptation to attack aggressively, as the compact putting surface punishes wayward iron shots. This strategic par 4 rewards thoughtful course management and sets the tone for the challenging back nine ahead.
Off the tee
The tee shot strategy centers on finding the ideal position in the fairway to set up the best angle for your approach. With the hole playing straight and measuring 427 yards, most players will need a solid drive to leave a manageable second shot. Focus on the center-left portion of the fairway, as this typically provides the best angle into the small green. Driver is the preferred club for longer hitters who can control their ball flight, while shorter hitters might consider a fairway wood or hybrid to ensure accuracy. The key is avoiding any rough or marginal lies that could complicate club selection on the approach shot.
Approach & recovery
The approach shot represents the scoring opportunity on this hole. With a small green as your target, precision becomes paramount over power. Depending on your tee shot position, you'll likely face a mid-iron to long-iron into the green. Take one extra club to ensure you reach the putting surface, as coming up short of a small green often leaves difficult up-and-down opportunities. Focus on the center of the green regardless of pin position, as the small target doesn't offer much room for aggressive pin-seeking. Pay attention to wind conditions, which can significantly affect club selection on longer approach shots.
On the green
The small green demands respect with your putting approach. Expect subtle breaks that can be deceiving, especially on longer putts. Three-putting becomes a real concern when facing longer distances on a compact surface. Focus on speed control above all else, as running putts past the hole on a small green often leaves challenging return putts. When the pin is tucked near an edge, aim for the fat part of the green and accept a longer first putt rather than risking a shot that runs off the putting surface. ## RISK VS REWARD This hole offers a classic risk/reward scenario in club selection and target selection. The primary decision point comes on the approach shot - whether to fire directly at tucked pins or play conservatively to the center of the green. Given the small green size, the conservative play typically offers better scoring opportunities. The reward for aggressive play is limited, while the risk of missing the green entirely can lead to difficult recovery shots and potential bogeys or worse. ## DIFFERENT SKILL LEVELS **High-Handicap Players:** Focus on two-shot strategy with emphasis on finding the fairway and hitting the green in regulation. Consider laying up with your second shot if the approach distance exceeds your comfort zone, leaving a full wedge rather than attempting a difficult long-iron shot. **Low-Handicap Players:** Can be more aggressive with driver off the tee to shorten the approach shot. Still should respect the small green size and focus on precision over pin-seeking. Consider wind conditions and green firmness when selecting both tee shot strategy and approach club selection. The hole's #7 handicap ranking indicates it plays as one of the more challenging holes on the course, demanding solid execution from tee to green for scoring opportunities.
Watch for
- Course conditioning and mapped hazards may affect line selection; confirm from the aerial.
Hole 9 Green Complex
Mapped green boundary
Green size: 3,548 sq ft
How did Hole 9 play?
How did this hole play today?
Frequently asked questions
Yardage reference: Championship tees · 427 yards.
What's the best strategy off the tee?
↓
For this 427-yard par 4, most players will hit driver to set up a comfortable approach.
How difficult is hole 9?
↓
This hole is one of the tougher holes on the course for most golfers. Key challenges include: water in play, small green.
What hazards should I watch out for on hole 9?
↓
Key hazards include: water at 260.2 yards. Plan your shots to avoid these trouble spots.
How big is the green on hole 9?
↓
The green is small and requires precision. Expect challenging pin positions with limited room for error.