Hole 11 at Standard Country Club, The
- Par
- 5
- Yardage
- 584 yds
- Stroke index
- 6
- Hazards
- 5 bunkers
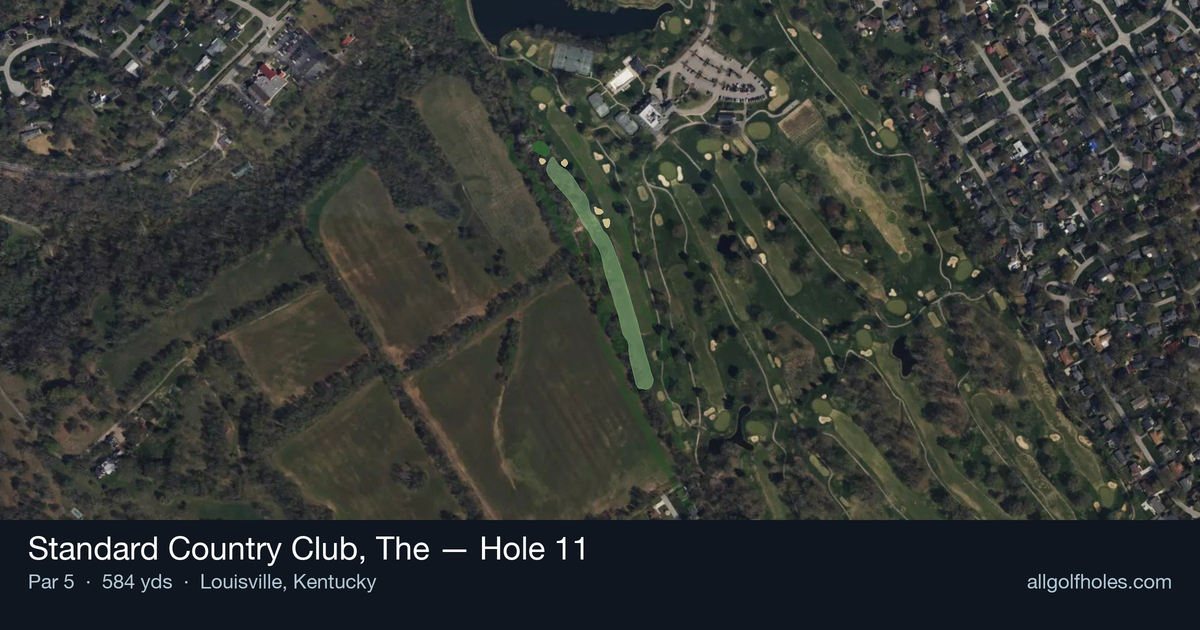
Aerial source not provided
Green size: 27 yds deep × 23 yds wide
Scorecard yardage is for Championship tees. The aerial shows its labeled reference position; distance rings measure to the green.
Championship tees · Par 5 · 584 yards
The plan for No. 11
The Standard Country Club's 584-yard par 5 eleventh hole presents a deceptively straightforward challenge that rewards precision over power. This straight-away layout features a generous fairway that invites aggressive drives, but the small green demands careful consideration for approach strategy. Without major hazards to dictate play, golfers can focus purely on course management and execution. The compact putting surface becomes the hole's primary defense, requiring accurate iron play on the second or third shot depending on your chosen strategy. Length hitters may be tempted to reach in two, but the diminutive target makes laying up to a comfortable wedge distance often the wiser play. This hole epitomizes strategic golf design through simplicity.
Off the tee
The opening shot should focus on finding the fairway and setting up the best angle for your second. With no significant hazards mentioned, accuracy takes precedence over distance. Most players should favor their most reliable driver or strong 3-wood to ensure they're playing from the short grass. The straight layout means you can be aggressive with your target line down the center, but don't sacrifice control for extra yards - position is crucial on this lengthy hole.
Approach & recovery
Your second shot strategy depends heavily on your distance remaining and skill level. For longer hitters within range of the green, the small target demands exceptional precision. Consider the pin position and your confidence level before attempting to reach in two. For most players, a strategic layup to your favorite wedge distance (typically 80-120 yards) provides the best scoring opportunity. Focus on leaving yourself a full swing rather than an awkward half-shot to the small green.
On the green
The small green size means every approach shot must be precise, whether it's your second or third. With limited real estate, focus on the center of the green unless the pin is clearly accessible. Distance control becomes critical - being short or long of this target will likely result in difficult recovery shots. Take one extra club if you're between selections, as the small surface provides little margin for error. ## RISK VS REWARD The primary risk/reward decision comes on the second shot. Going for the green in two offers eagle potential but brings bogey or worse into play if you miss the small target. The conservative play of laying up virtually guarantees a birdie opportunity with a well-executed wedge. Given the green's size constraints, the percentage play favors the layup unless you're exceptionally confident in your long approach accuracy. ## DIFFERENT SKILL LEVELS **High-handicap players** should embrace the three-shot strategy without hesitation. Use your most reliable clubs off the tee and for the layup, leaving yourself the shortest possible approach to maximize your chances of finding the green. Focus on steady course management rather than trying to match longer hitters. **Low-handicap players** have the option to attack in two, but should carefully evaluate conditions and pin position. Even skilled players might benefit from the layup approach when the pin is tucked or conditions are challenging. Your superior short game skills make the three-shot strategy particularly effective, as you can get up and down from closer range if you miss the small green slightly. The 11th hole rewards patience and precision over power, making it a true test of golf strategy and execution for players of all skill levels.
Watch for
- Course conditioning and mapped hazards may affect line selection; confirm from the aerial.
Hole 11 Green Complex
Mapped green boundary
Green size: 3,255 sq ft
How did Hole 11 play?
How did this hole play today?
Frequently asked questions
Yardage reference: Championship tees · 584 yards.
Can this par 5 be reached in two?
↓
At 584 yards, A true three-shot hole for most players. Position your layup to leave a comfortable wedge distance.
How difficult is hole 11?
↓
This hole is a moderate challenge for most golfers. Key challenges include: long par 5, small green.
How big is the green on hole 11?
↓
The green is small and requires precision. Expect challenging pin positions with limited room for error.
What's a good score on hole 11?
↓
This hole is a true three-shot hole where birdie requires execution. This longer par 5 demands patience. Two good shots set up the scoring opportunity.