Hole 4 of 18 · Augusta, Georgia
Hole 4 at Augusta National Golf Club
- Par
- 3
- Yards
- 240
- Bunkers
- 2
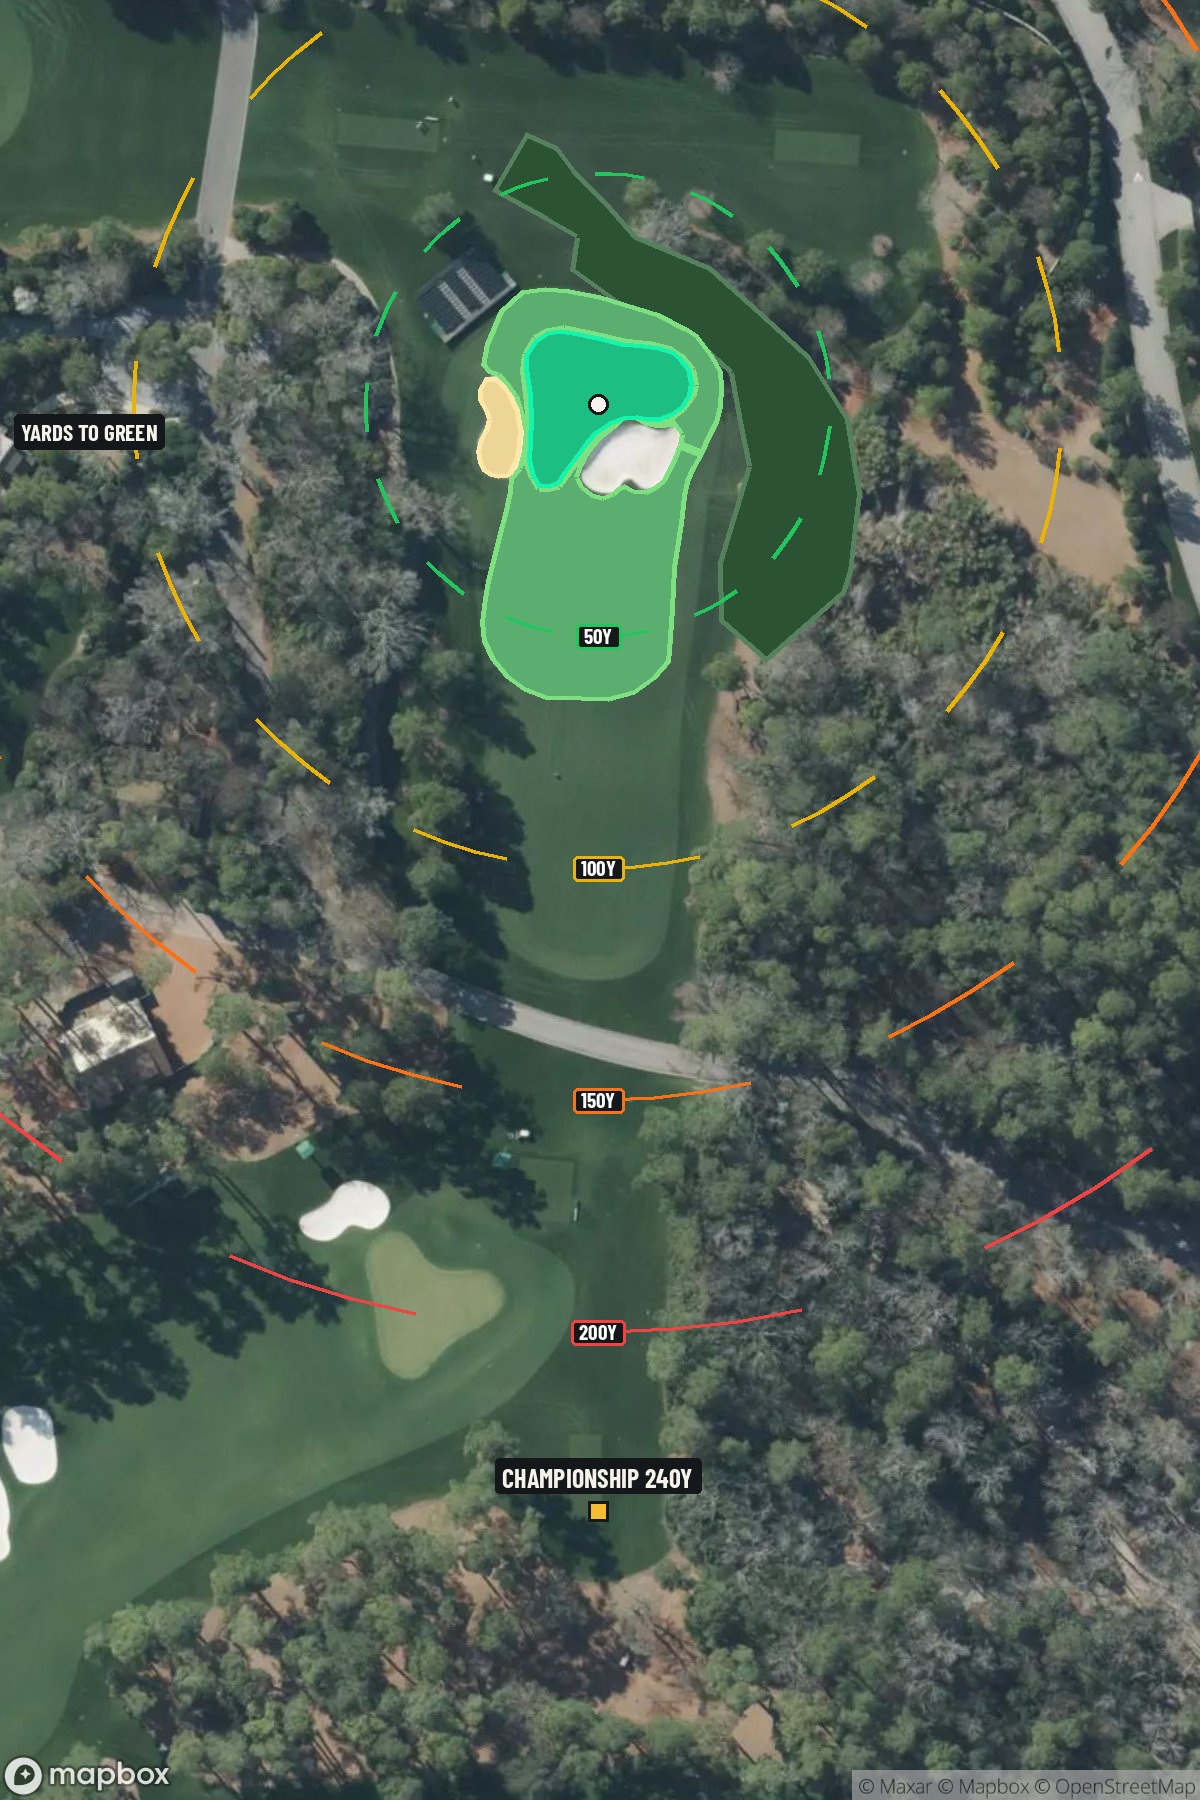
Map distances from Championship tee · 240 yds
The map's printed distances are measured from the Championship tee to the green; they do not move when you change tees.
Green size: 34 yds deep × 37 yds wide
Mapbox Satellite composite · capture date not provided. Green at the top.
Where this map comes from
- Satellite photo
- Date not published
- Mapbox satellite
- Green contours
- 2018–2019 survey
- USGS lidar survey
The plan for No. 4
The play: The 4th hole at Augusta National Golf Club, known as "Flowering Crab Apple," presents a deceptively challenging par 3 that demands precision from the championship tees at 240 yards. This elegant one-shotter features a straight shot to a small, well-guarded green that sits beautifully framed by the course's signature landscaping. The tee shot requires careful club selection and committed execution, as the compact green offers little room for error. Pin placement becomes crucial here, with different quadrants of the putting surface presenting varying degrees of difficulty. What makes this hole memorable is its understated elegance – while lacking the dramatic water hazards found elsewhere at Augusta National, the 4th hole's subtle challenges and pristine conditioning exemplify the course's reputation for rewarding thoughtful, strategic golf over pure power.
Shot by shot
The green on No. 4
Mapped boundary- Wide × deepyards
- 37×34
- Areasq ft
- 5,537
Gear for Hole 4
240yd par 3
A hybrid beats a long iron here
 Callaway Elyte Hybrid$329 MSRPCheck priceCompare all picks →
We may earn a commission when you buy through these links.
Course coverage
Tournament and creator videos about Augusta National Golf Club — shared course coverage, not hole-specific clips.
Featured by these creators
Creator videos about this course
YouTube creators who filmed or featured Augusta National Golf Club. · Stats as of Nov 16, 2026 · 3d ago
How to Play Augusta National at Home! ⛳️ #golf #golfsimulator #augustanational
Strapped: Augusta National
Jim "Bones" Mackay Goes In-Depth on Augusta National | Lunch With The Boys
Template Holes at Augusta National? | Designing Golf
The Original Augusta National (feat. Brian Schneider) | Designing Golf
Bernhard Langer on Augusta National, the “Big Five,” & His Life in Golf | The Fried Egg Golf Podcast
Will Zalatoris Talks Injury Comeback, Augusta National, & Much More | The Fried Egg Golf Podcast
I Play Golf at the FAKE Augusta National! (Wow!)
Playing Augusta National & Three Courses Brian Schneider Thinks About | The Fried Egg Golf Podcast
How did Hole 4 play?
How did this hole play today?
Frequently asked questions
Yardage reference: Championship tees · 240 yards.
What club should I use on this par 3?
↓
At 240 yards, most golfers will need a fairway wood or hybrid to reach this green. Adjust for elevation, wind, and pin position.
How difficult is hole 4?
↓
This hole is a moderate challenge for most golfers. Key challenges include: long par 3.
What hazards should I watch out for on hole 4?
↓
Key hazards include: 2 greenside bunkers. Plan your shots to avoid these trouble spots.
How big is the green on hole 4?
↓
The green is medium-sized with moderate targets. Pay attention to pin placement when selecting your approach club.
What's a good score on hole 4?
↓
This hole is a challenging par where bogey is acceptable. This longer par 3 will test your long iron or hybrid game. Par is a good score.